Sections of the Brisket
Below is a diagram that shows the fat side and the meat side of a brisket.
These names will be repeated throughout so, here’s a reference if you need it.
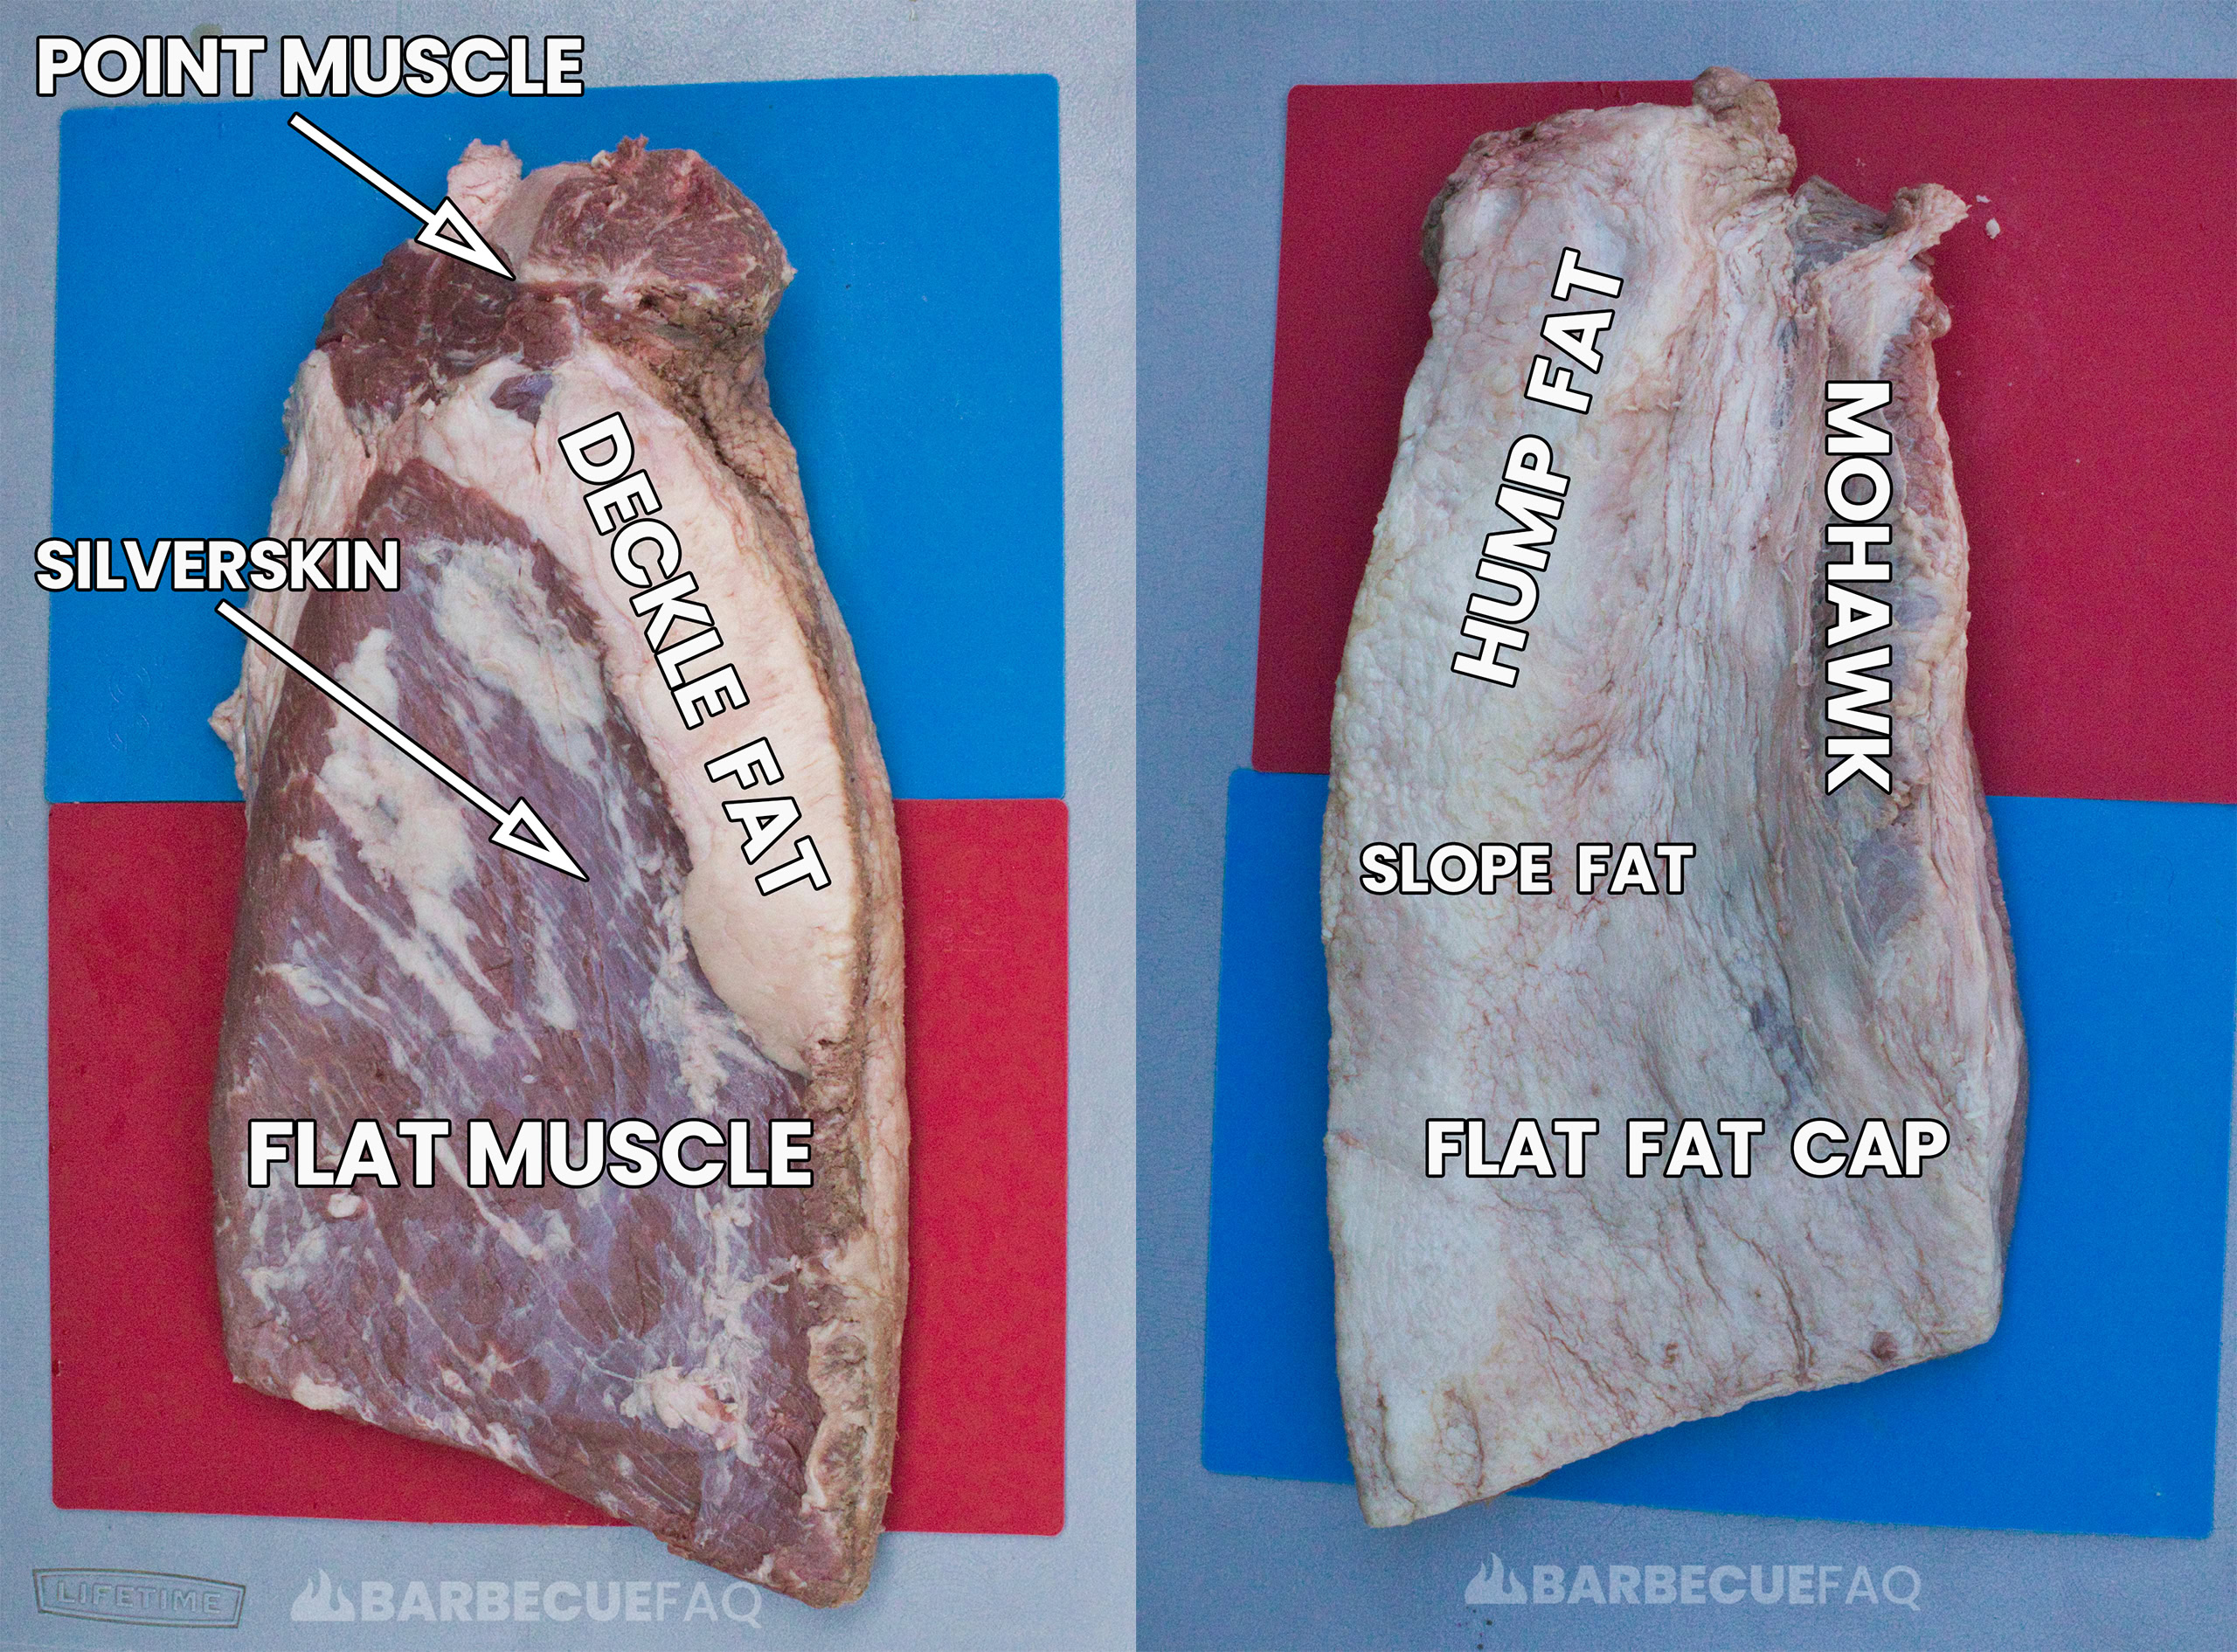
- On the meat side we have deckle fat, silver skin, the flat muscle, and the point muscle.
- On the fat side we have the point muscle, the Mohawk, the hump, the slope, and flat fat.
Start By Trimming the Fat Side
If your brisket is thawed, pop it into the freezer (in the package) for 30-60 minutes.
As the fat comes up in temperature it will start to smear and be a pain to slice.
1. Completely Remove the “Mohawk”
The Mohawk is a large scraggly piece of fat and meat that points upwards.
More or less, the the brisket essentially looks like it has a Mohawk haircut.
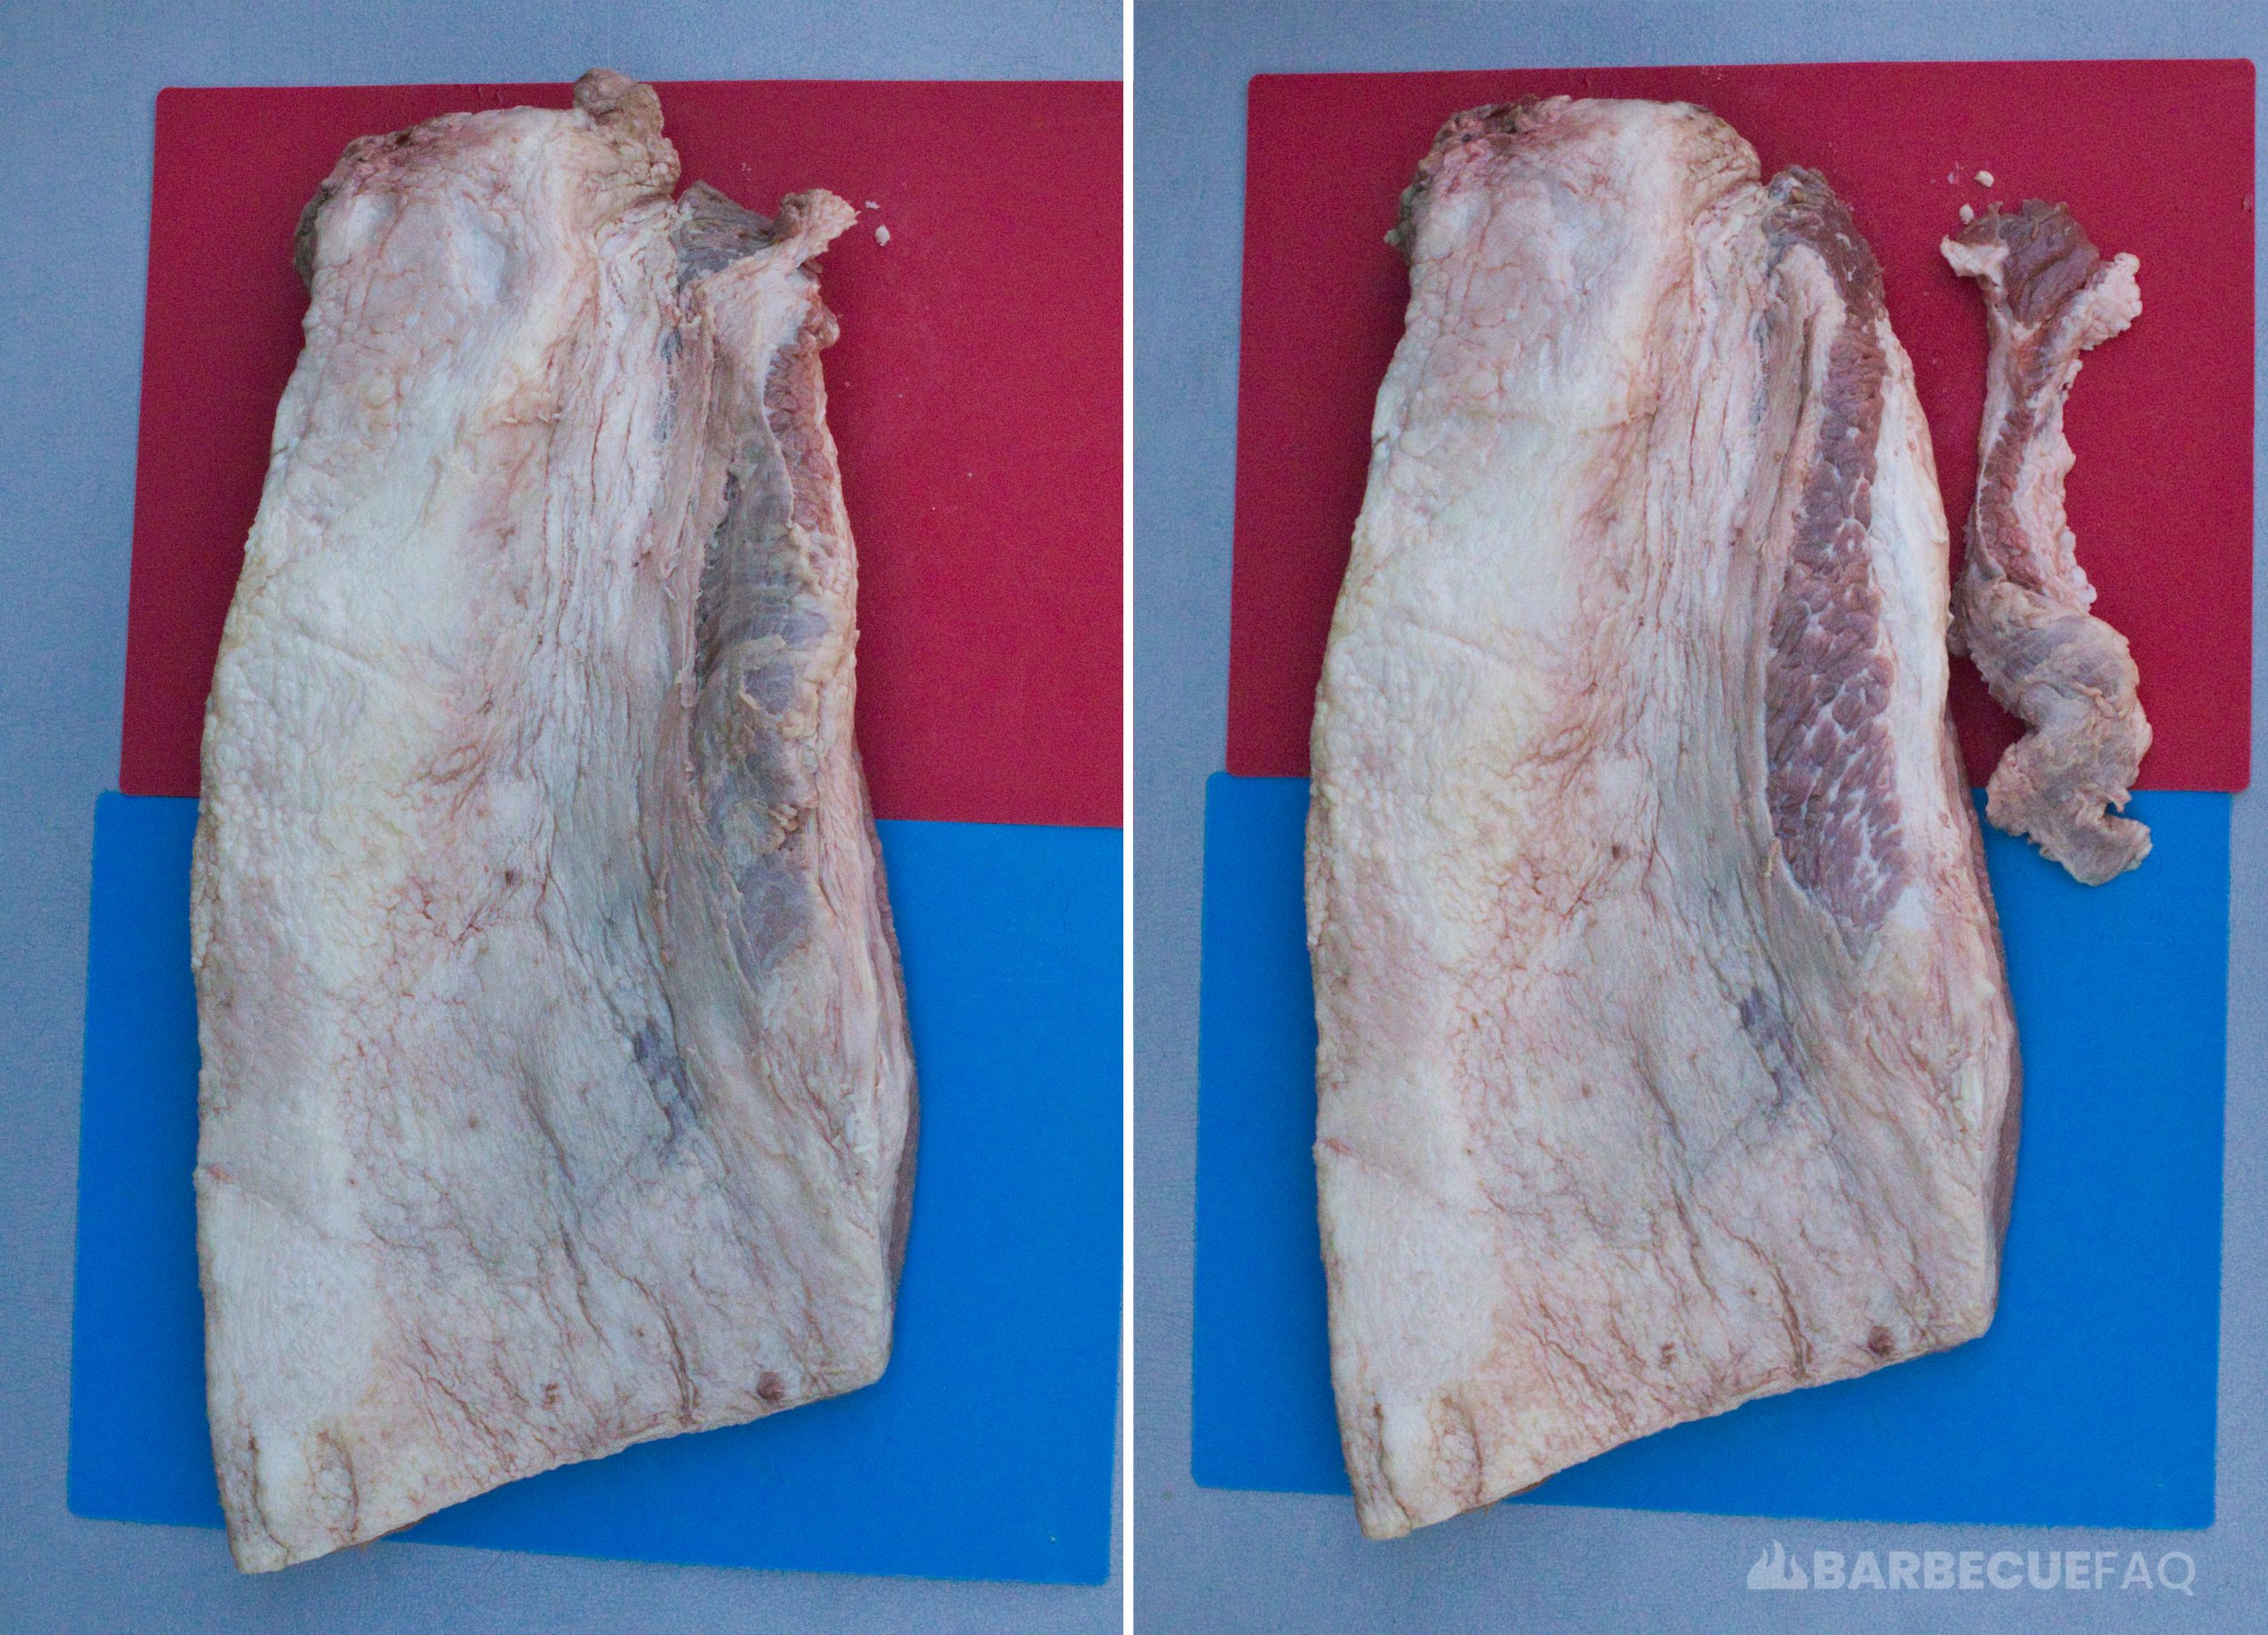
If this part isn’t removed it will overcook, burn, and be inedible; You can toss or save for burger grind.
You want to glide your knife through the mohawk, round the point muscle off.
You’re basically making it a level surface.
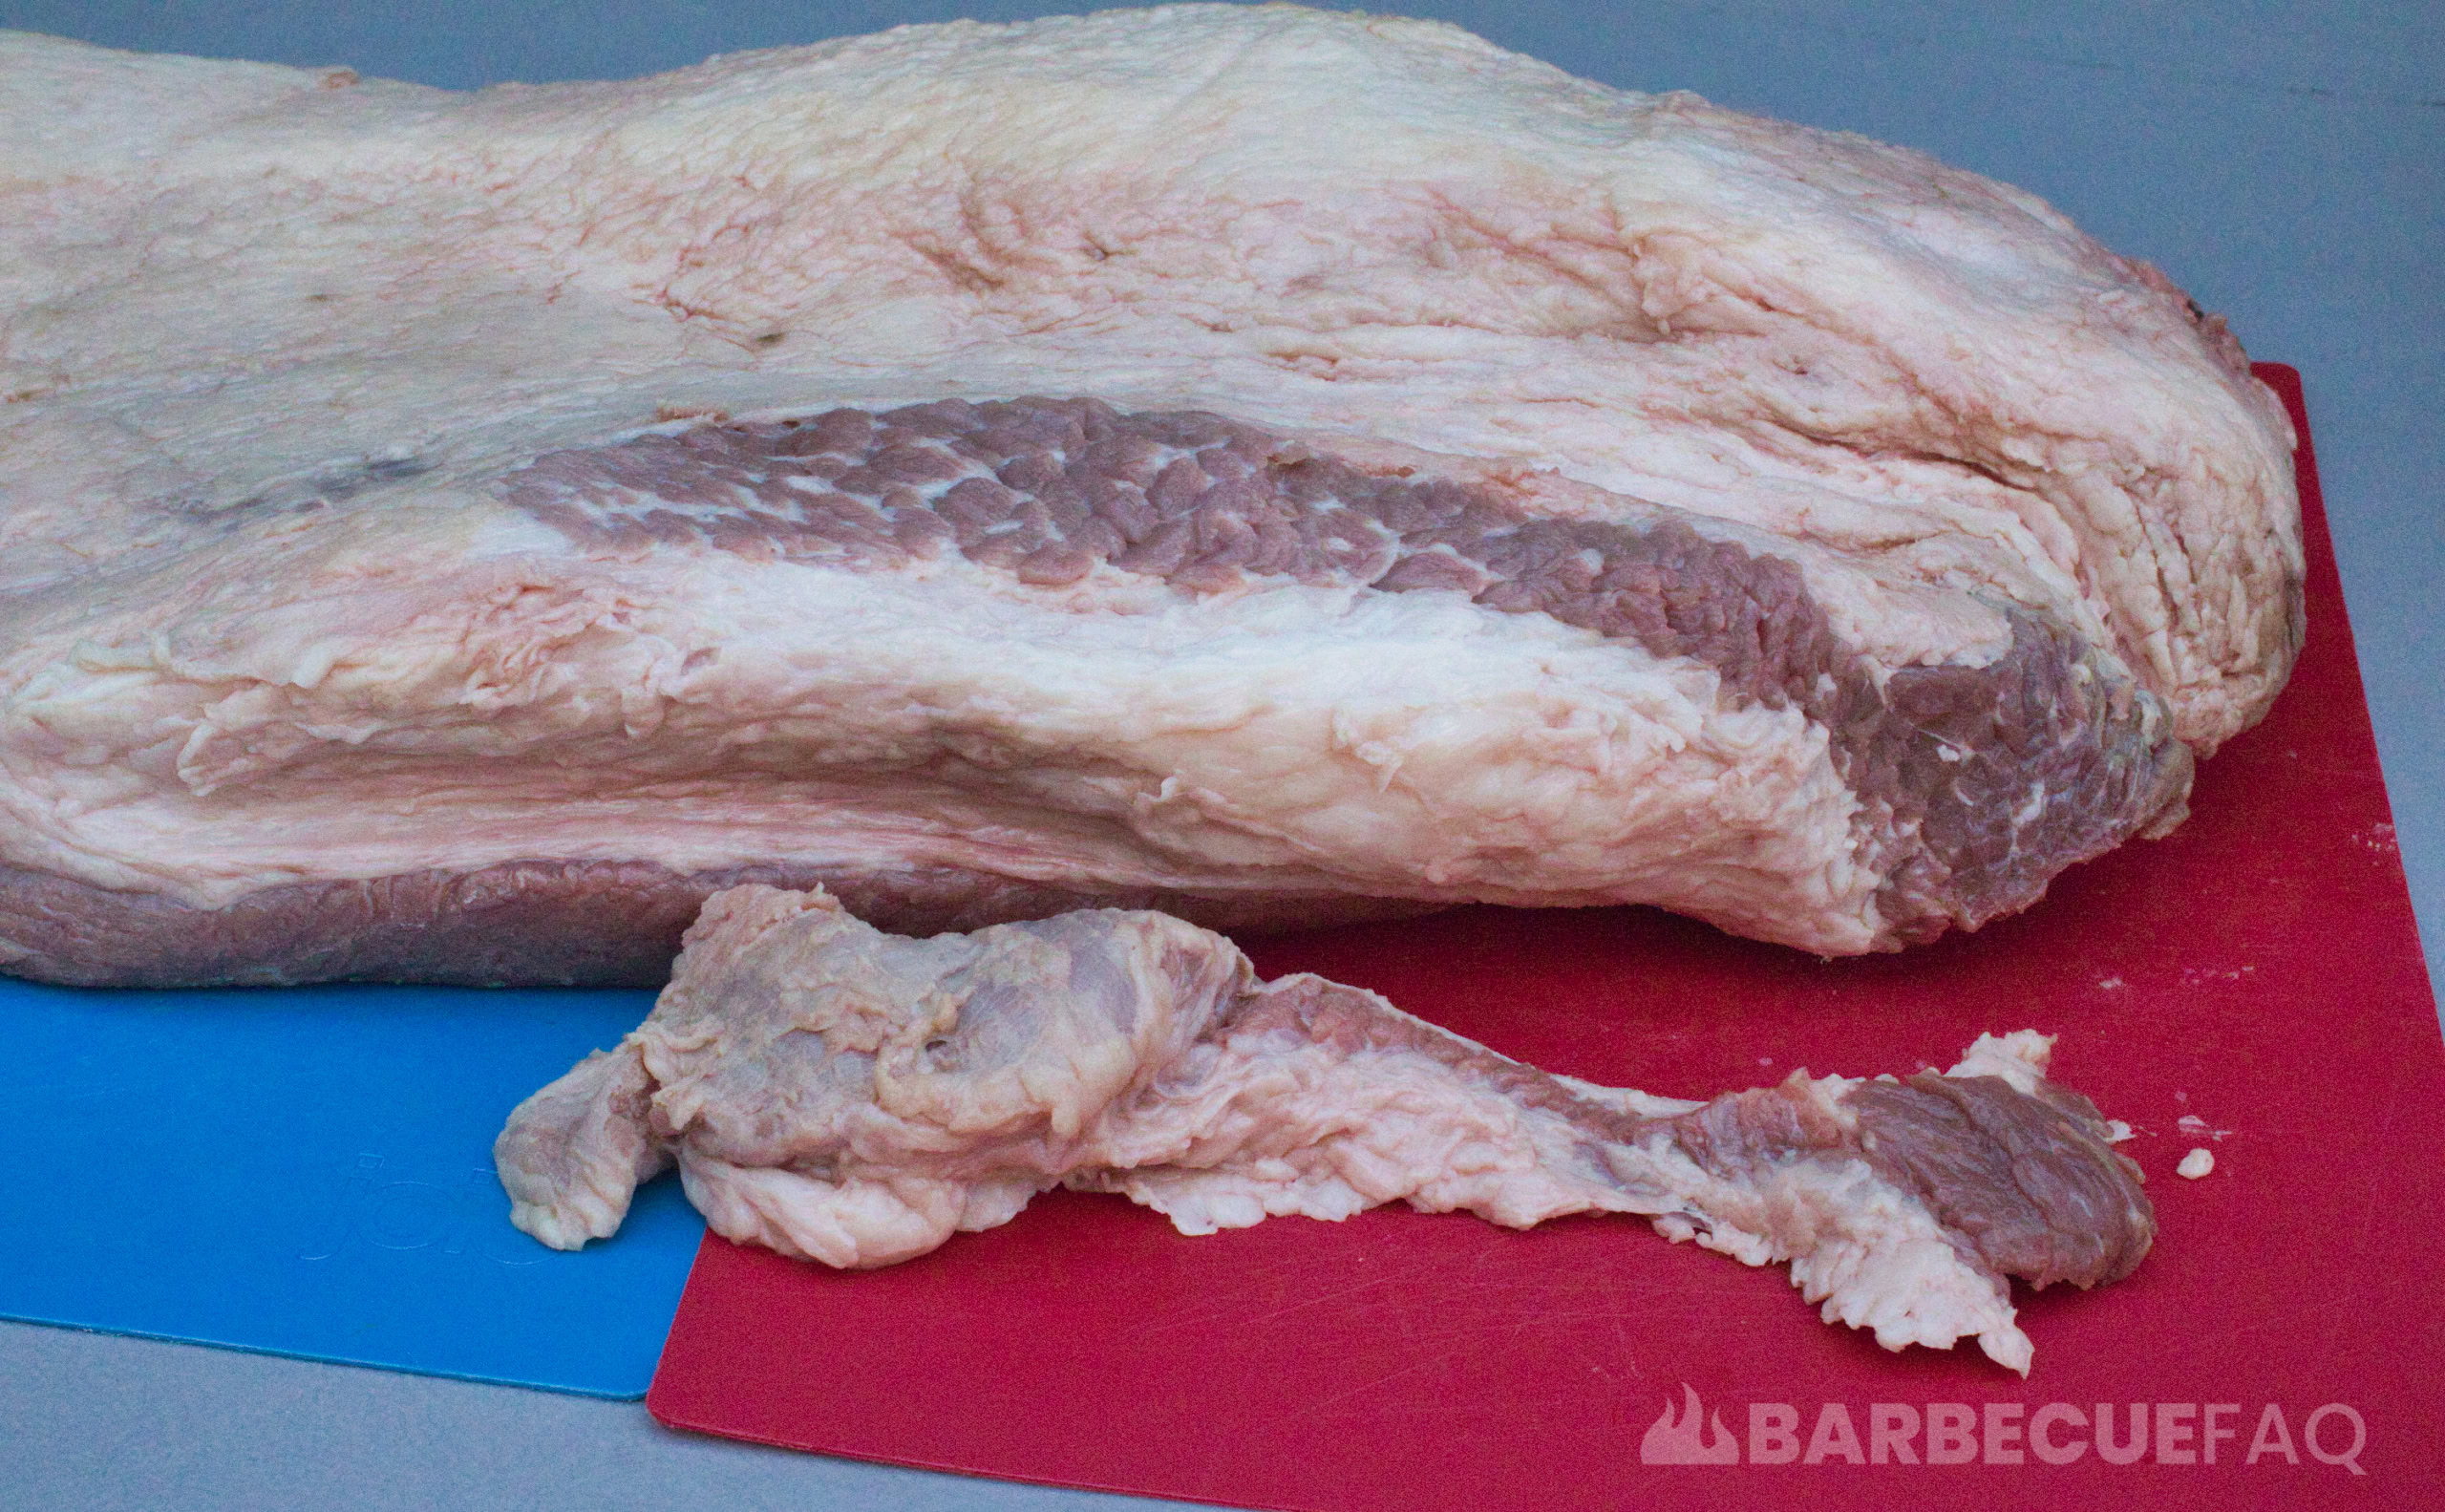
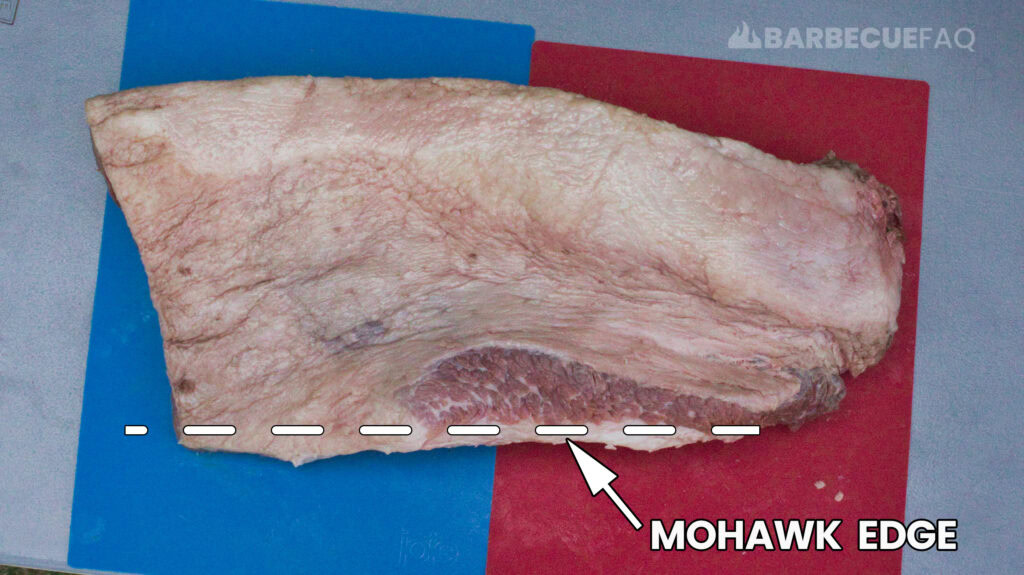
1.1 Mohawk Edge
The reason for removing edge meat is because it’s typically “browned.”
This is both due to oxidation and because of how the beef is separated.
I personally like to remove it.
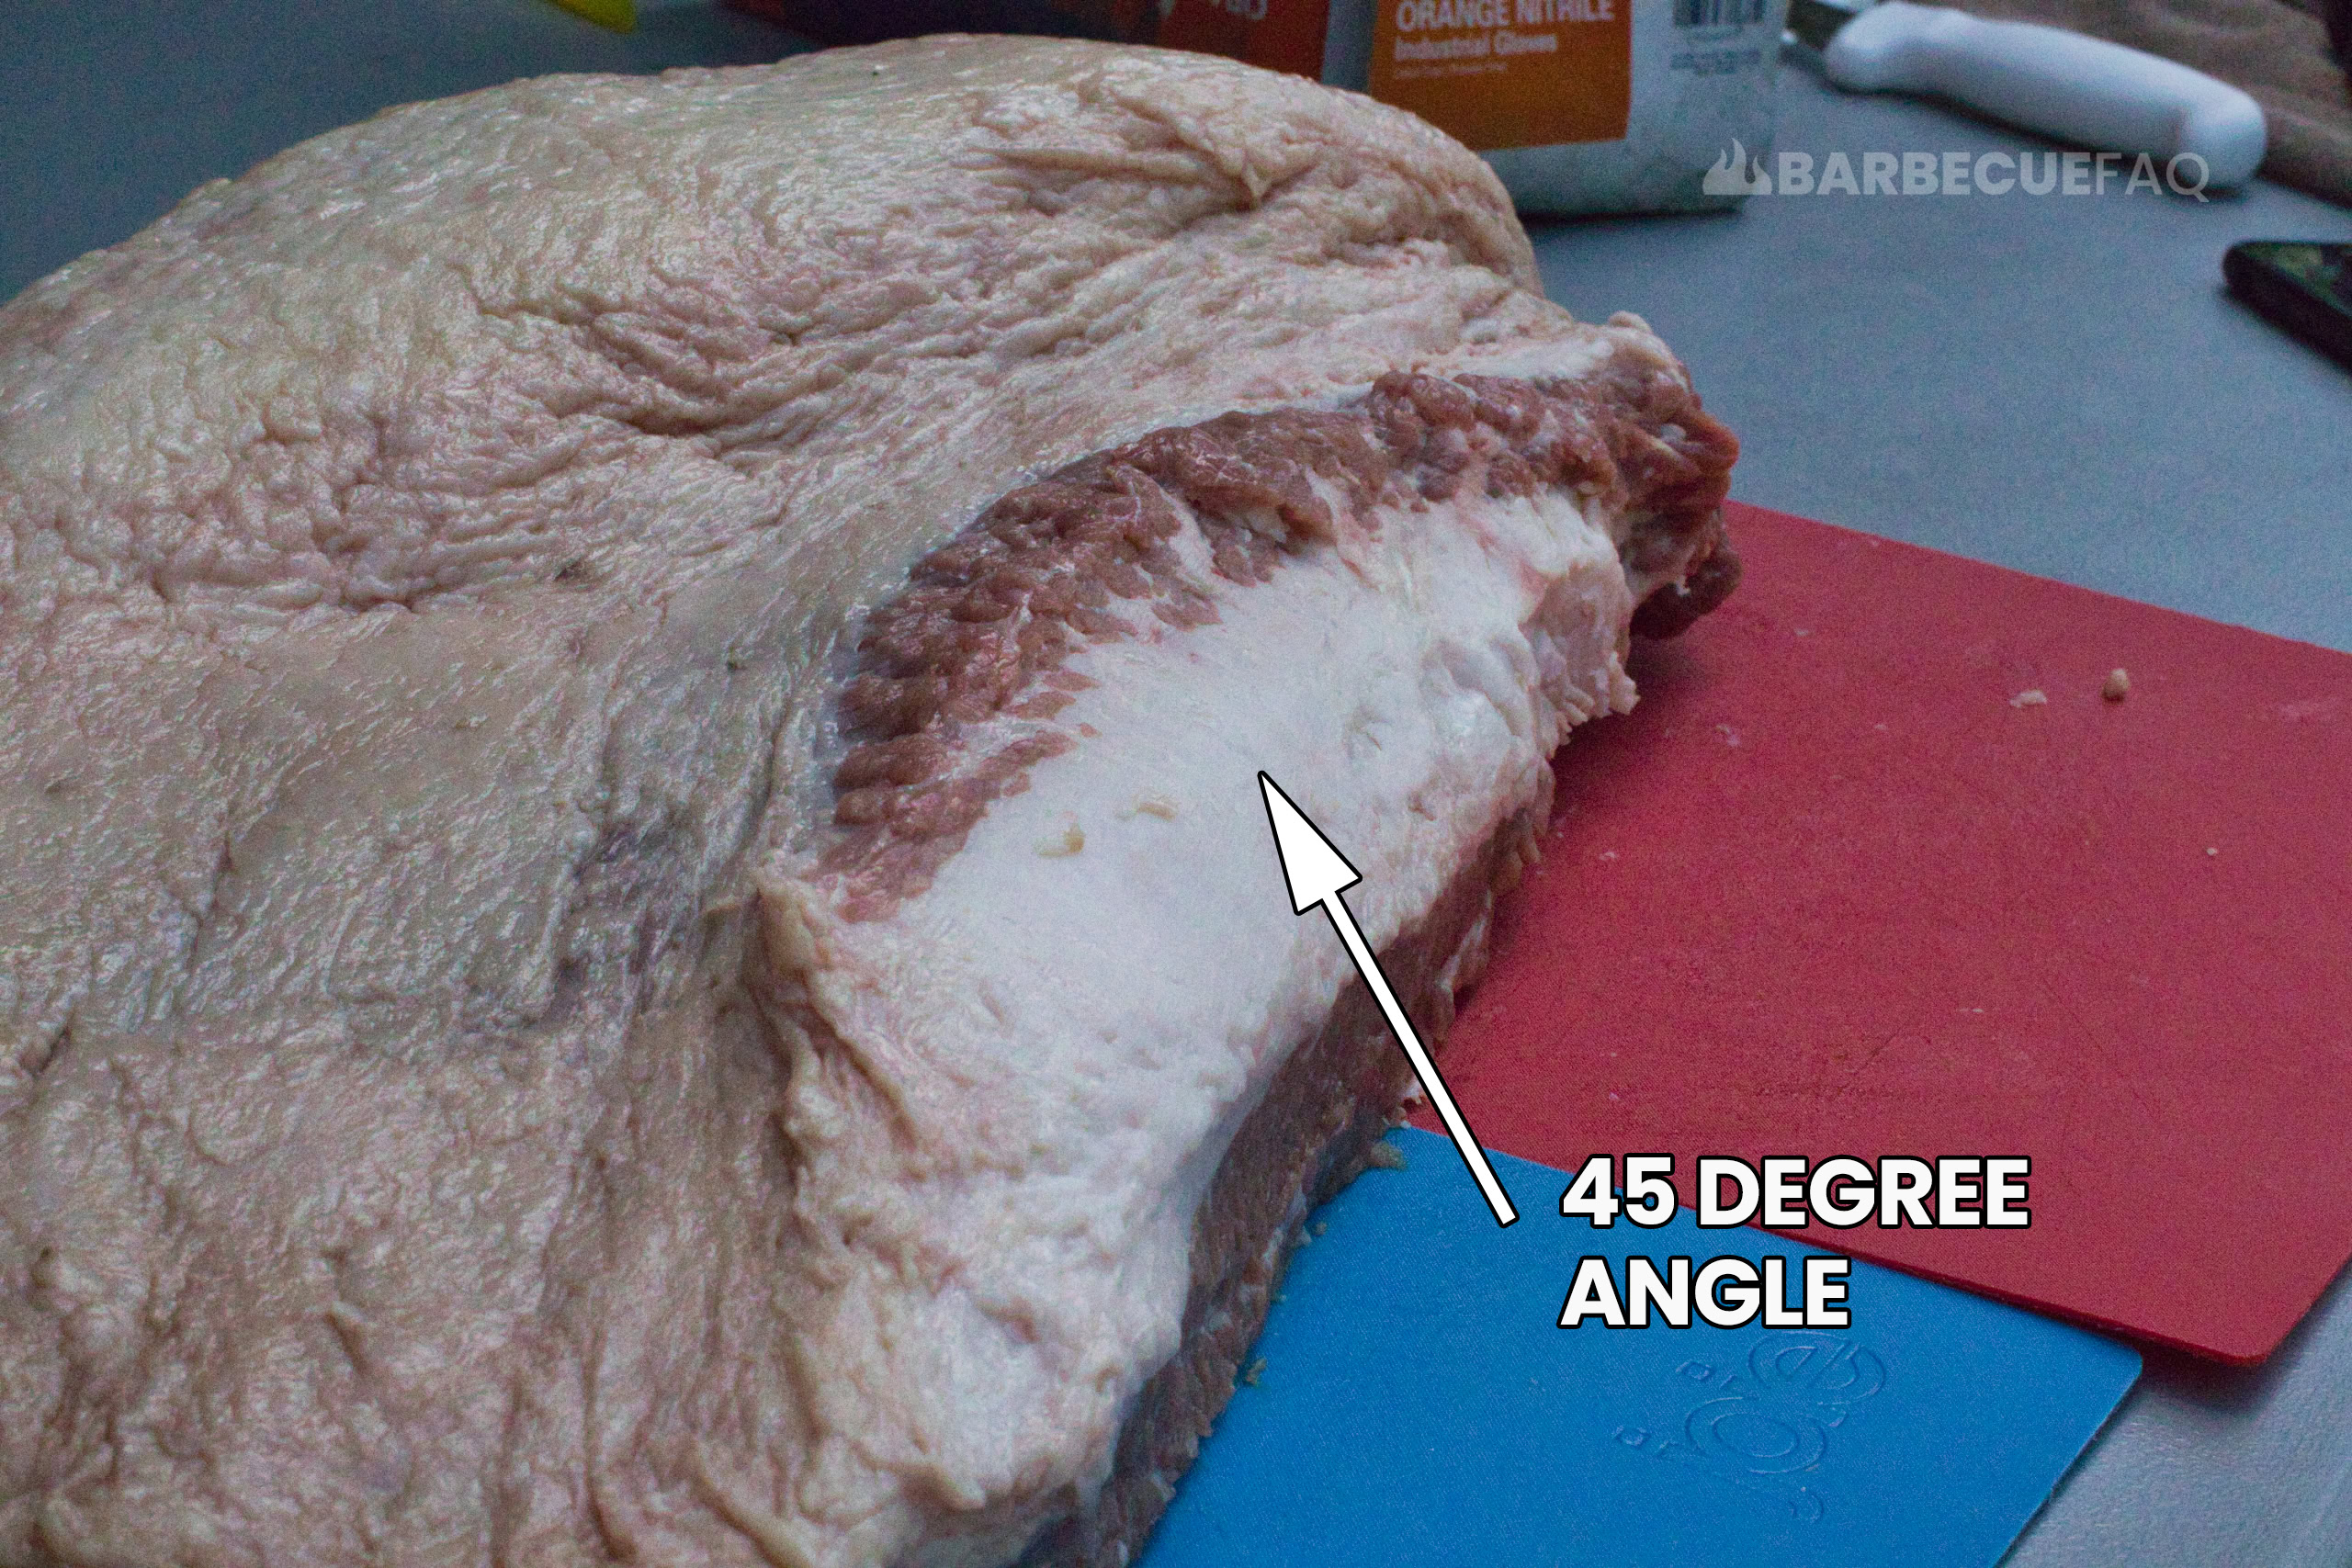
1.2 Mohawk Deckle
Underneath mohawk is hard fat that won’t render.
You want to remove this hard fat by slicing at a 45 degree angle.
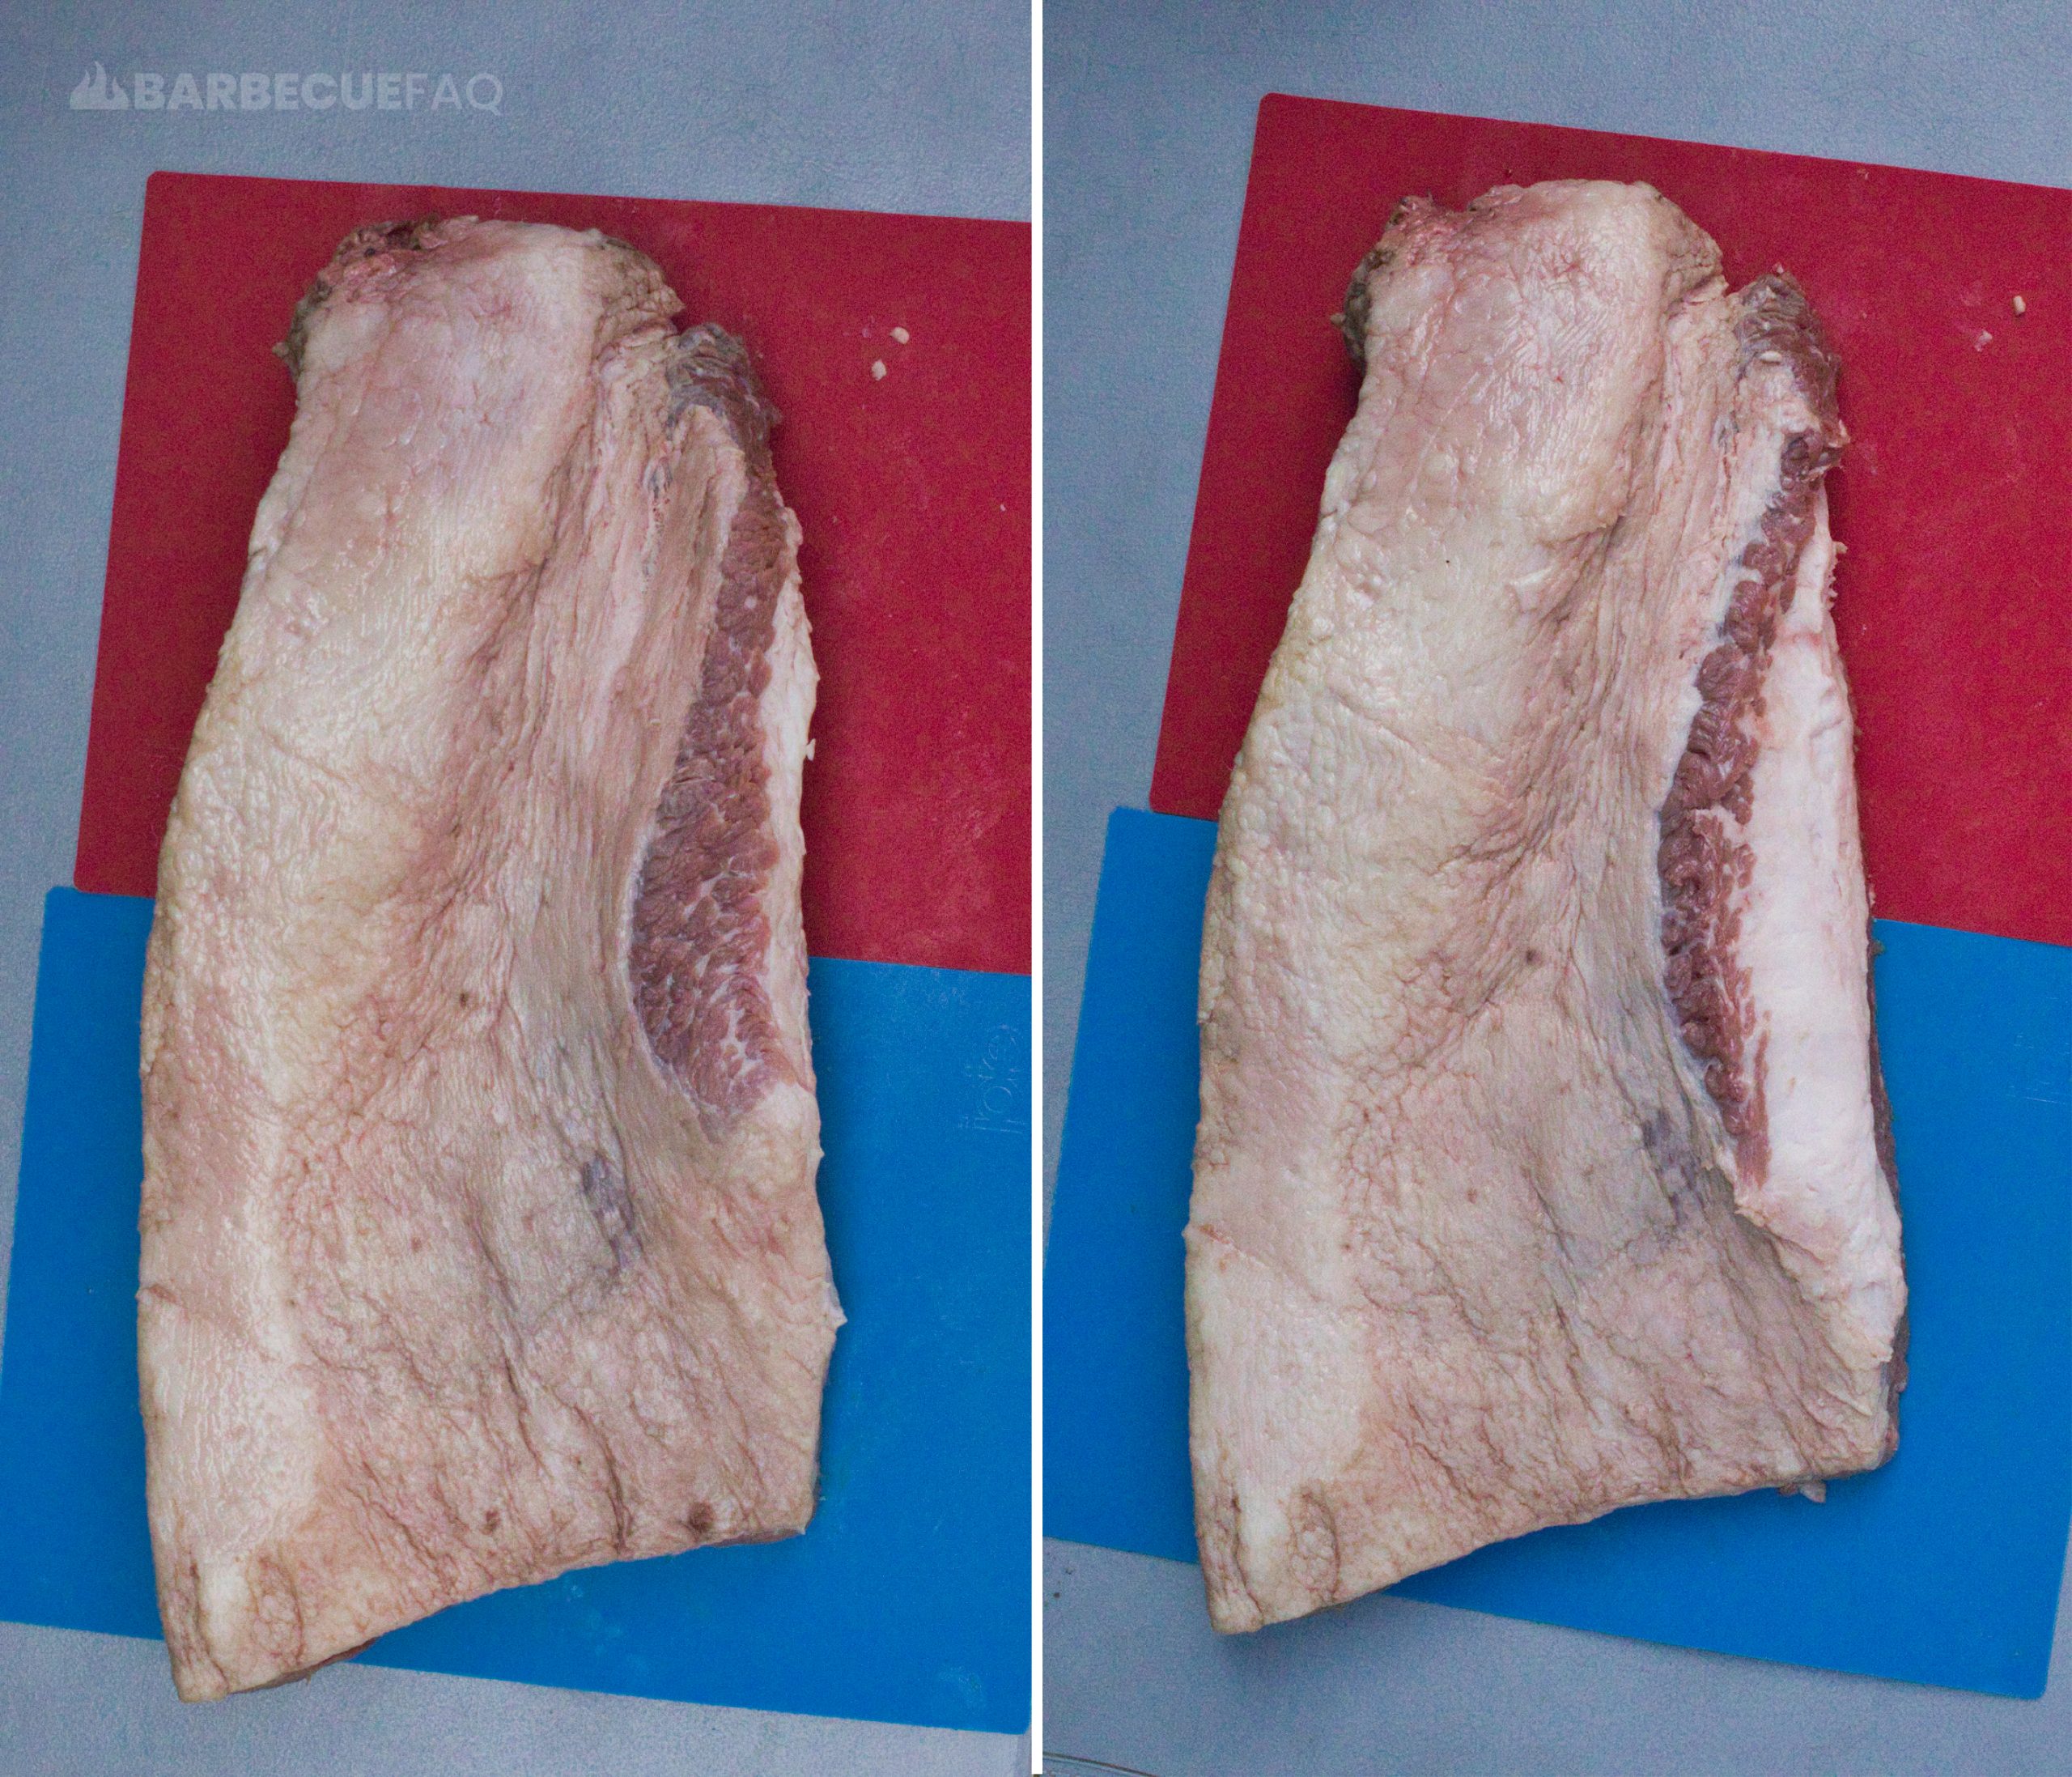
Again, most if not all of this is hard fat that won’t render.
1.3 Mohawk Flat
On the extension of the mohawk, there is the flat muscle.
Typically on this side of the flat, the meat is very thin.
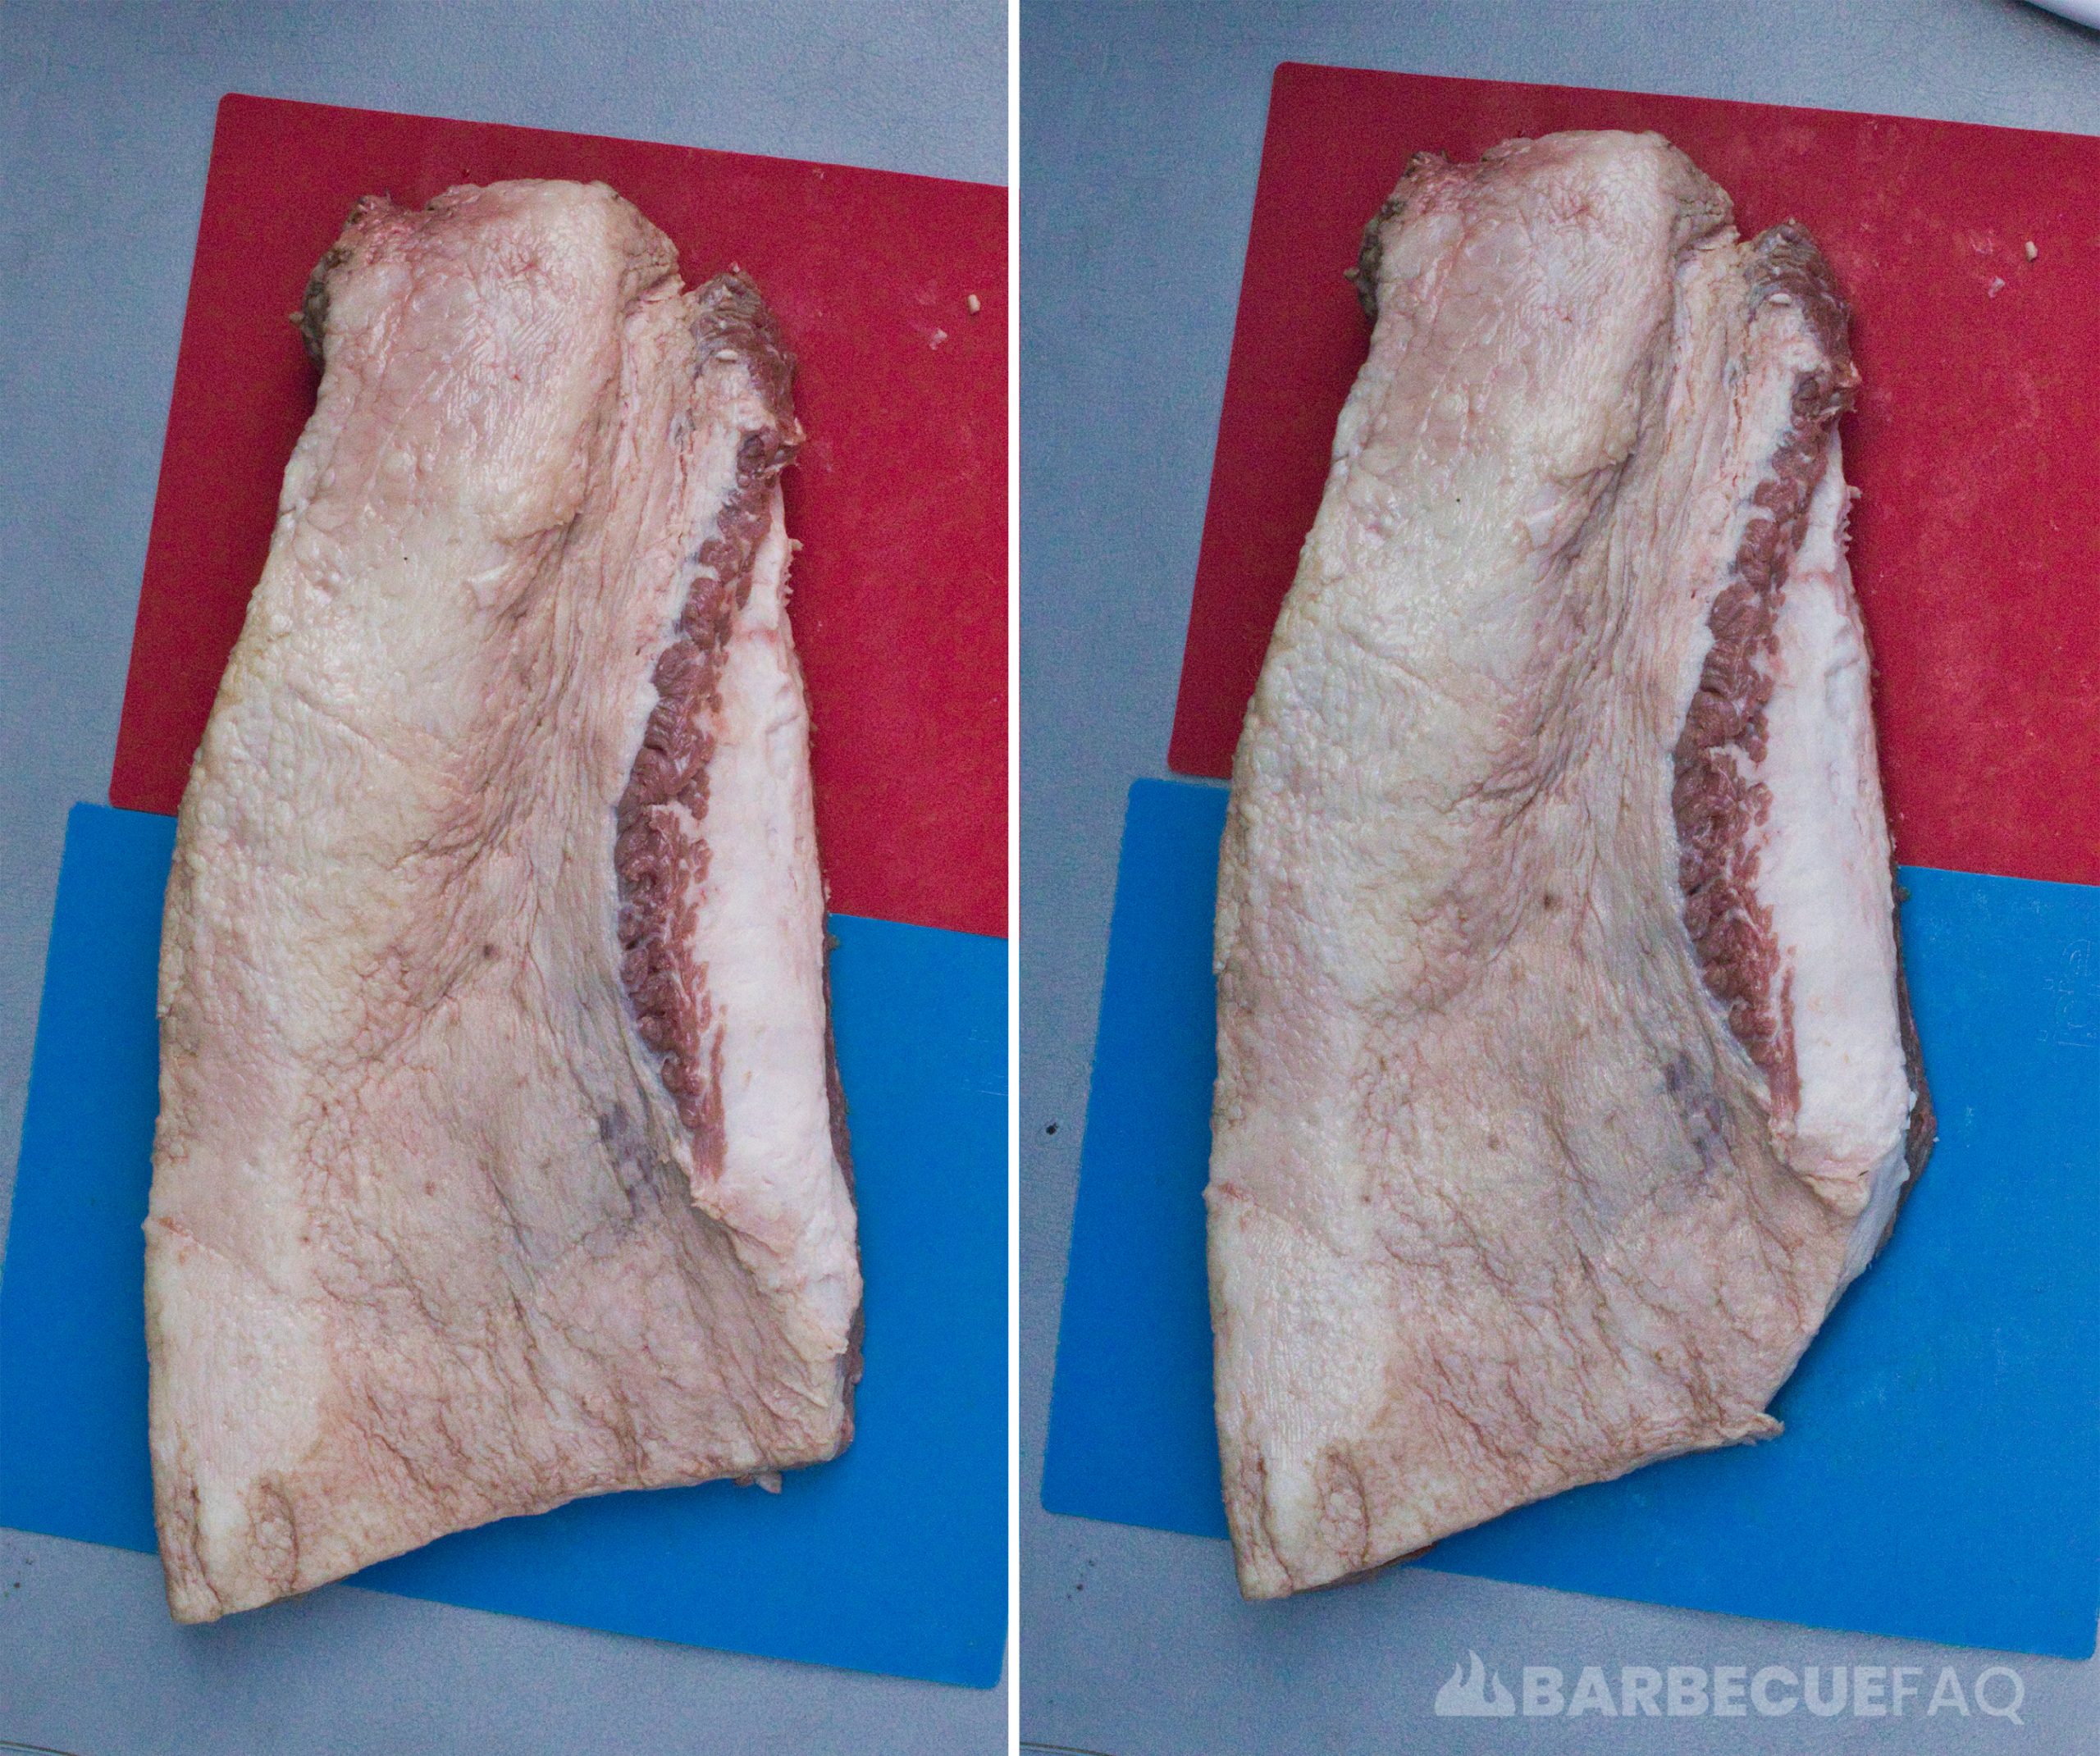
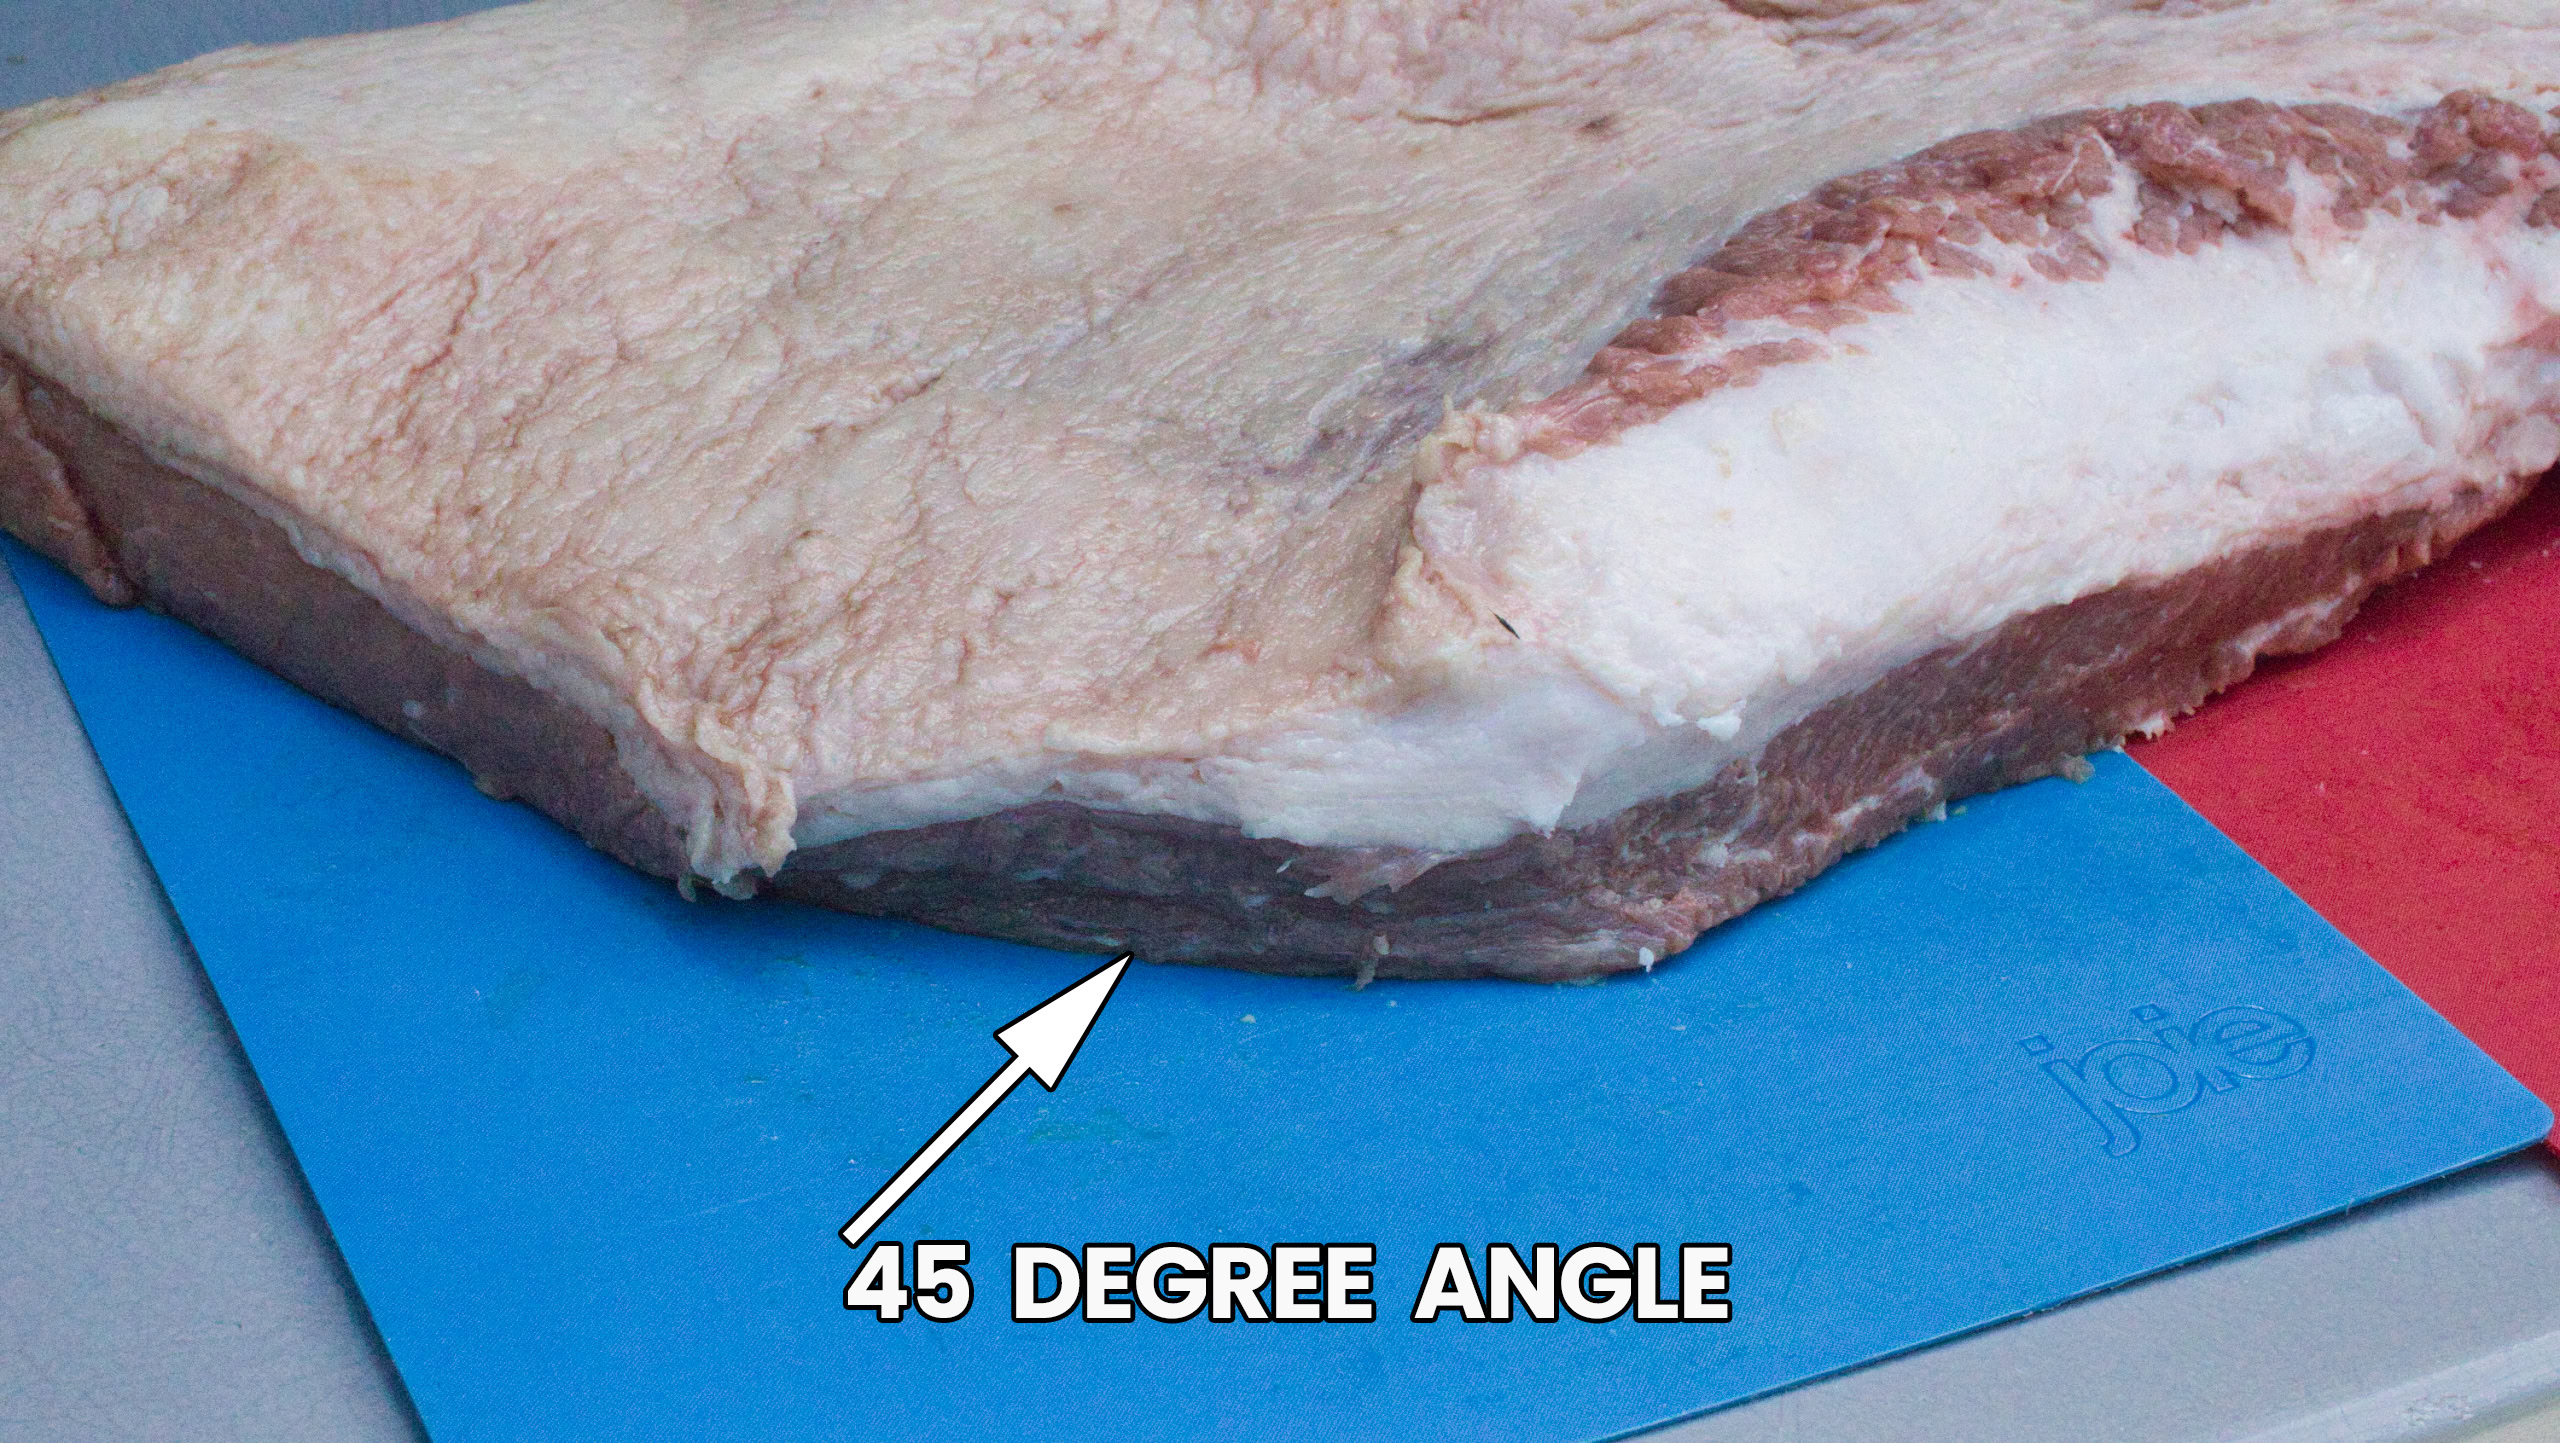
You want to slice this corner so that the flat is roughly uniform – an inch thick is a good goal.
When slicing, simply cut at a 45 degree angle.
Don’t worry about rounding at the moment – you’ll do this later.
2. The Hump
Next to the mohawk is a “hump” of fat that needs to be trimmed down.
All you have to do here is feel the fat. Any fat that feels “hard” to the touch, can be shaved down as it won’t render and nobody will eat it.
Your goal is roughly 1/4″-1/2″ of fat.
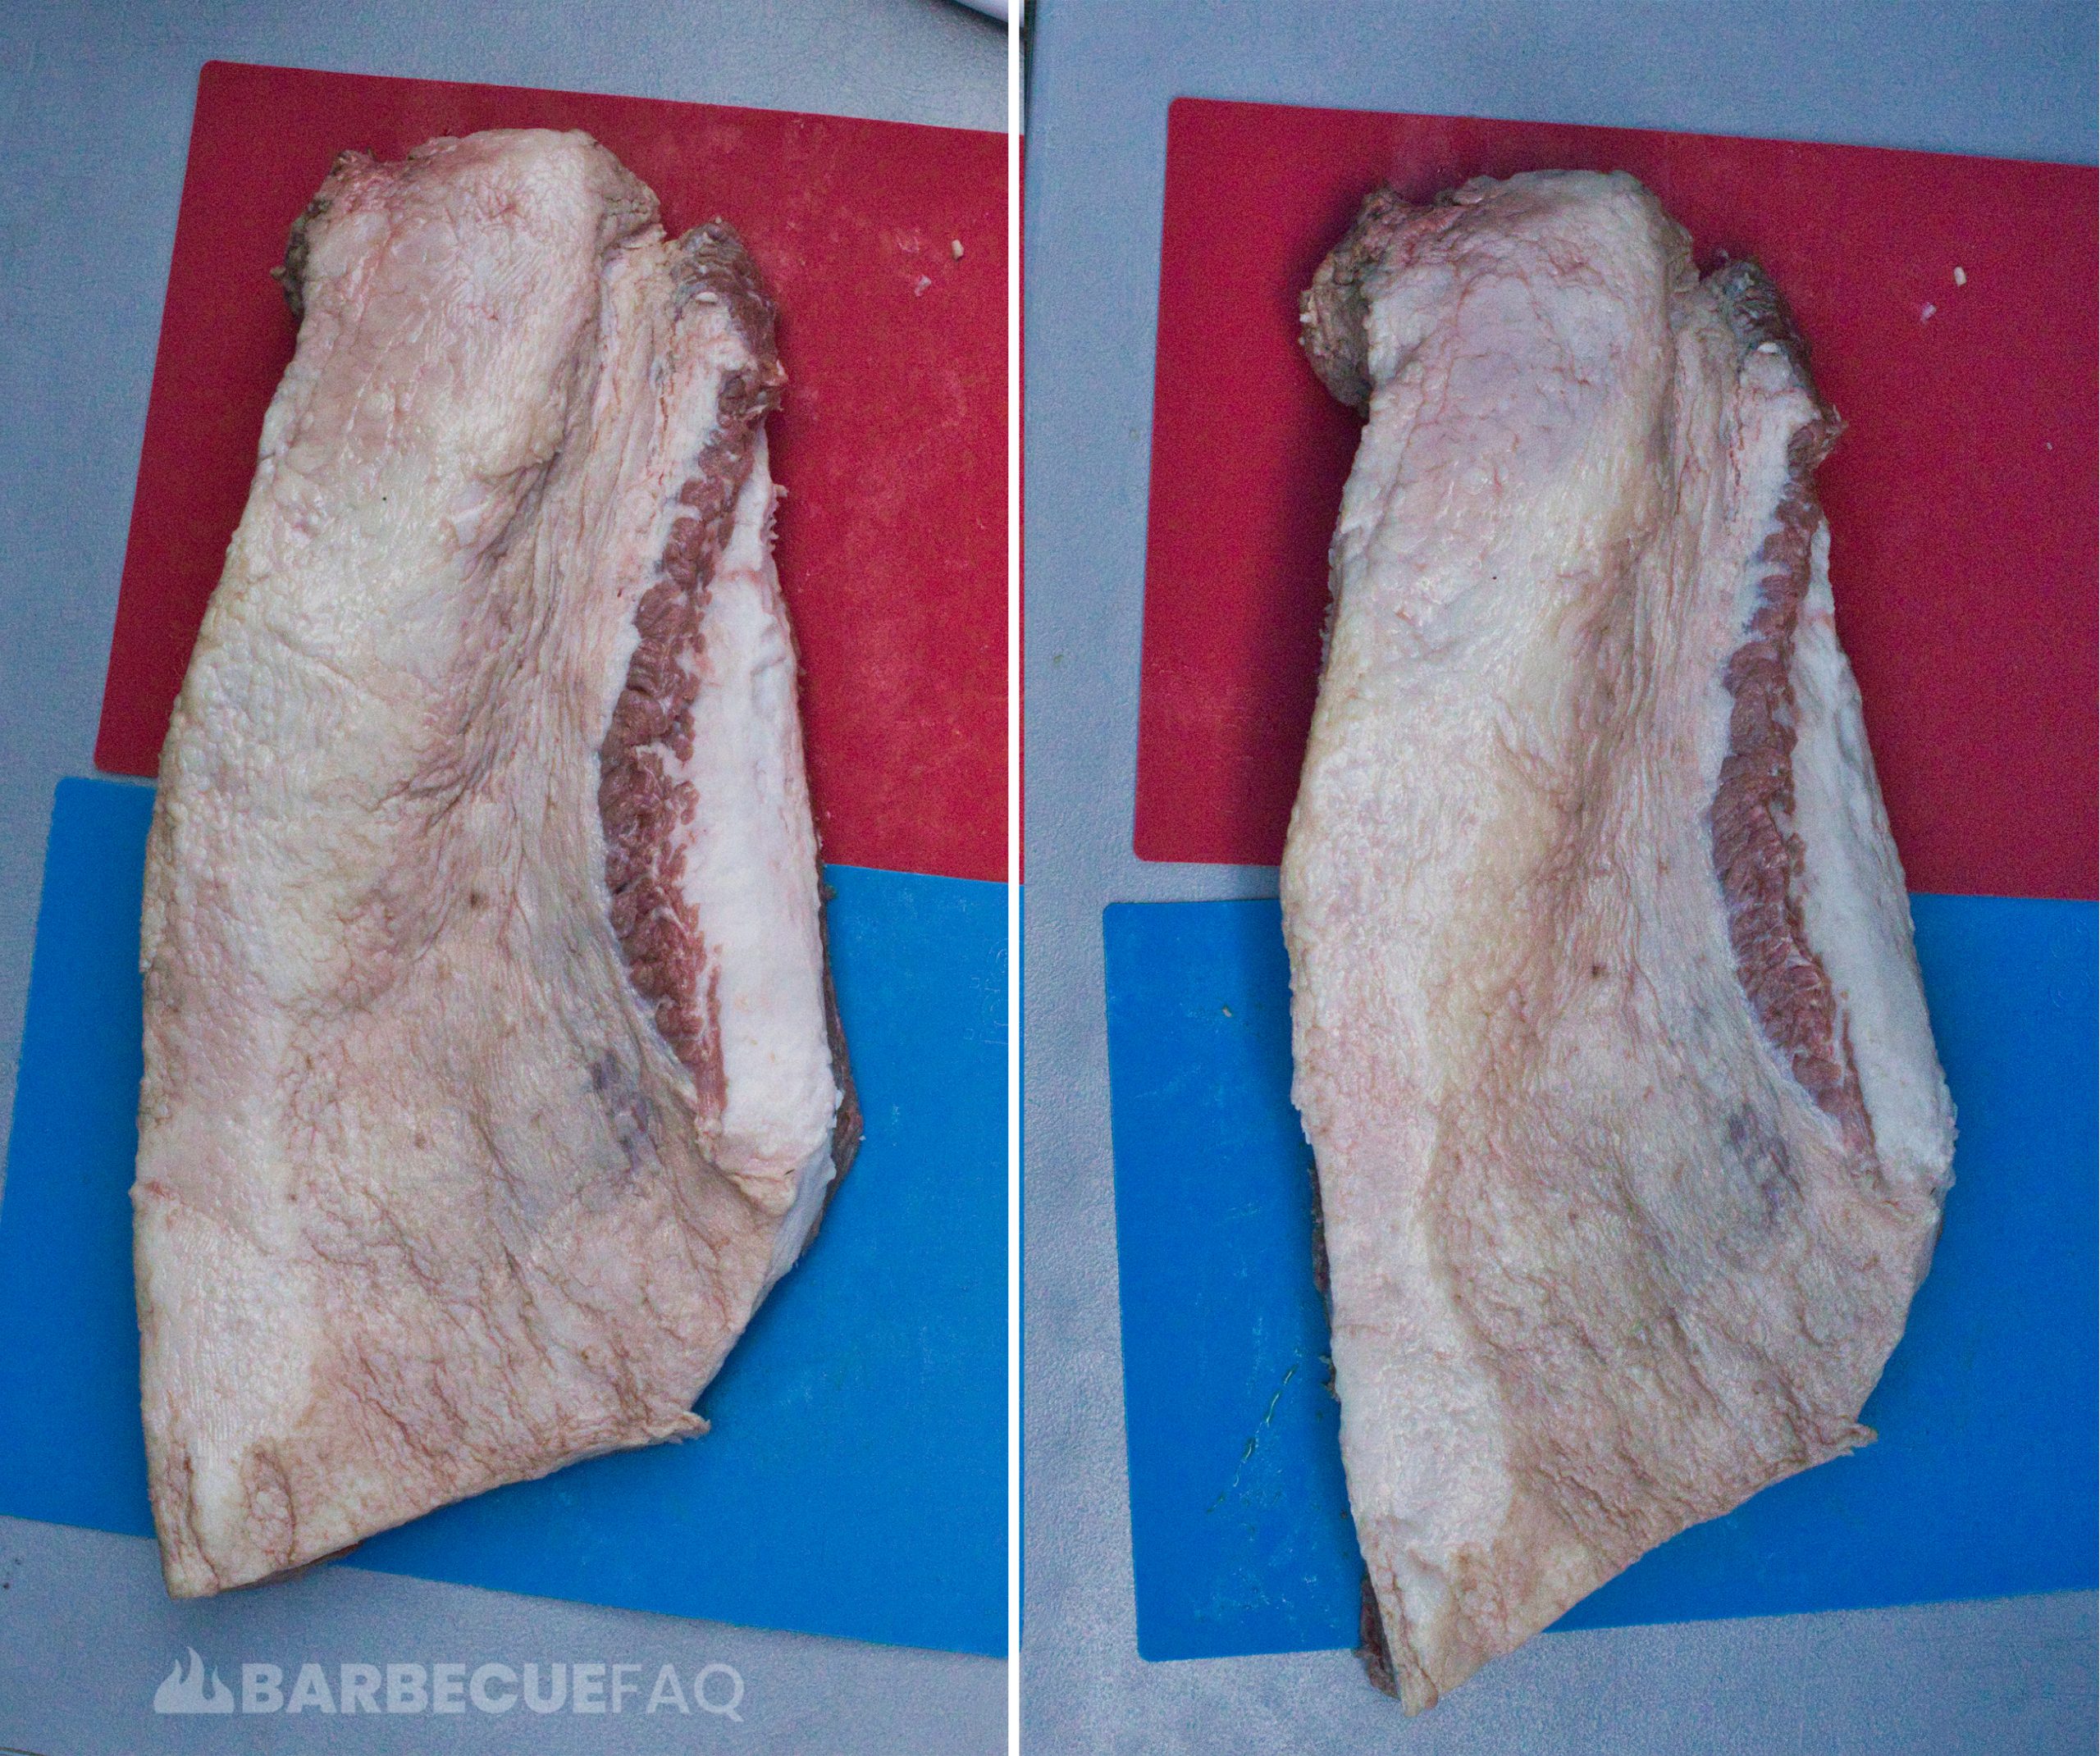
Don’t sweat it if you scalp your brisket a bit here. I’ve trimmed 100s of briskets and still scalp them.
Remember, this is backyard barbecue.
2.1 Hump Edge
Same as the other side – this can tend to be oxidized and brown.
Just slice the edge to remove this meat.
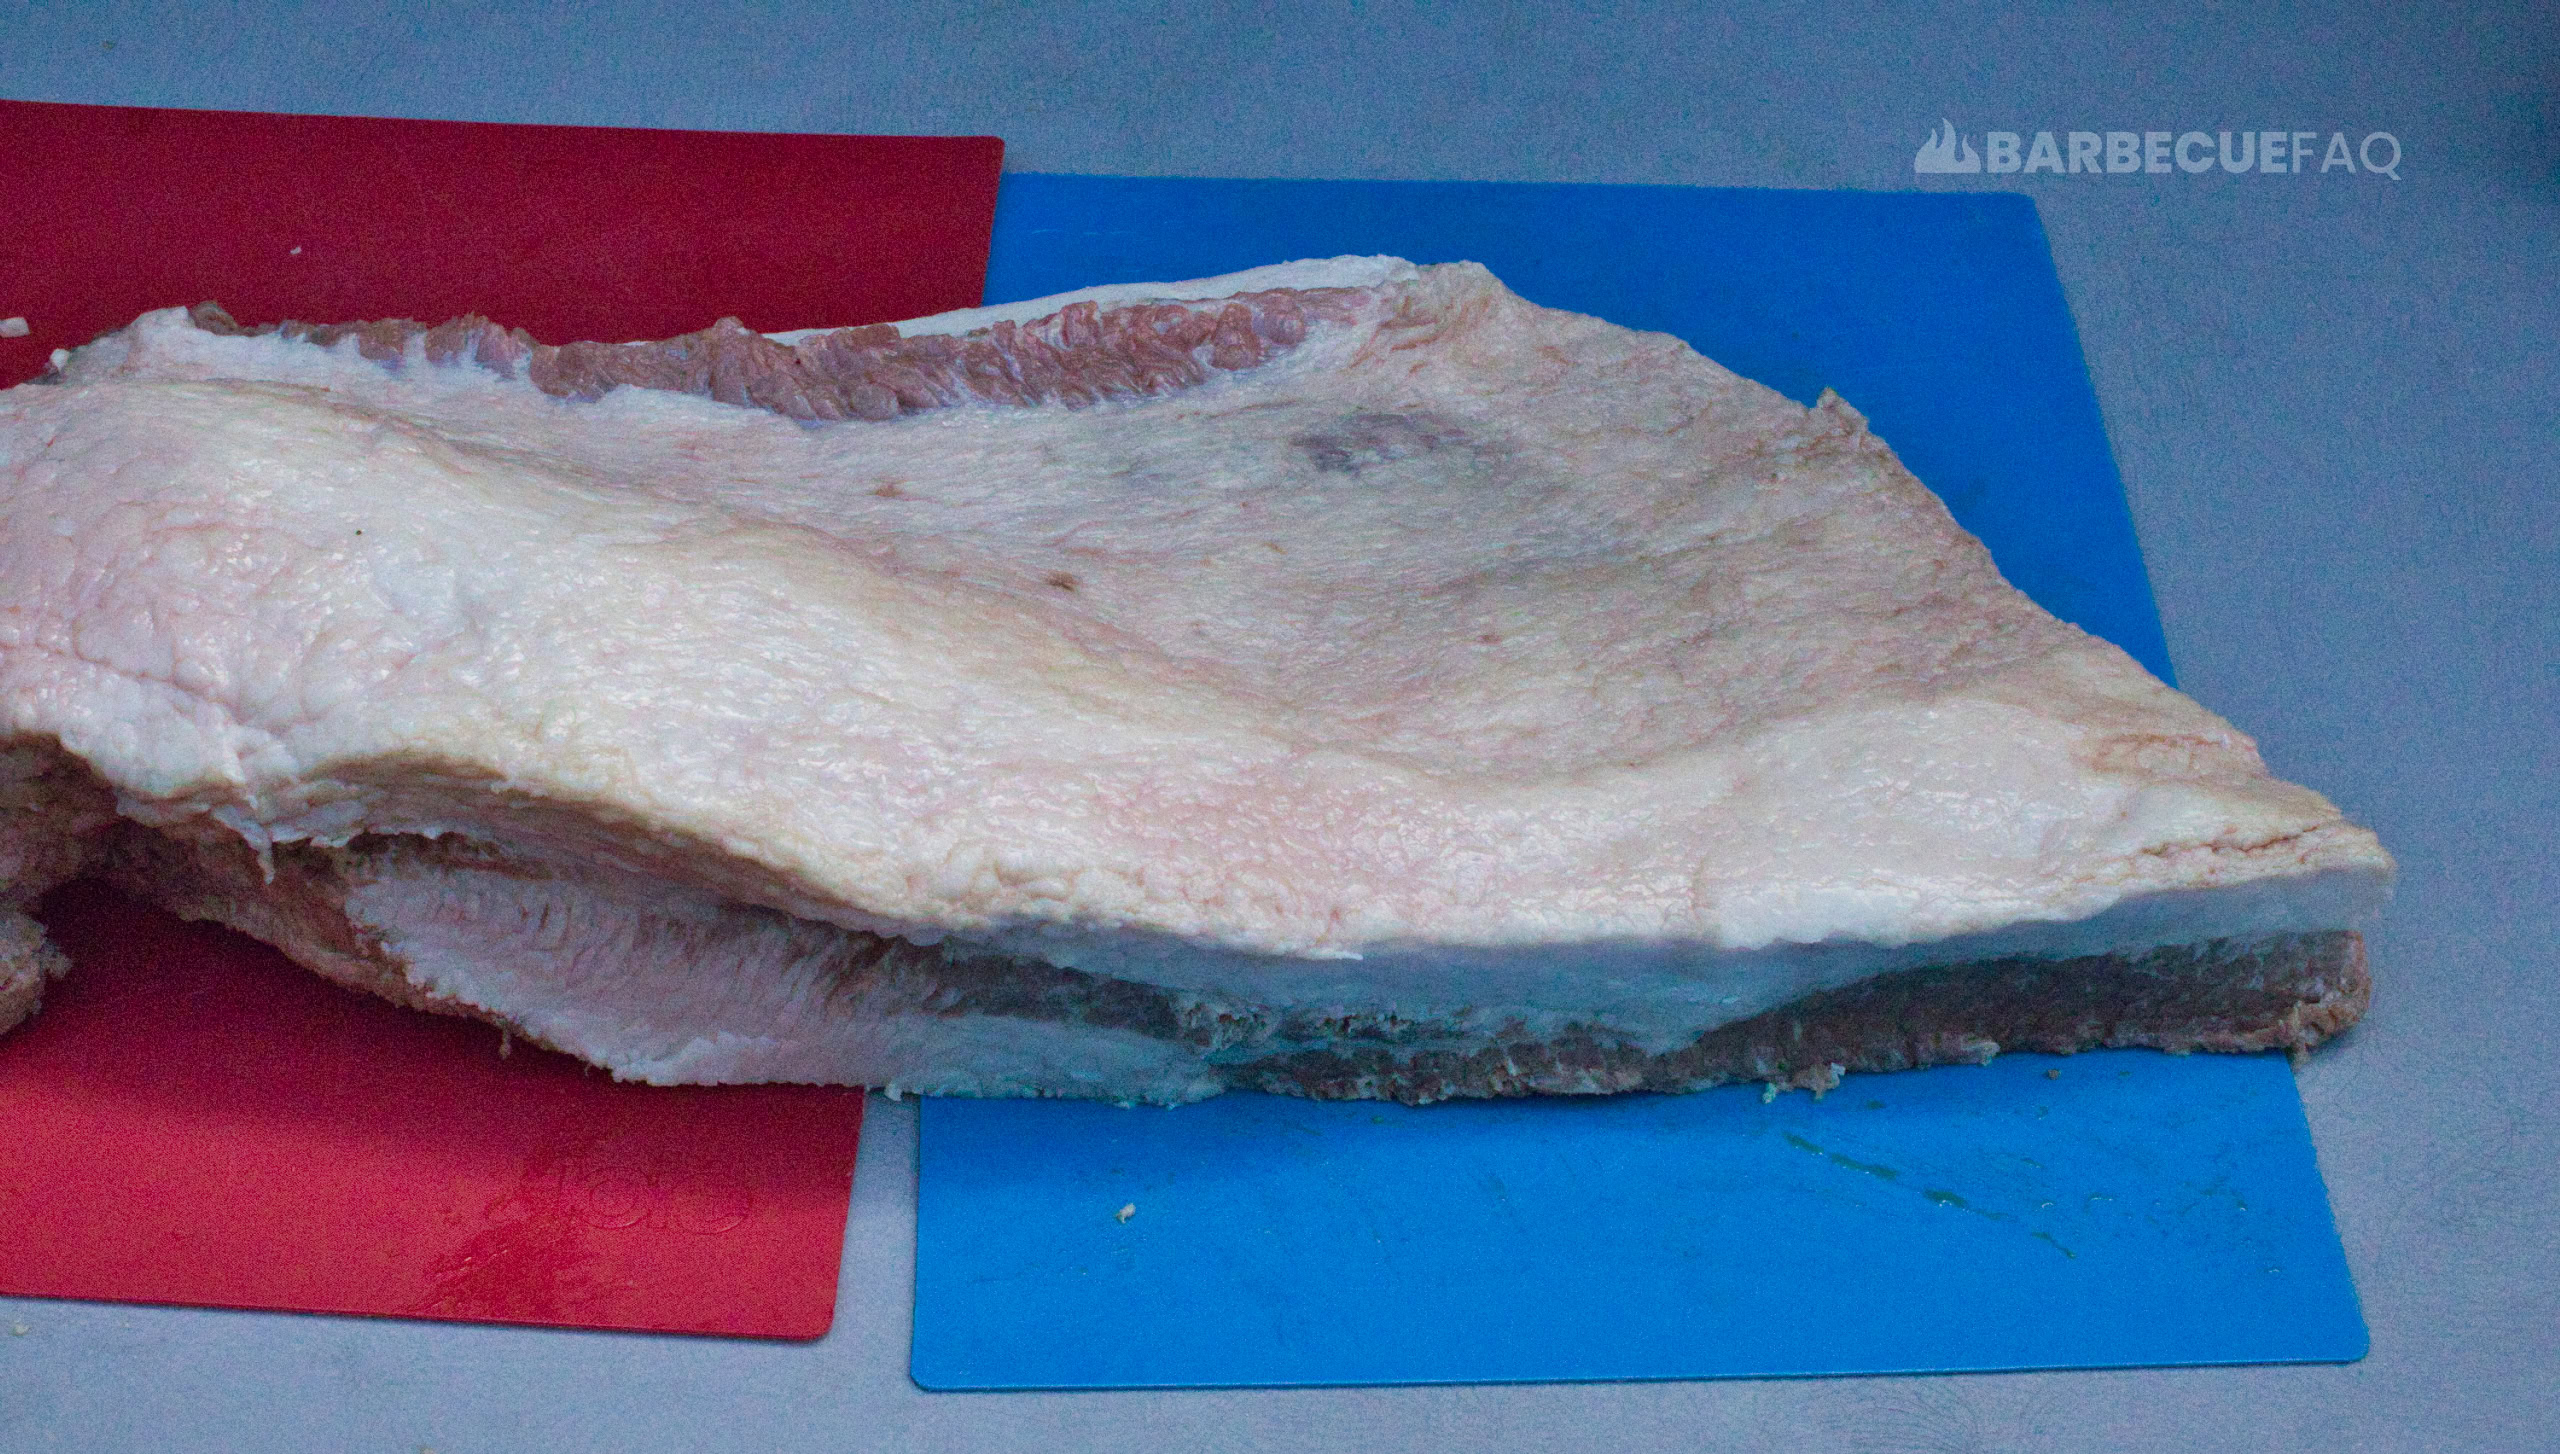
2.2 Hump Flat
This end can tend to be thicker and you just want to round it out into a tear drop shape.
If you have a smaller smoker – like me – this is an easy way to make the brisket smaller and ensure the flat is an even thickness.
This is where I said you could “round” out more from where you trimmed earlier.
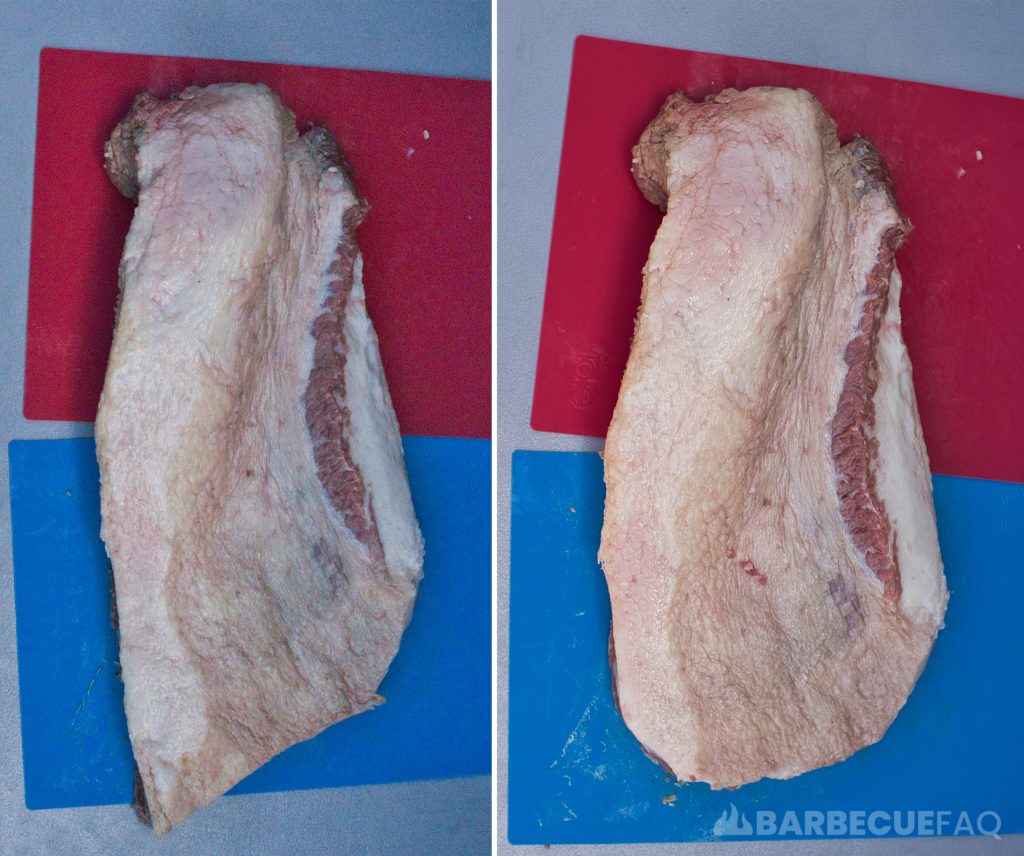
3. Flat Fat
Often, most folks will recommend 1/4 – 1/2″ thick in their flat fat cap; I typically stick with 1/4 inch-ish.
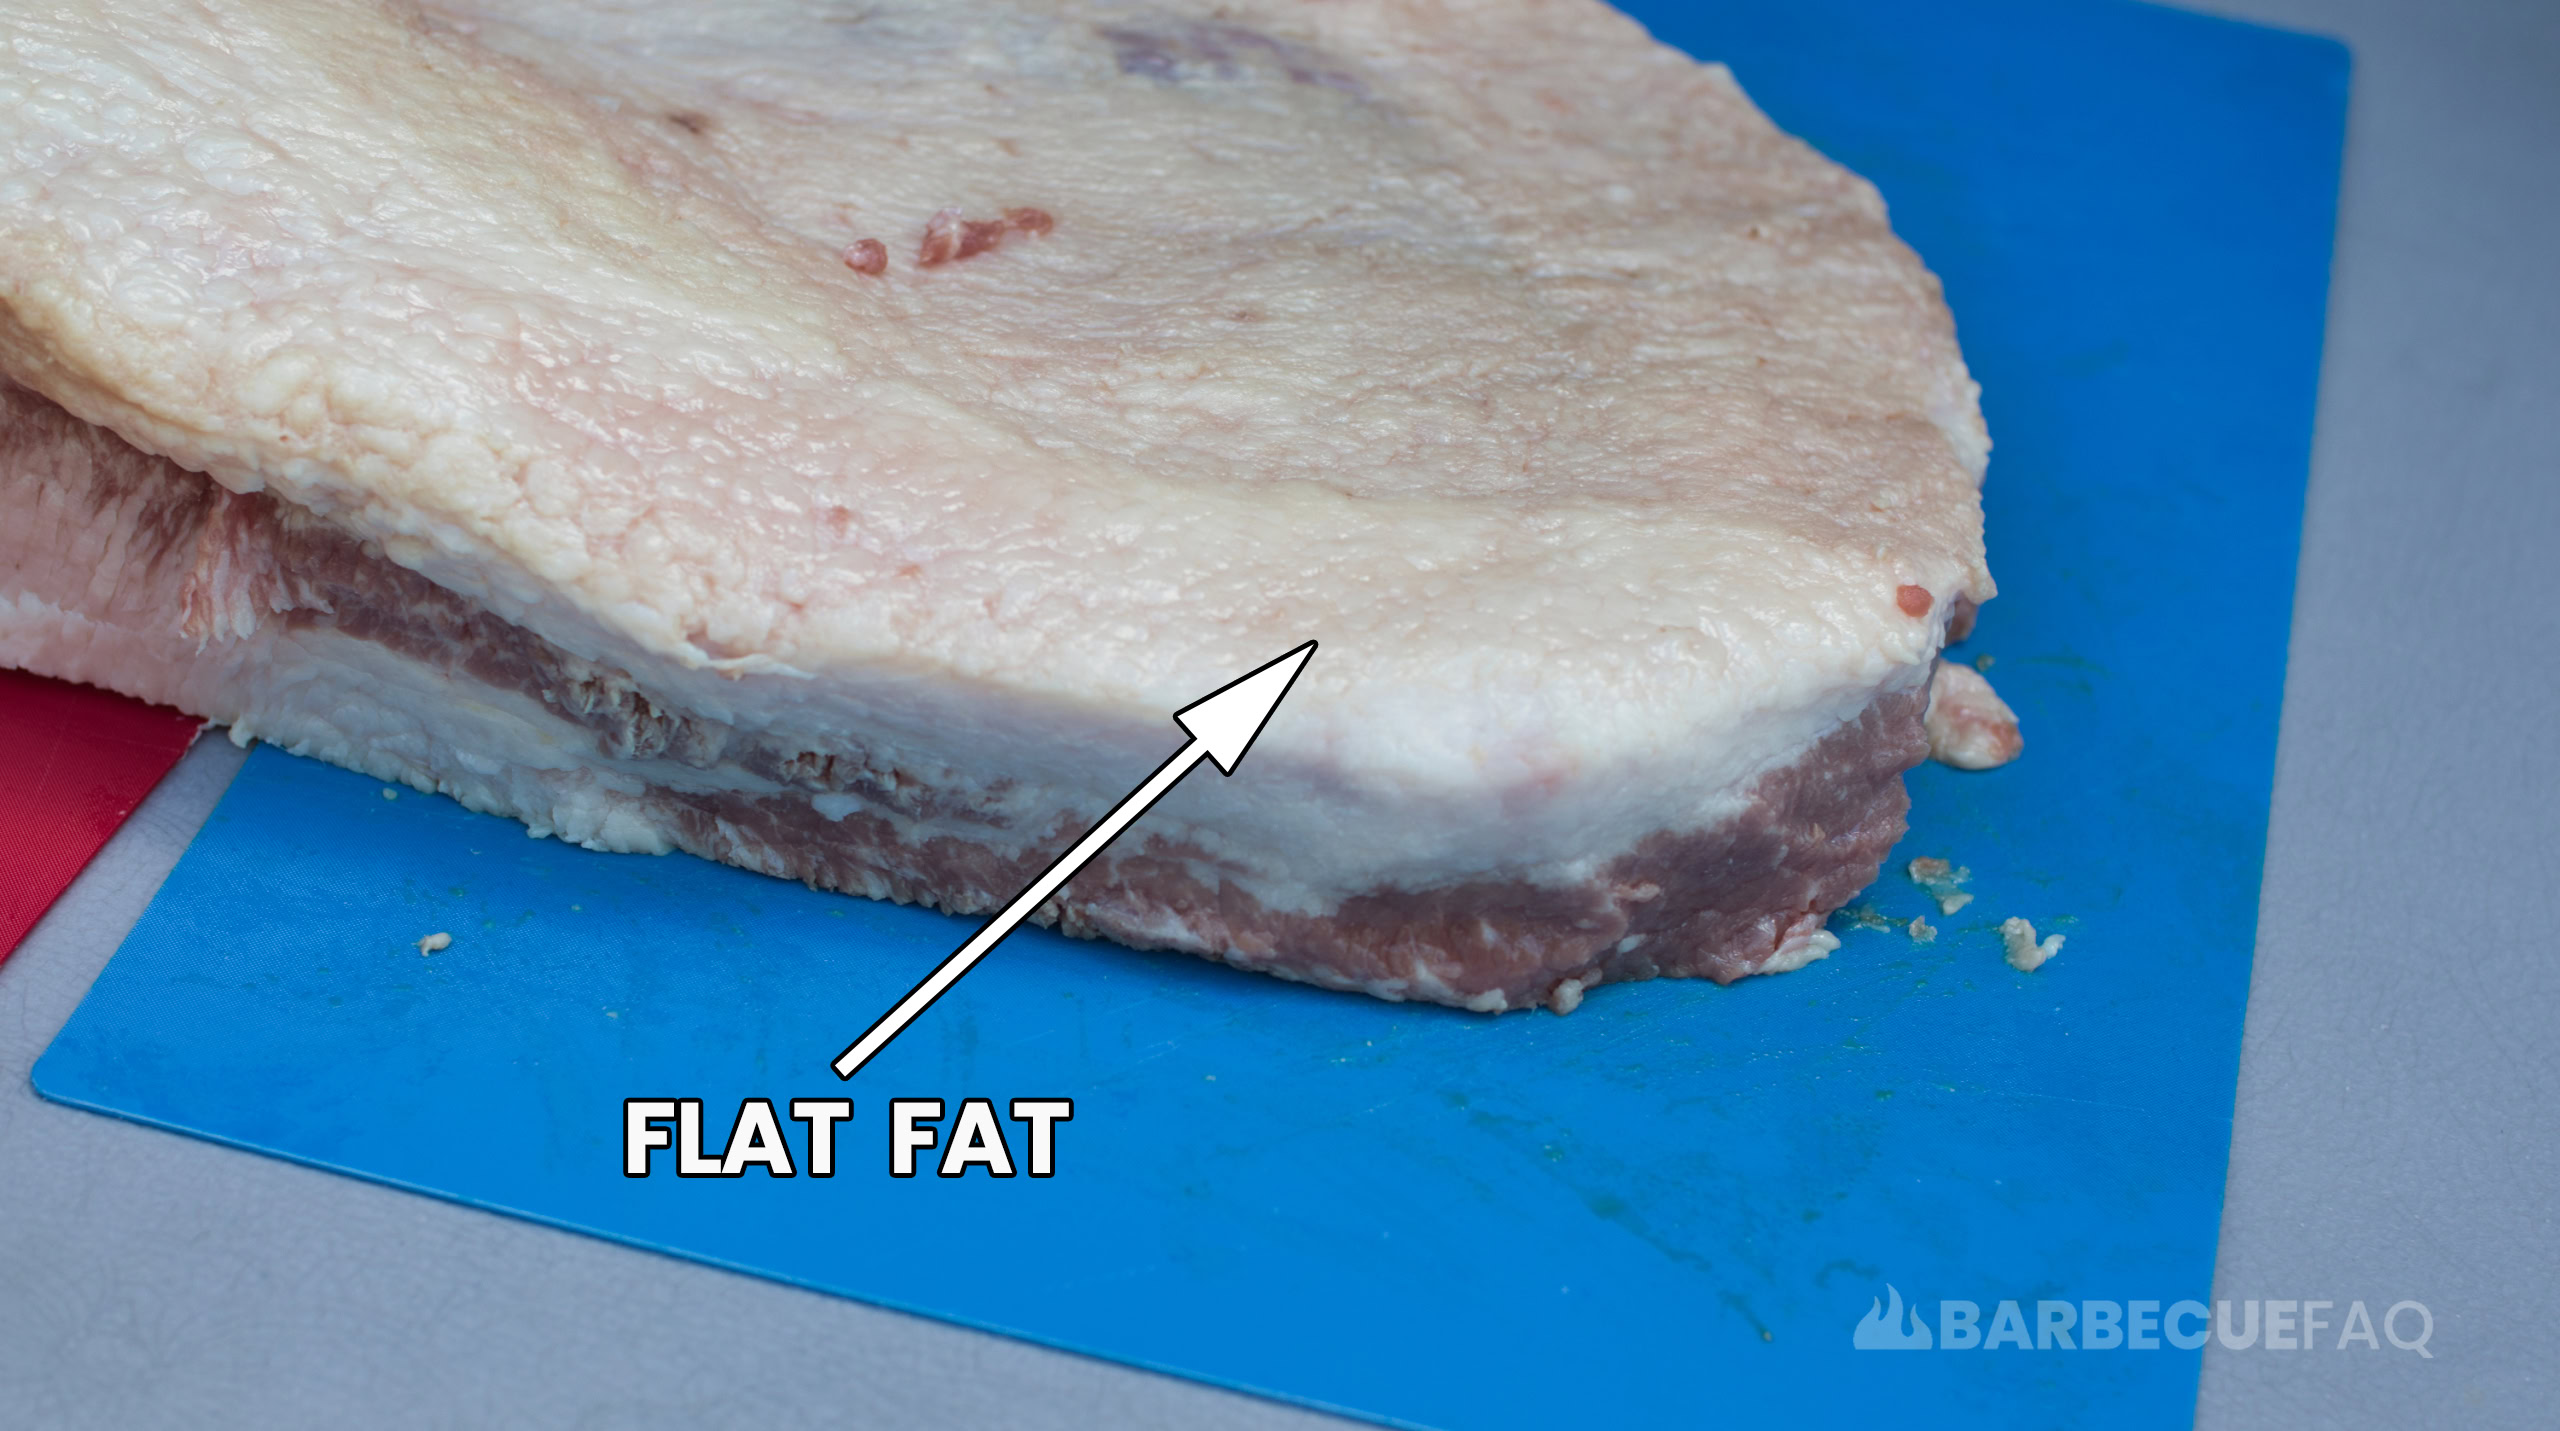
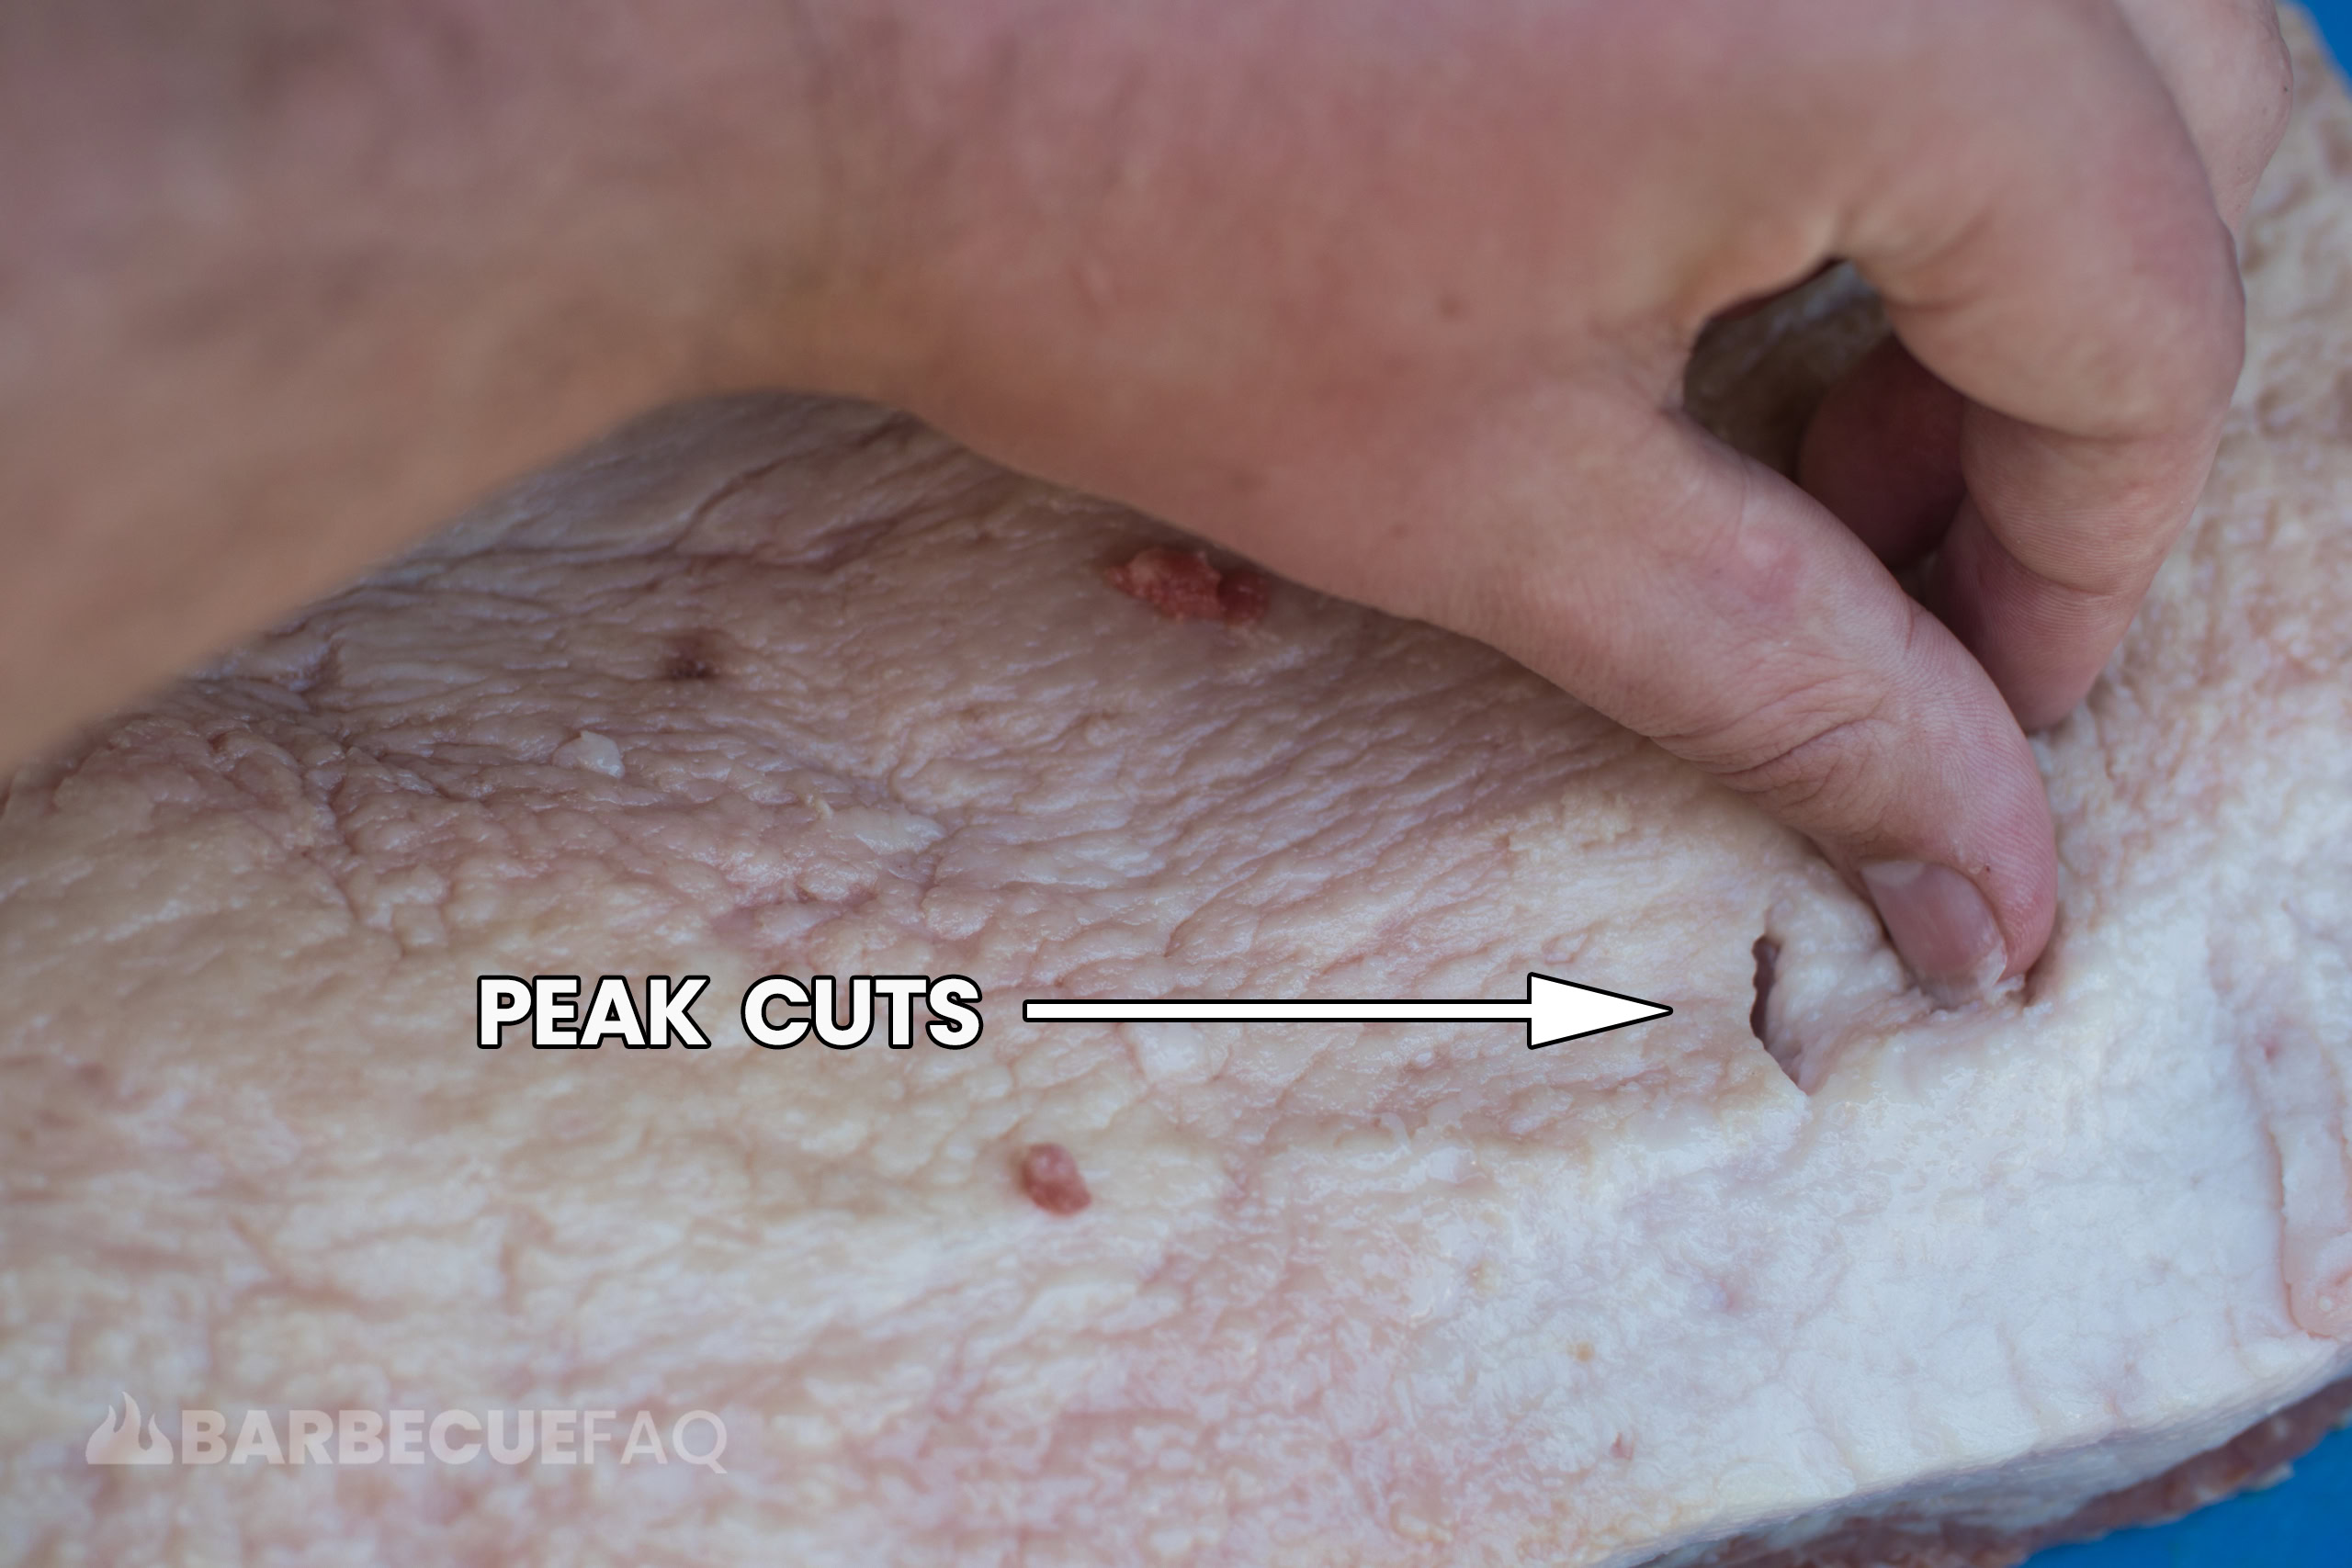
In the flat fat you can make peak cuts to see where you’re at so you can avoid scalp issues.
Slice into the fat with your knife, and check where you’re at.
When you go to smoke the meat this fat will melt and these peak cuts will disappear.
4. The “Slope”
The reason for trimming the flat fat first is that it makes it easier to determine where to end your slope fat cut.
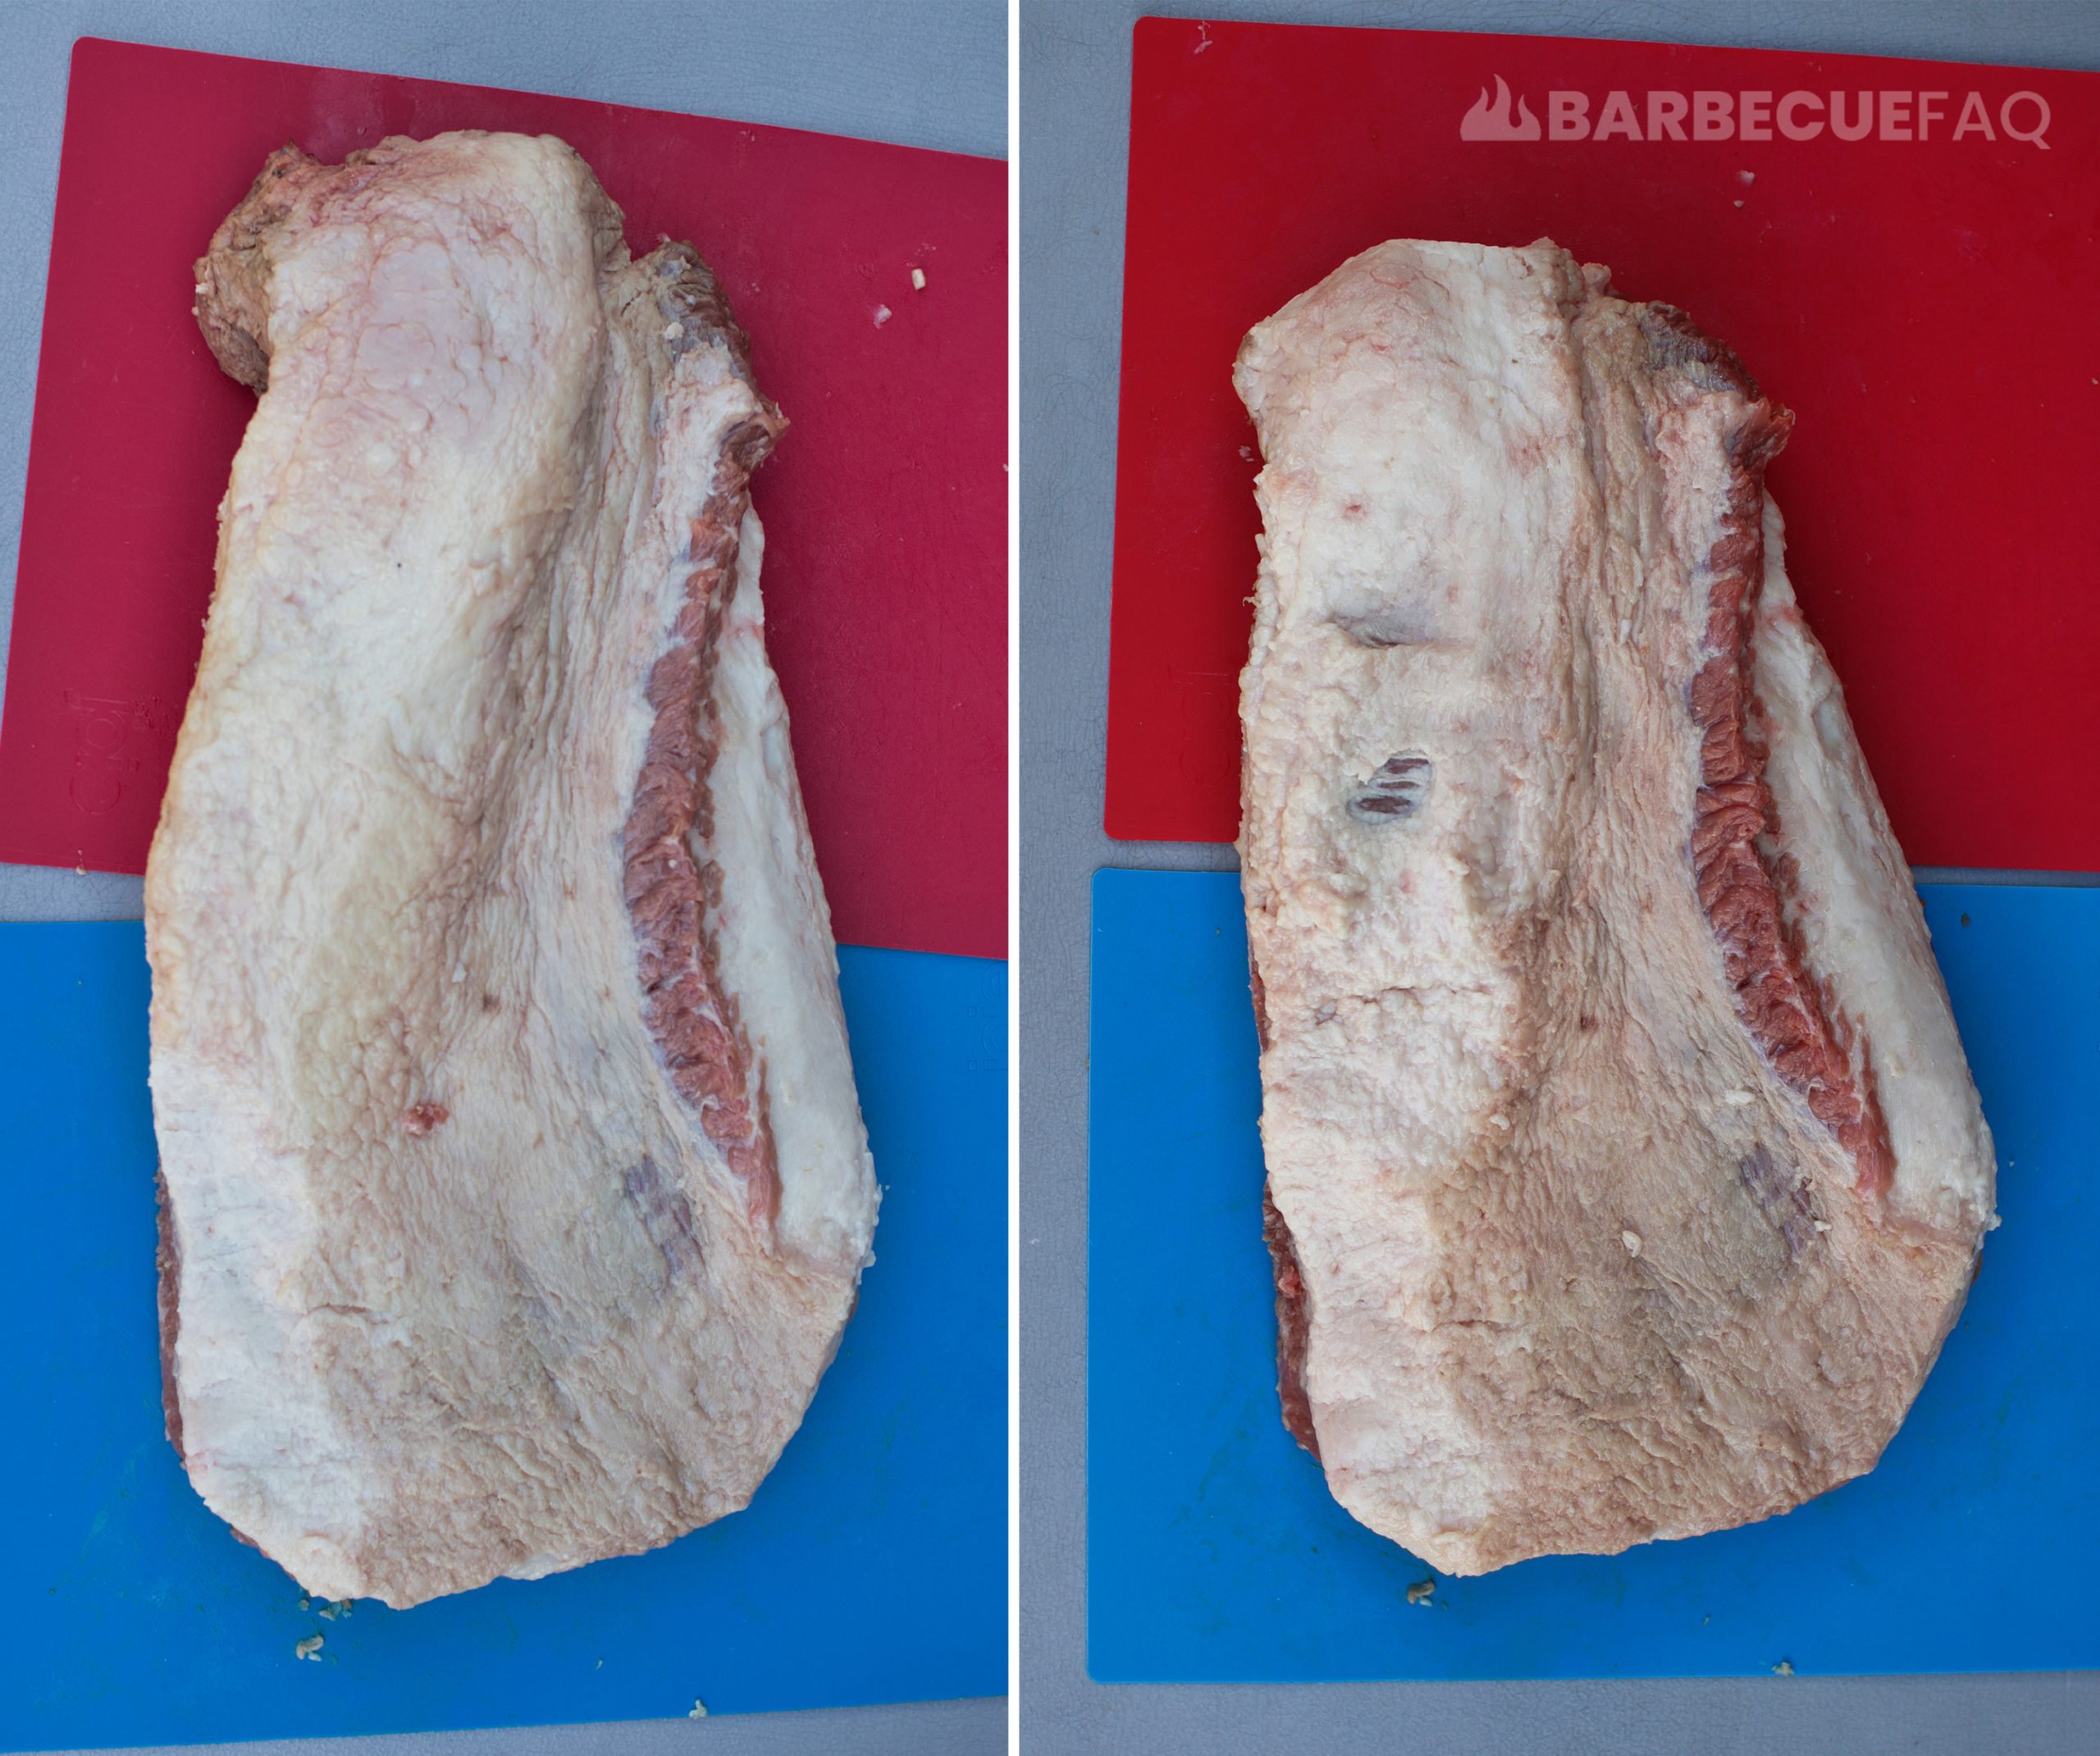
On every brisket will be a spot below the “hump” with lots of fat. This is where the flat meets the point.
The fat essentially slopes down from the brisket to the flat.
There is a chunk of fat at this intersection; Your goal is to remove the chunk of fat that sits here. Peak cuts are your friend here.
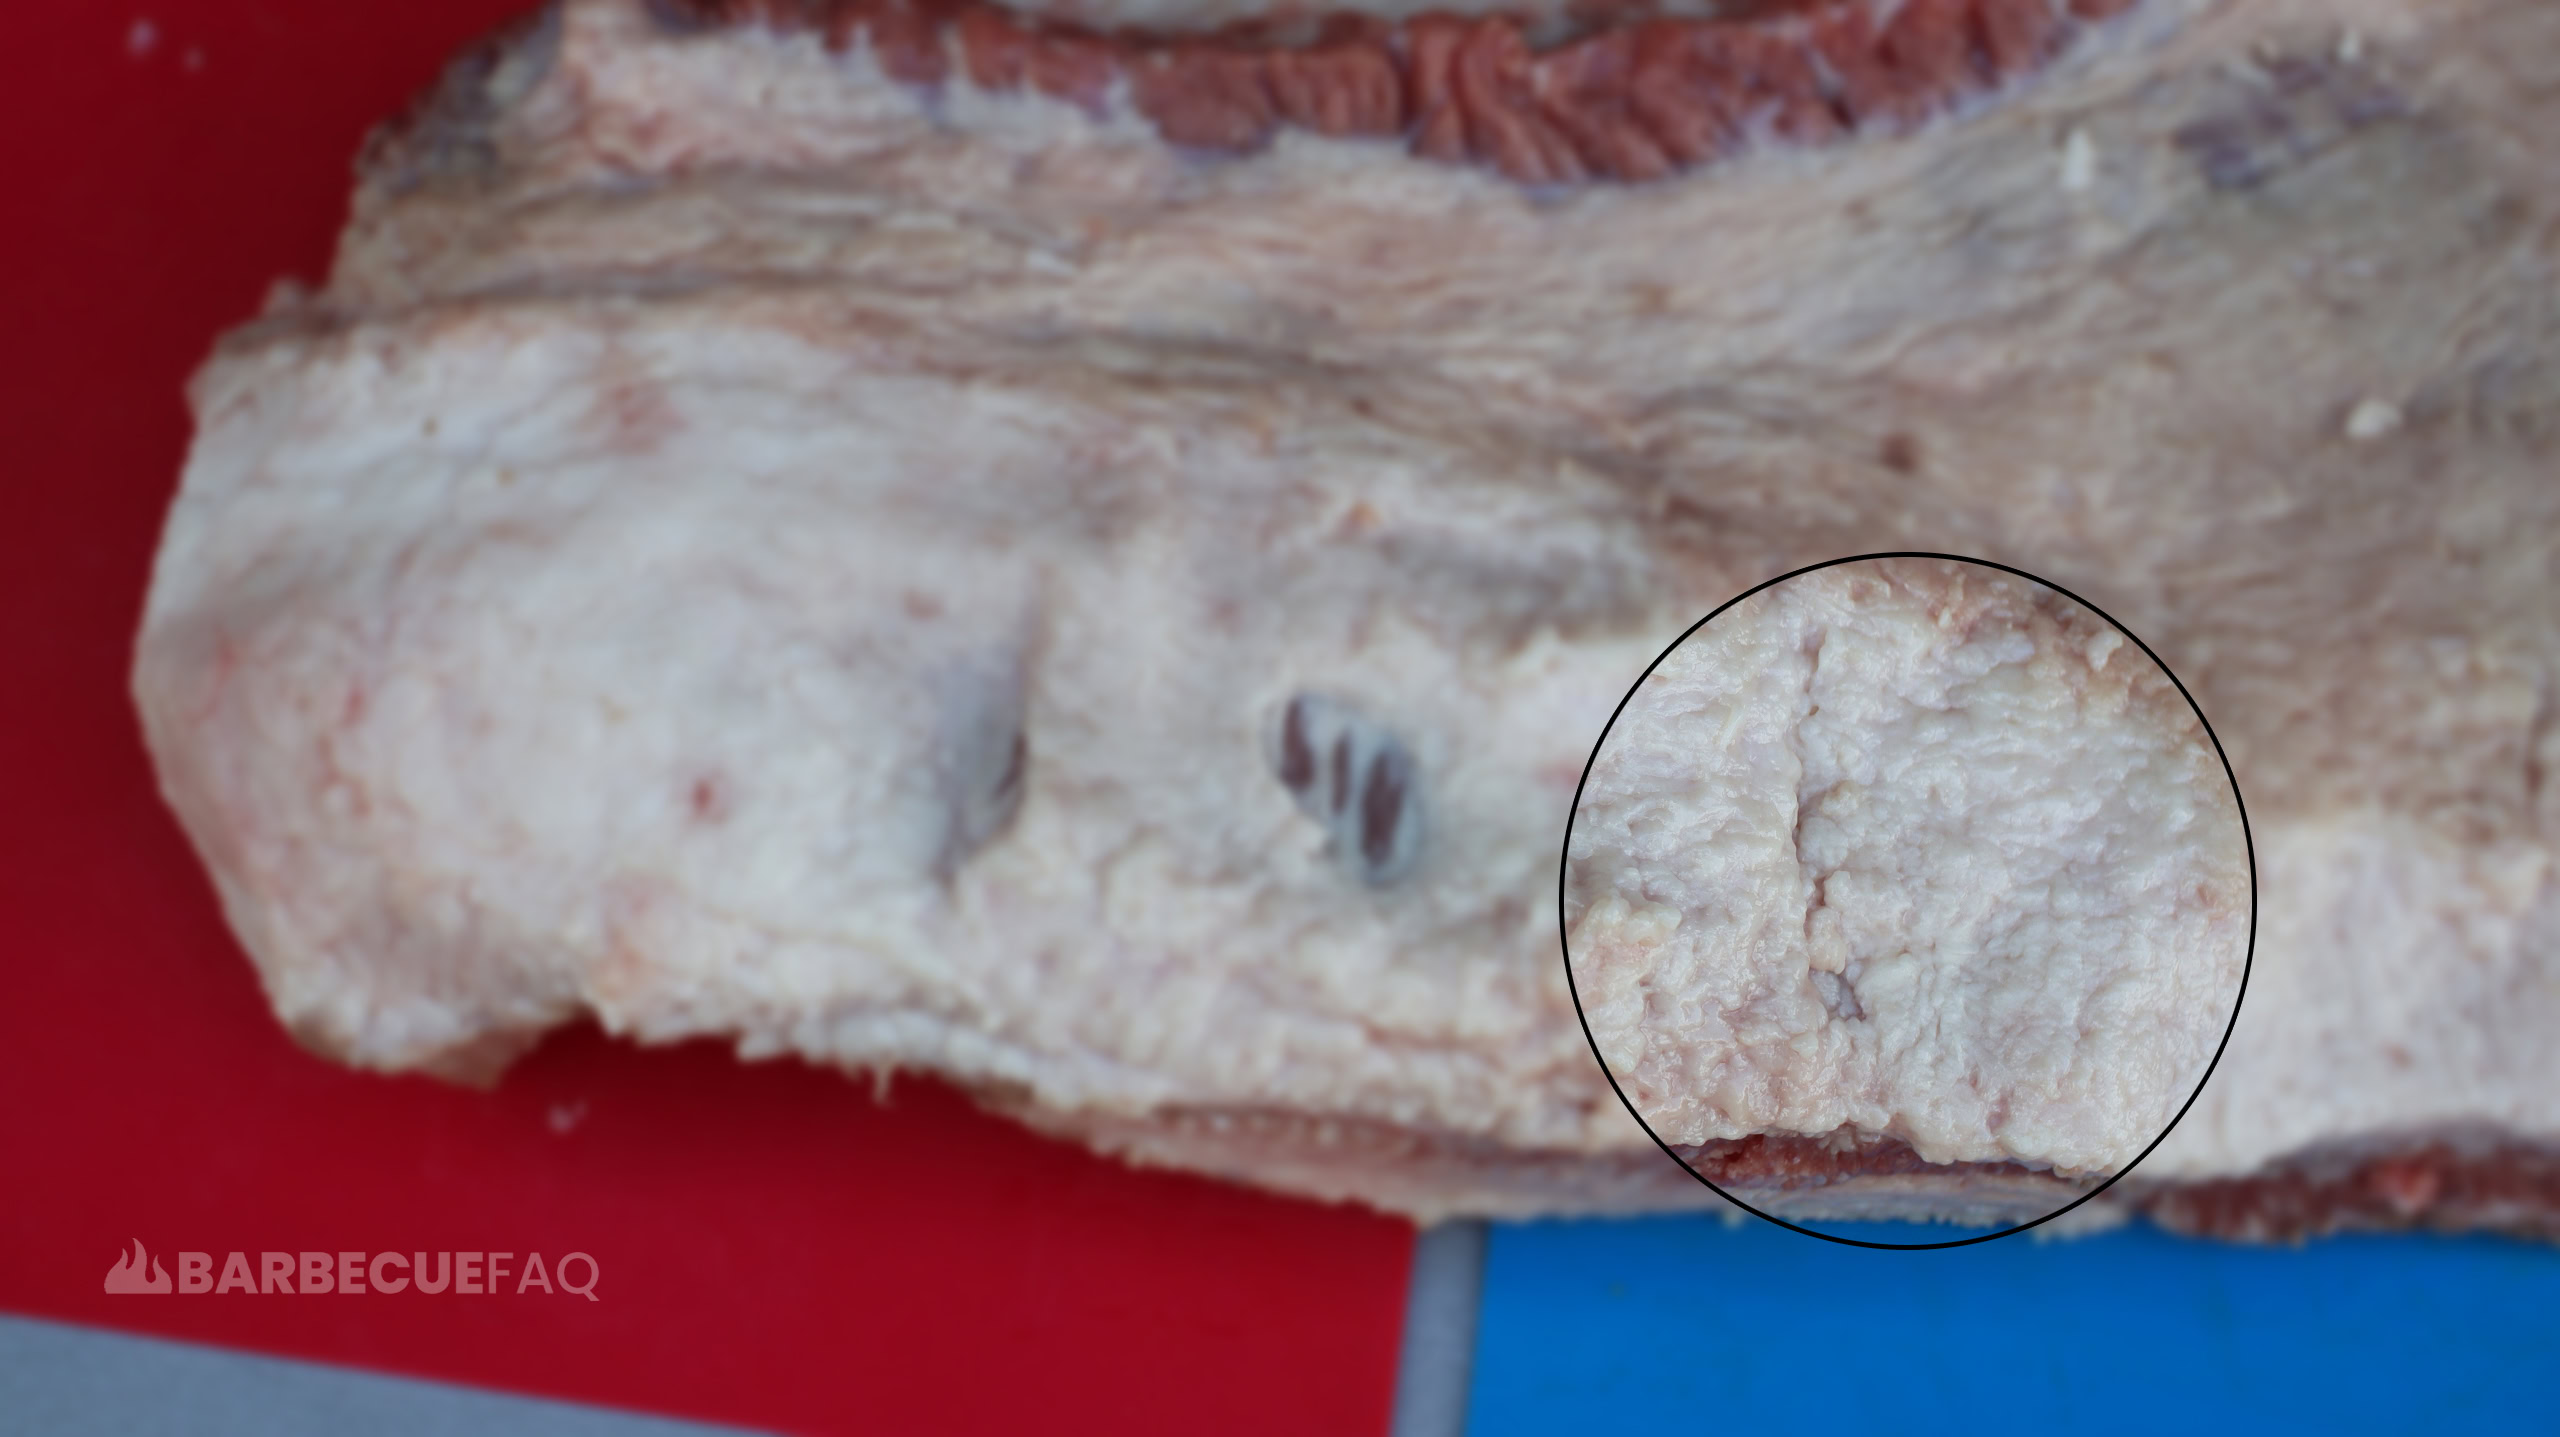
Trimming the Meat Side of the Brisket
All we care about are:
- Removing deckle fat
- Removing thick silverskin
1. The Deckle Fat
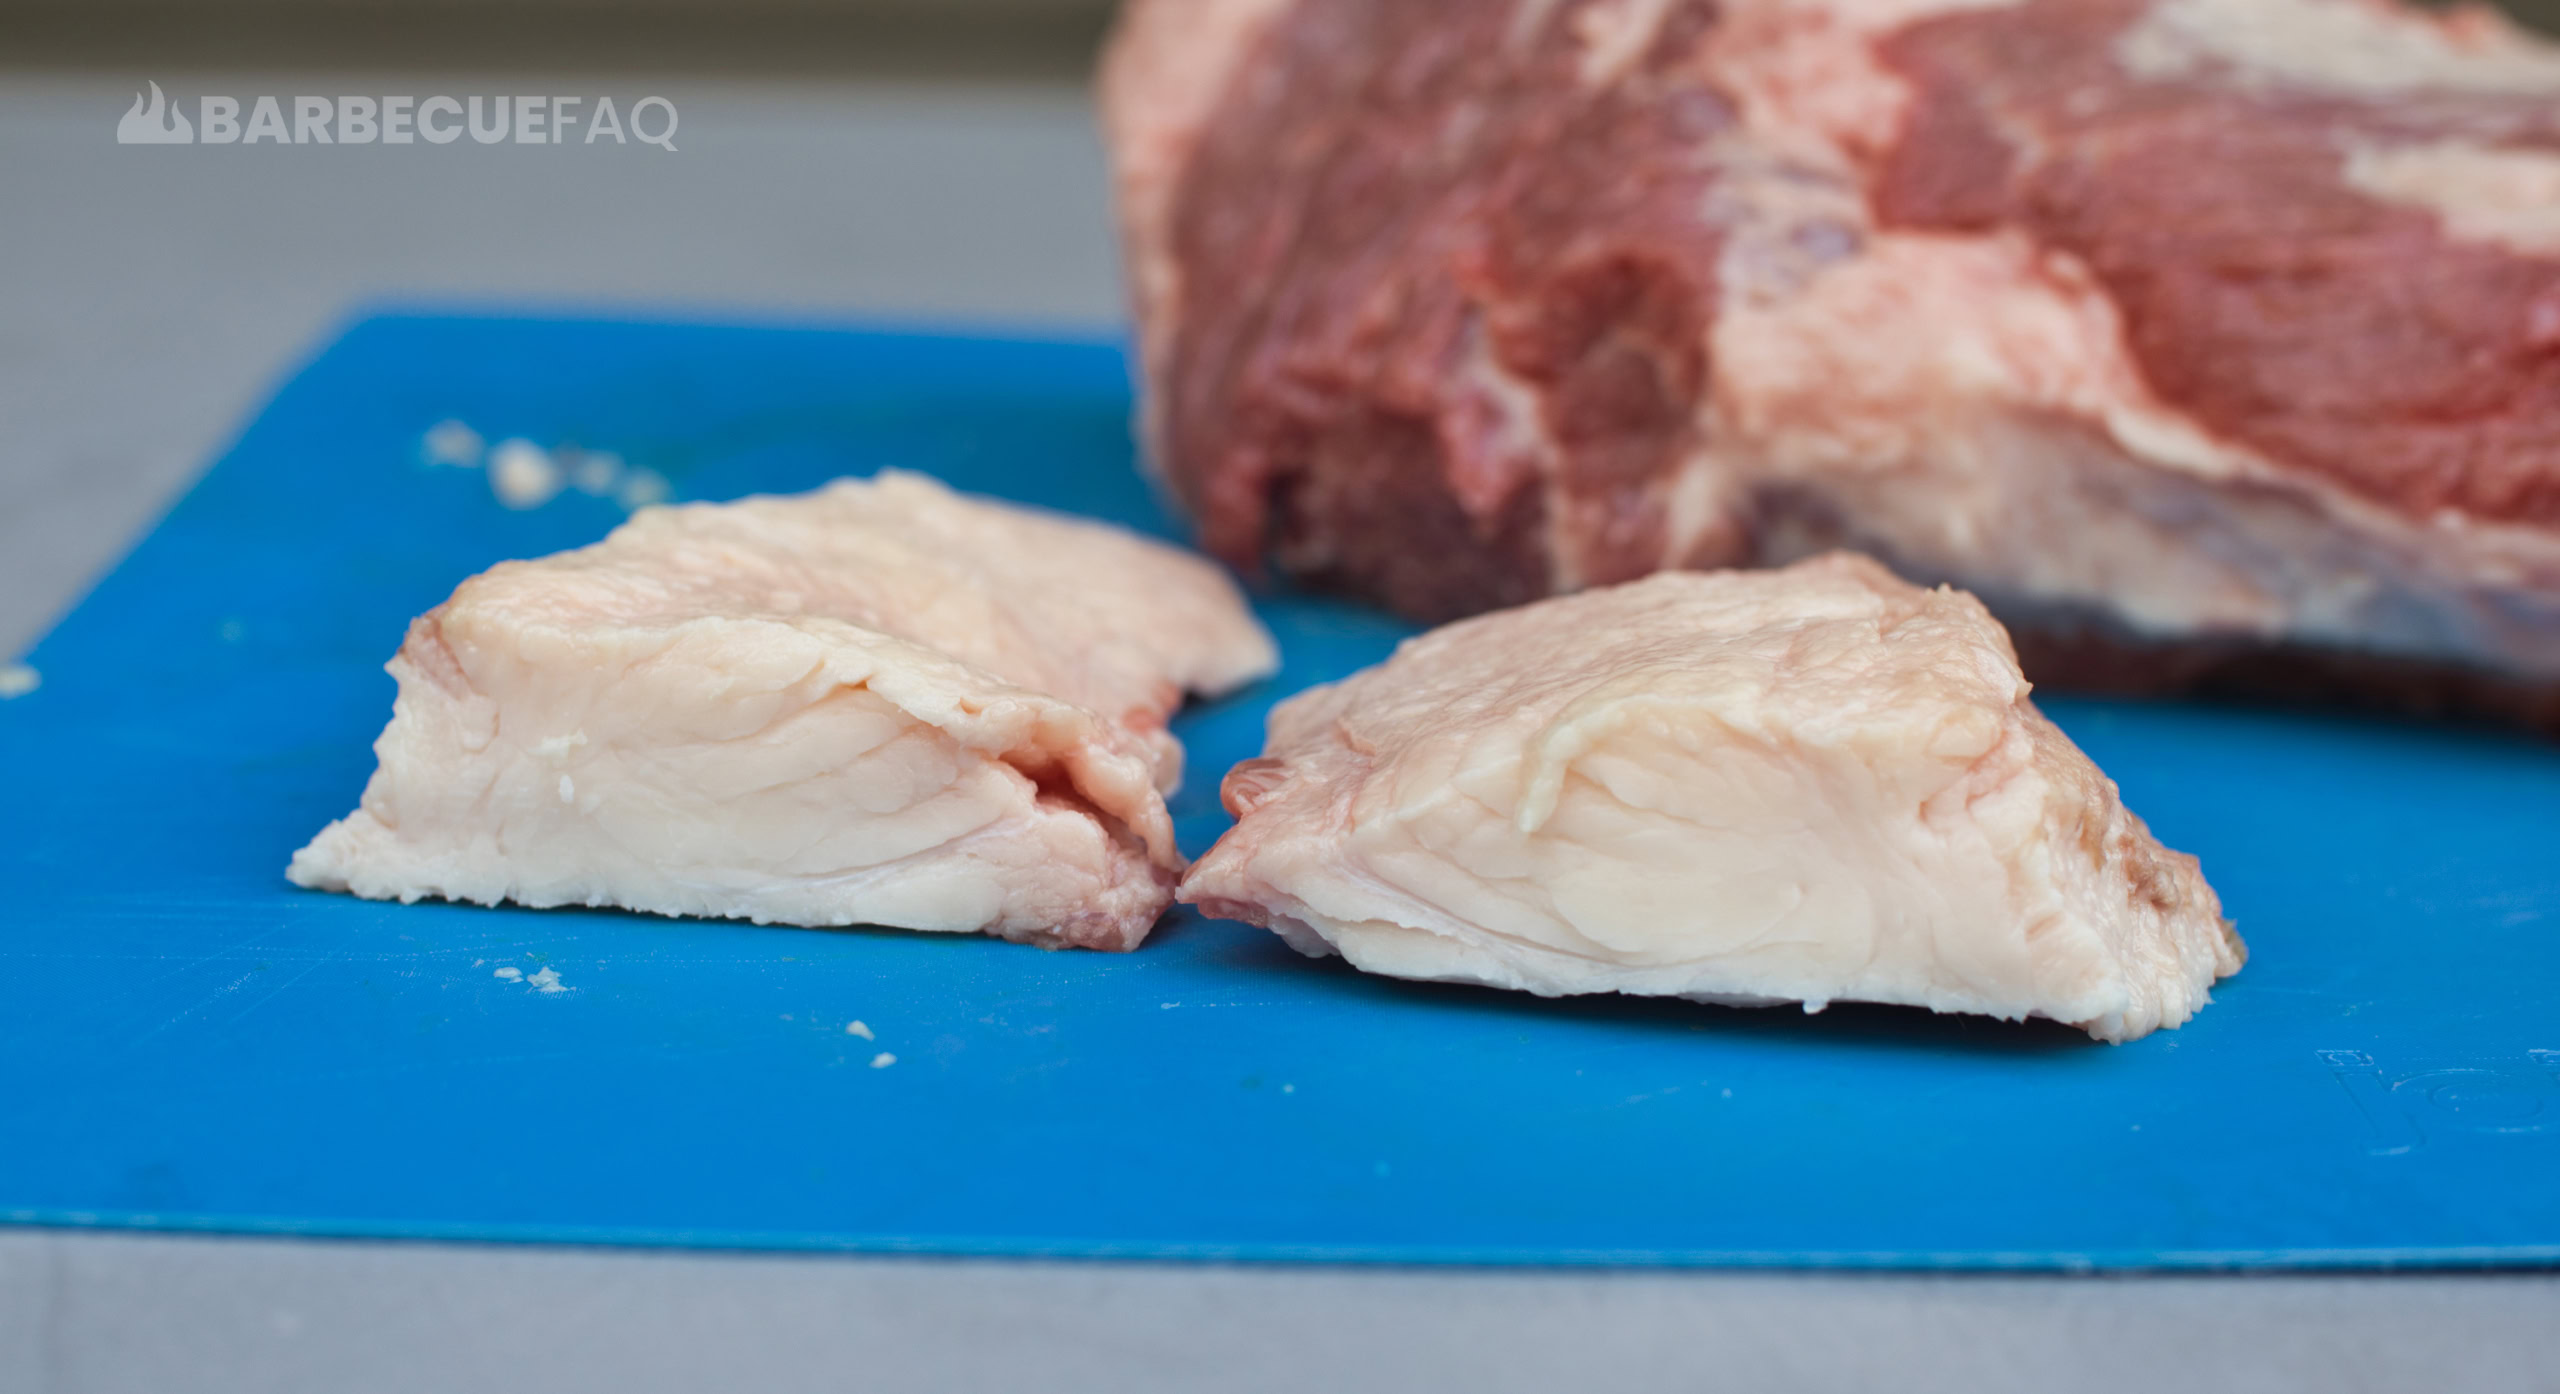
The deckle fat is a large piece of meat that lays on the fat seam between the flat and the point.
The reason for removing the deckle fat is because it’s hard fat that will not render when smoked.
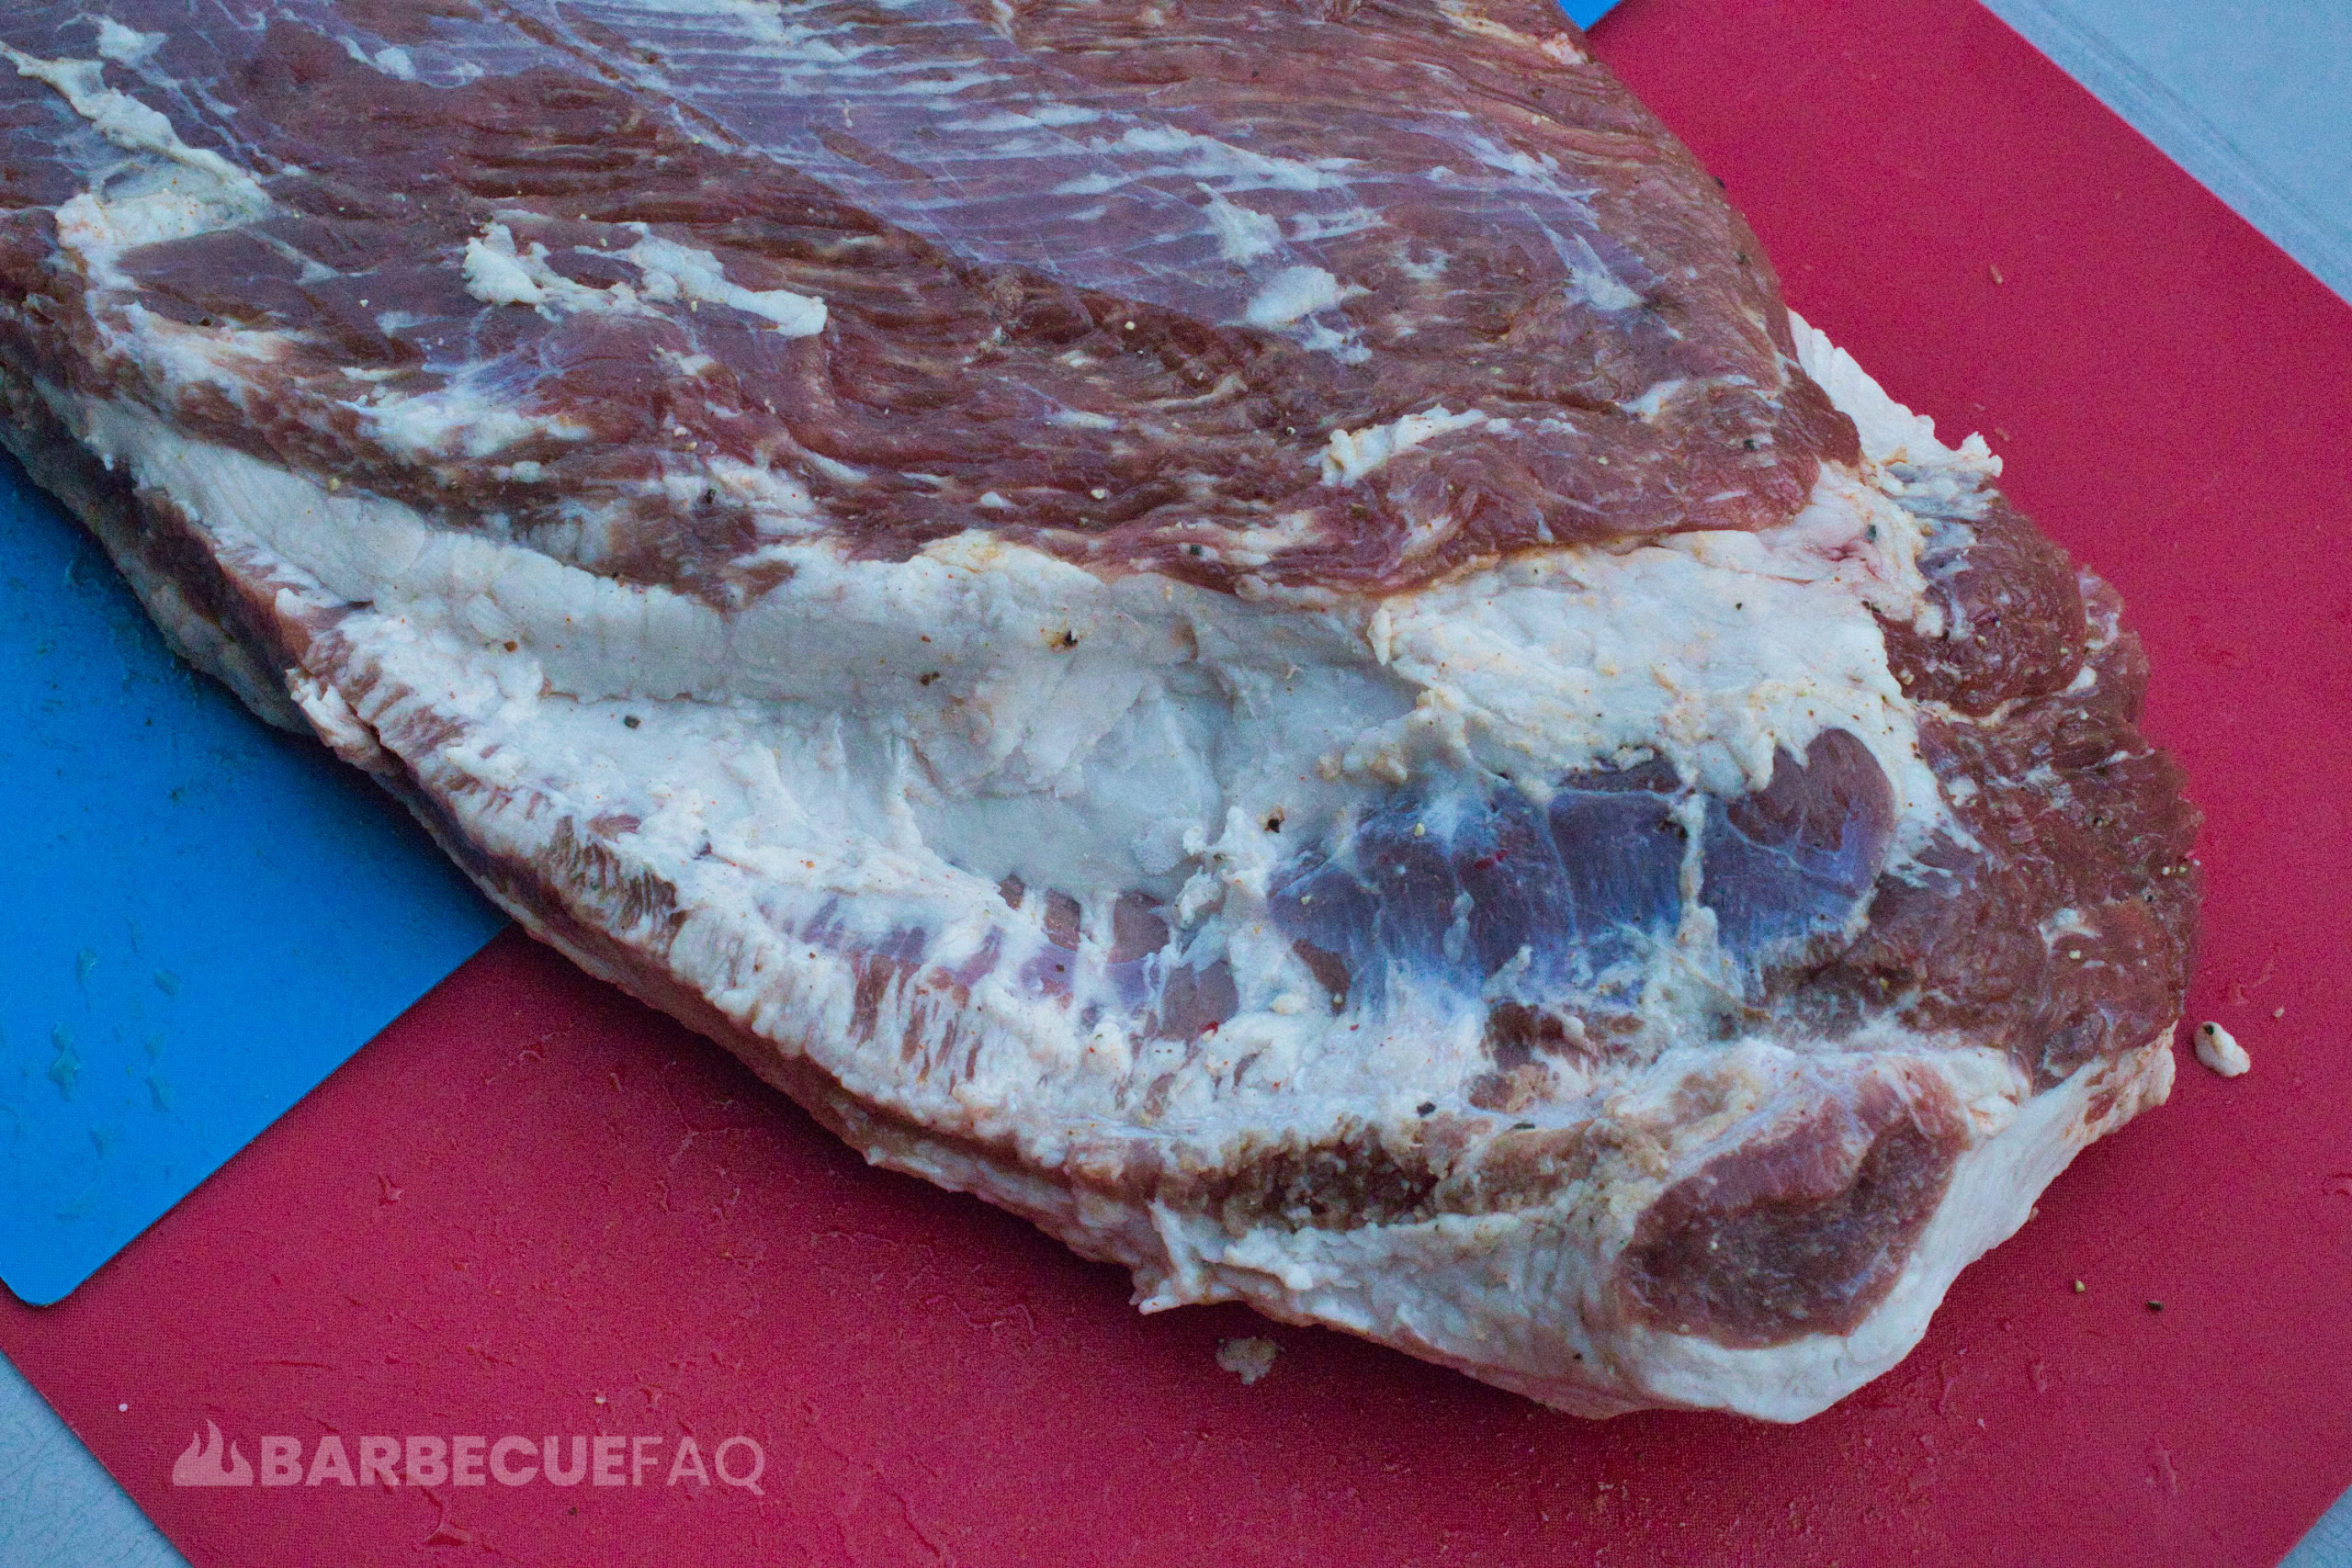
You want to dig out a lot of this fat BUT not all of it. The more you continue to dig, you’ll end up separating the muscles.
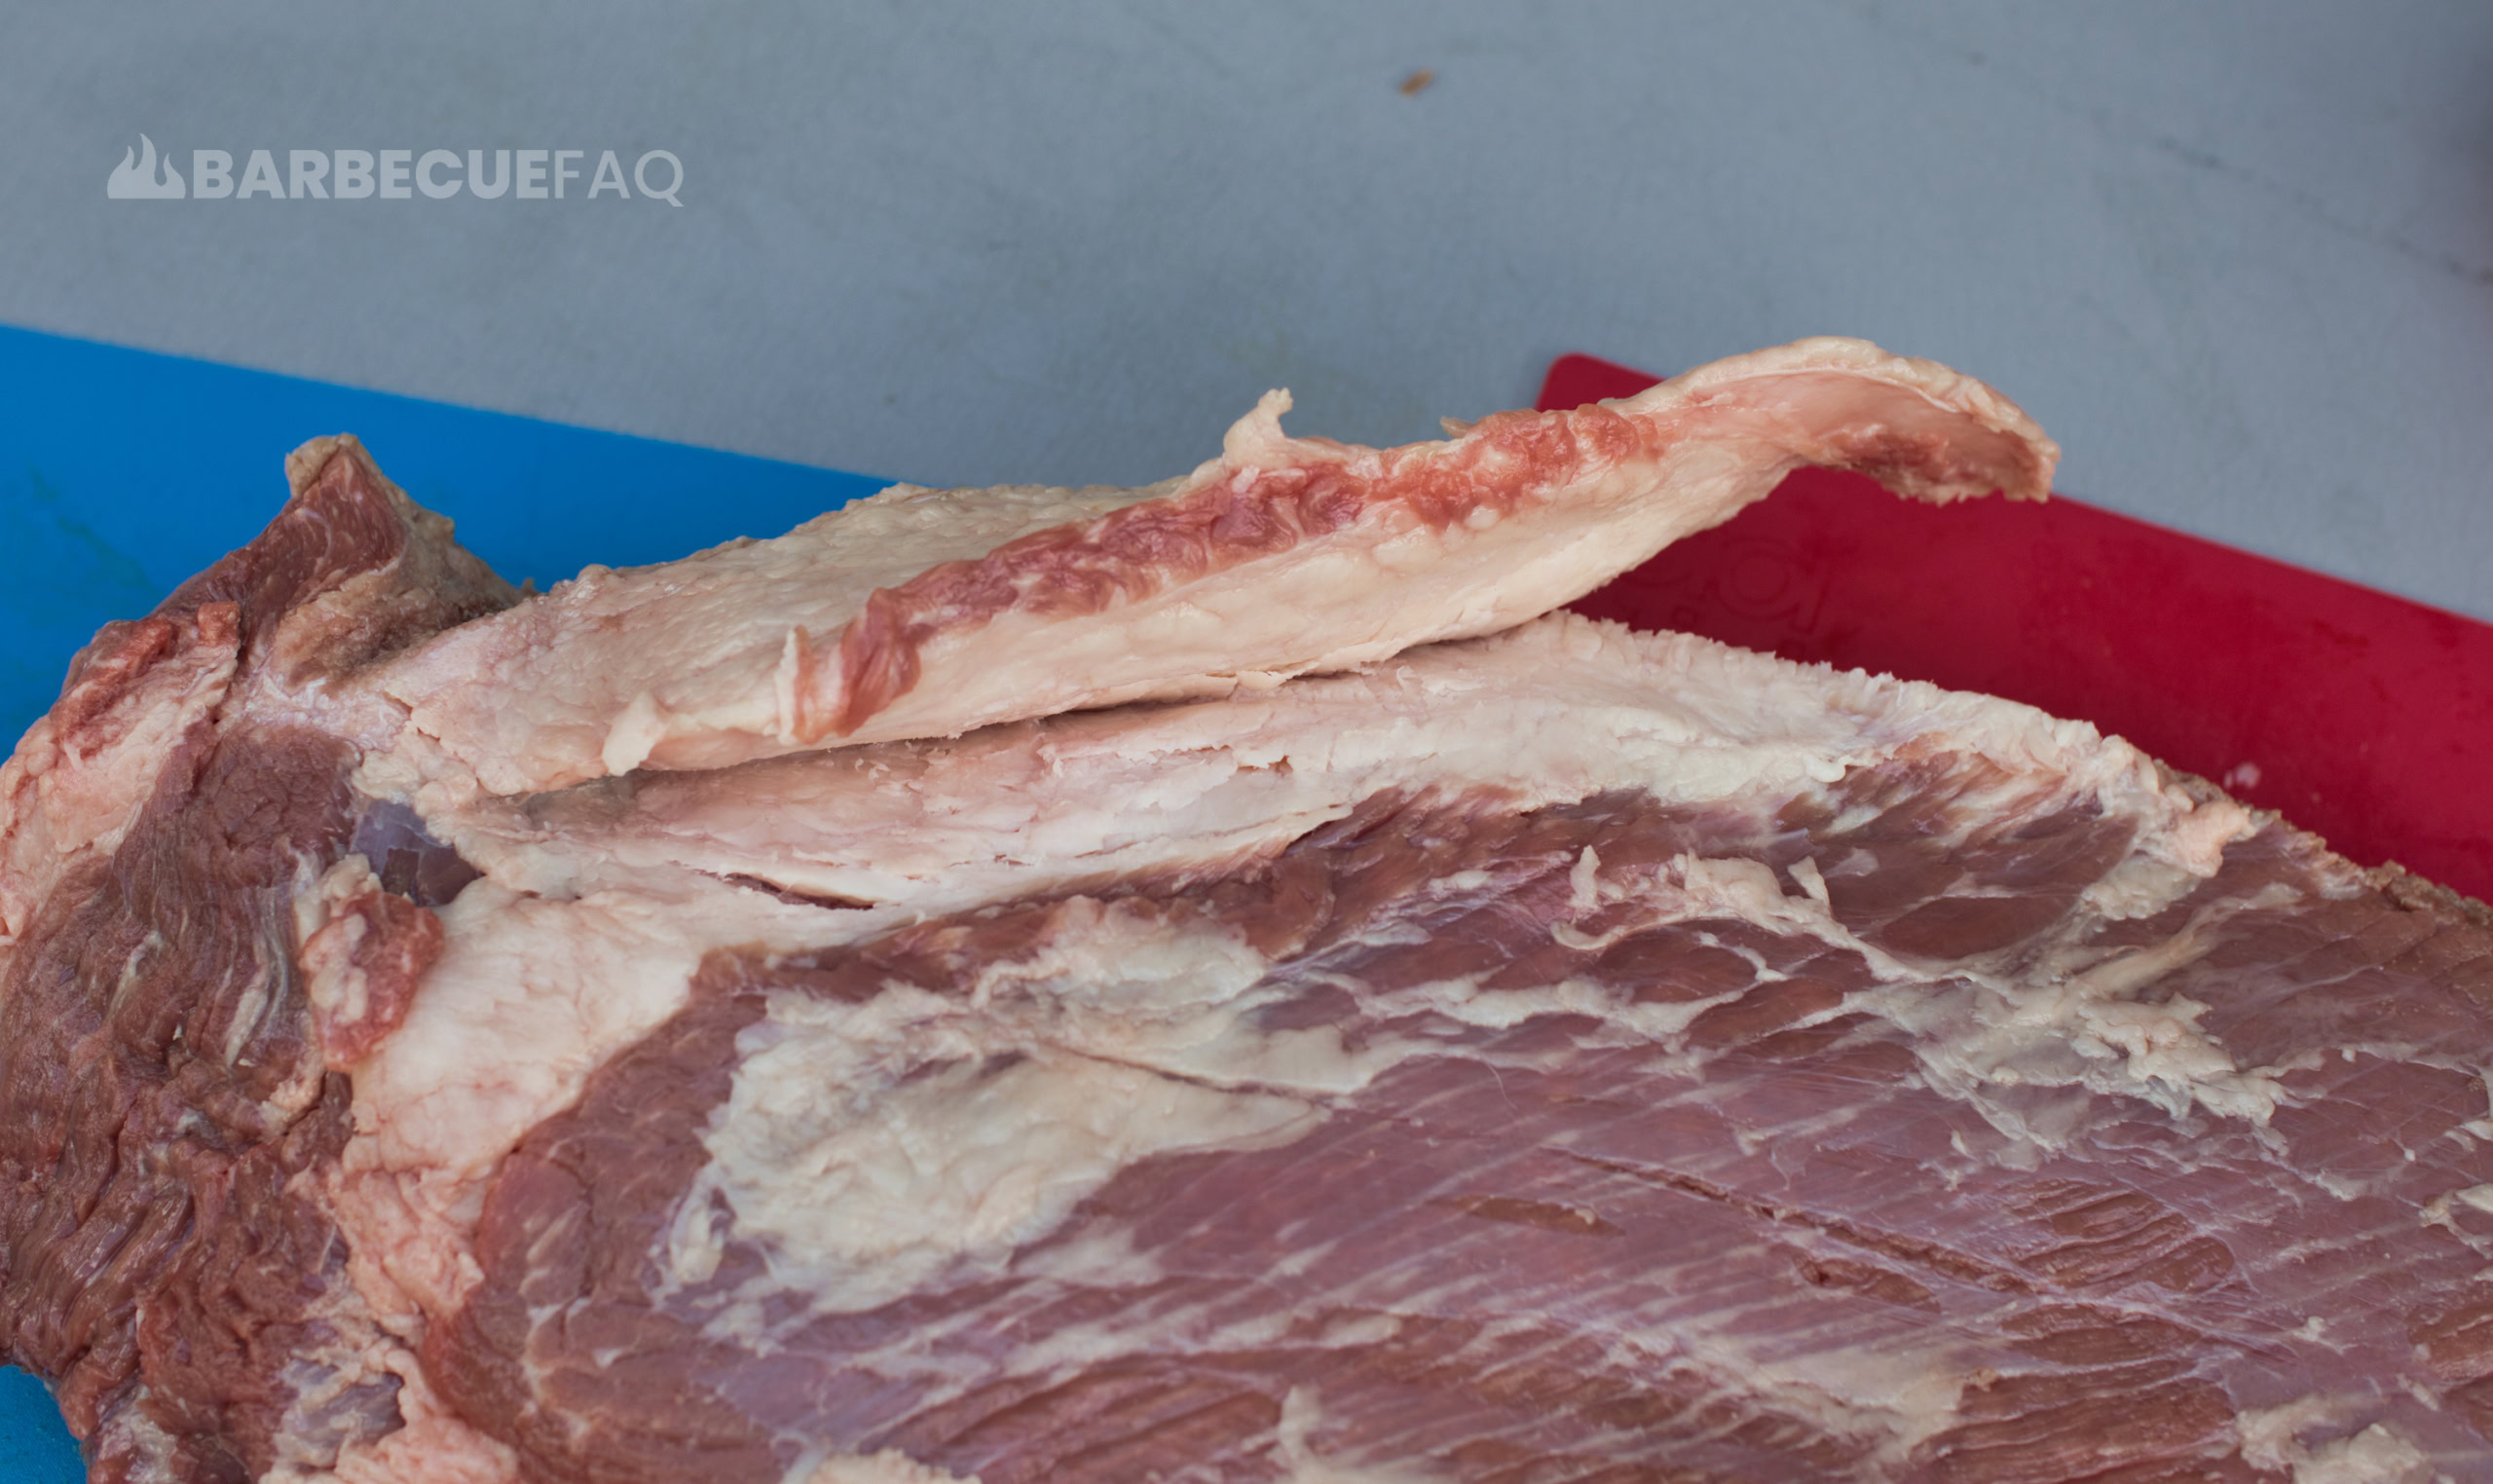
Here’s a cross section of this fat – again, it’s hard and PURE fat.
Once you remove a large chunk, I like to continue removing until I can visually see the point muscle’s lean meat.
2. Fat and Silver Skin
So this might be the opposite of what a lot of other folks might say but I personally don’t taste a ton of difference when I leave the silver skin on or off.
As someone who does backyard barbecue, all I do is remove large nodules of fat and less transparent pieces of silver-skin.
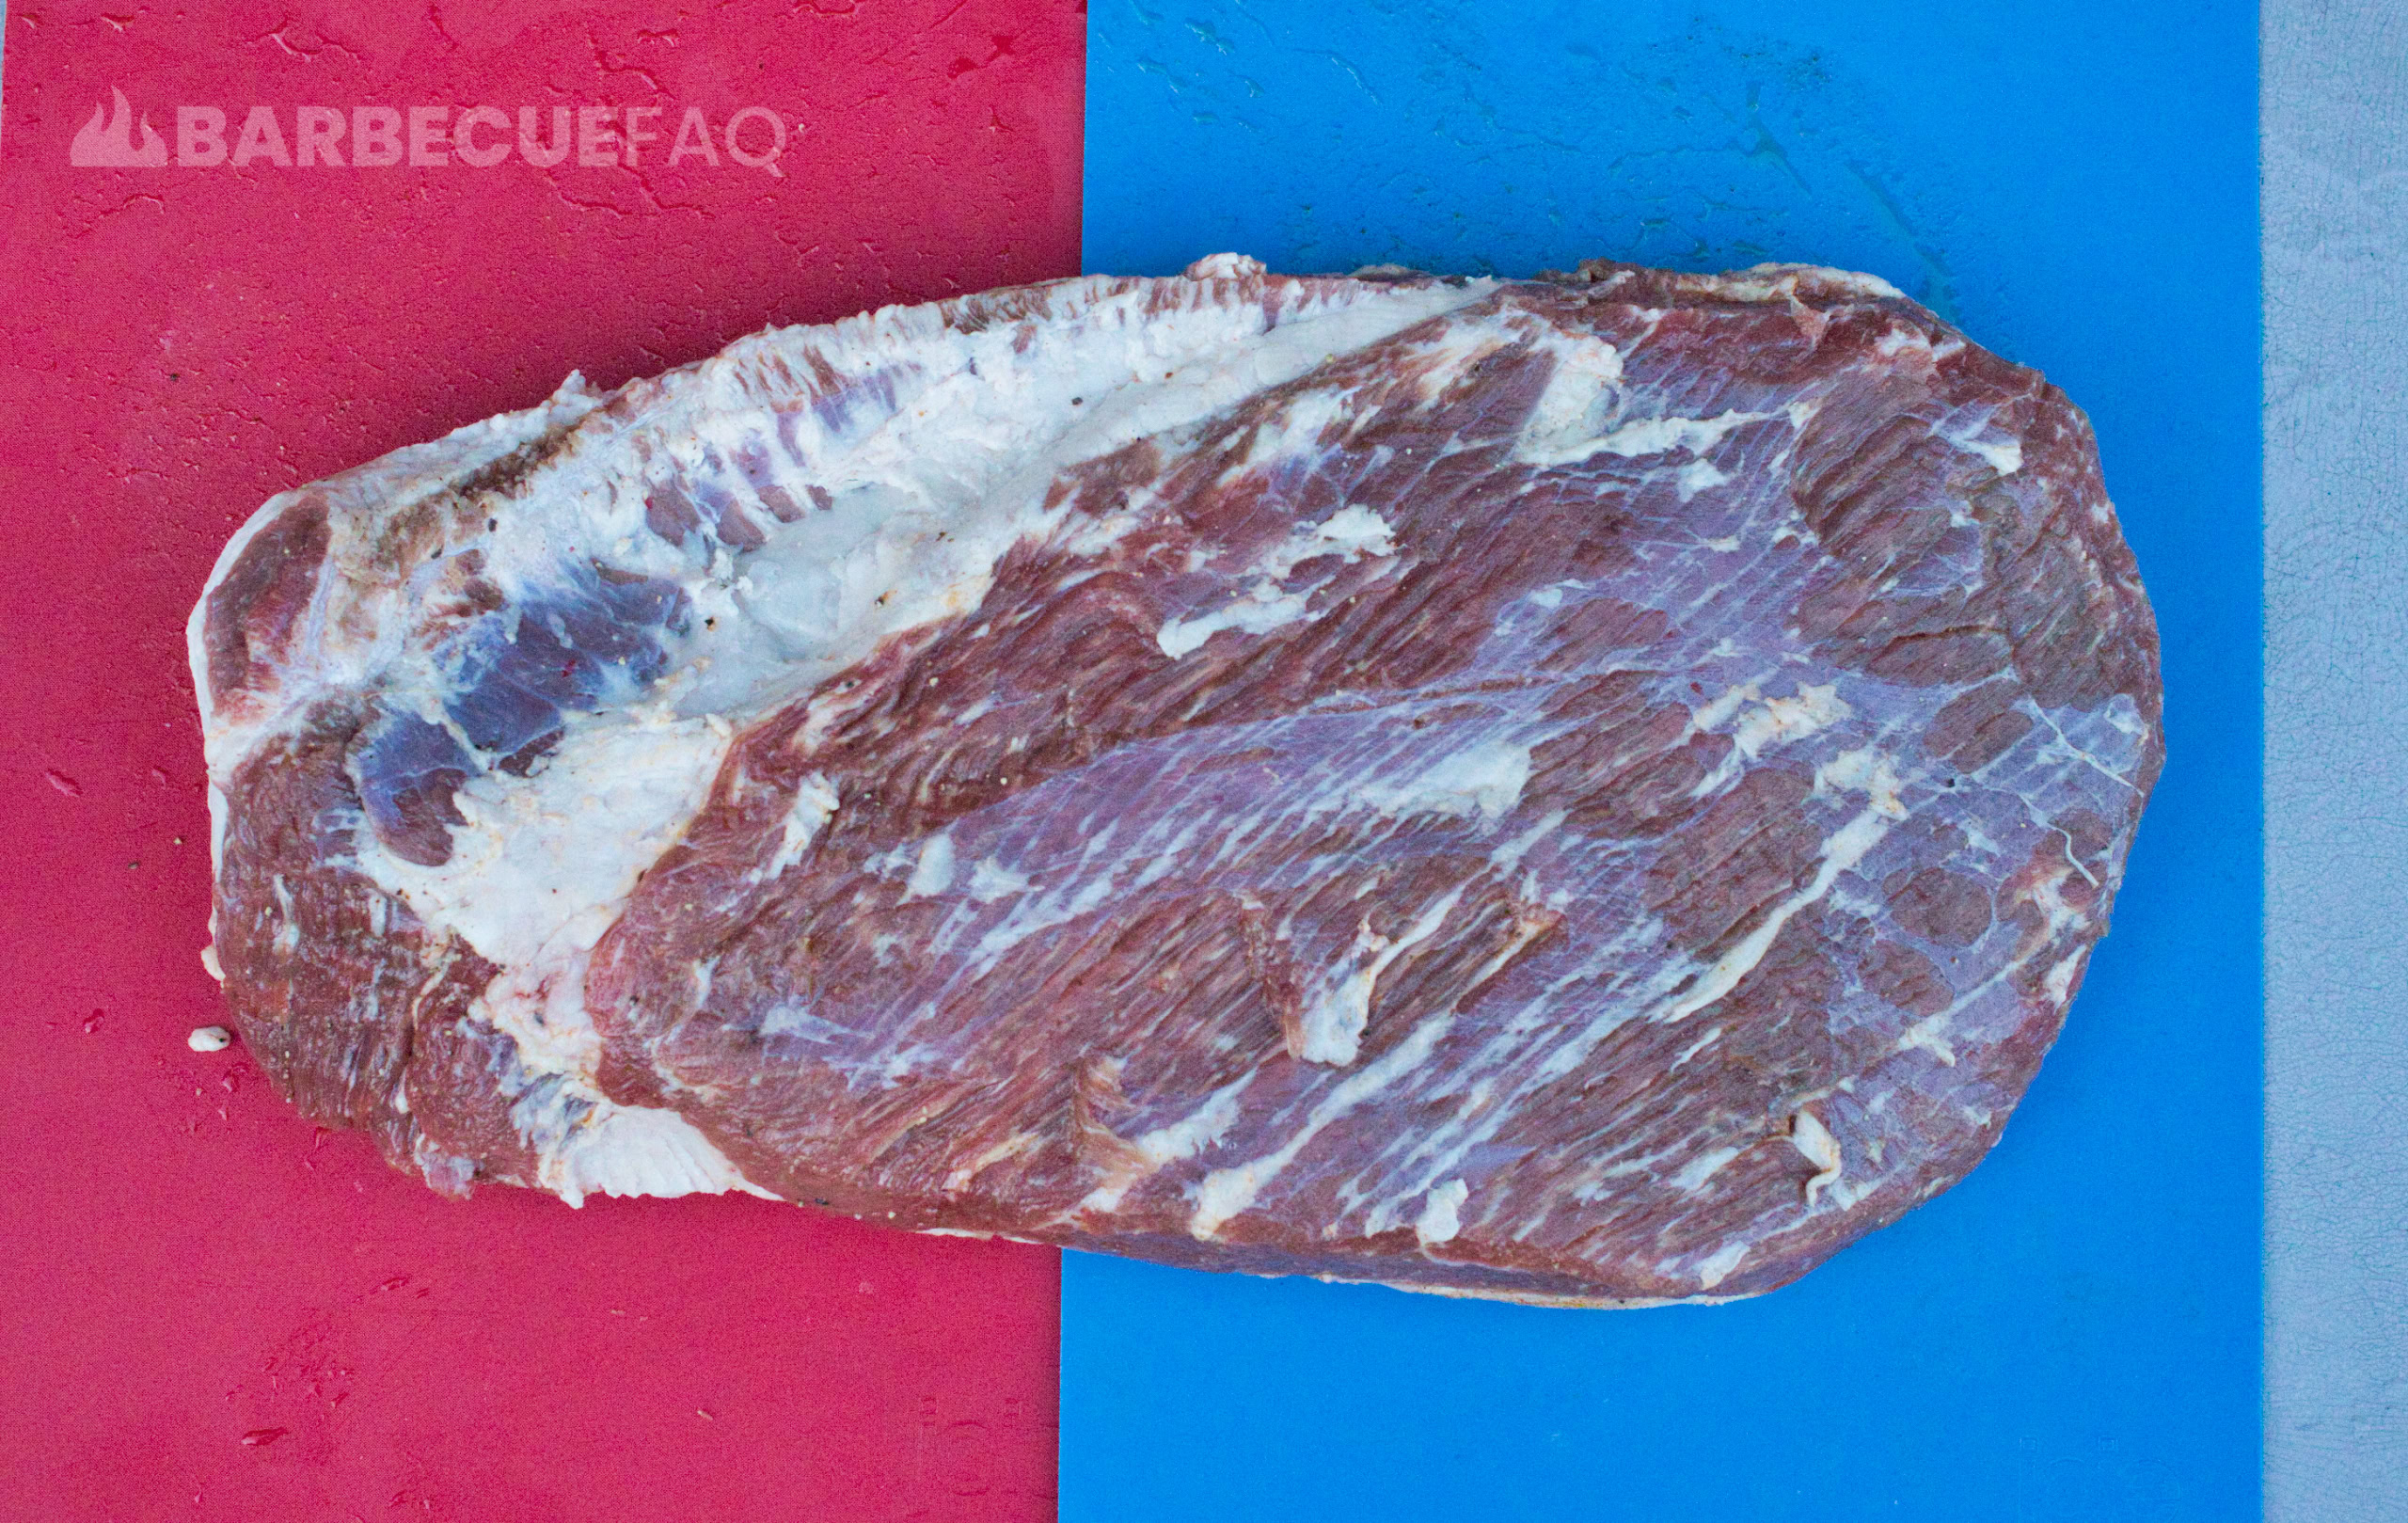
I don’t sit there for 10-15 minutes painstakingly sliding my knife below all of the silver skin.
I’ve done both and the differences are super negligible BUT if you want to do it – more power to you!
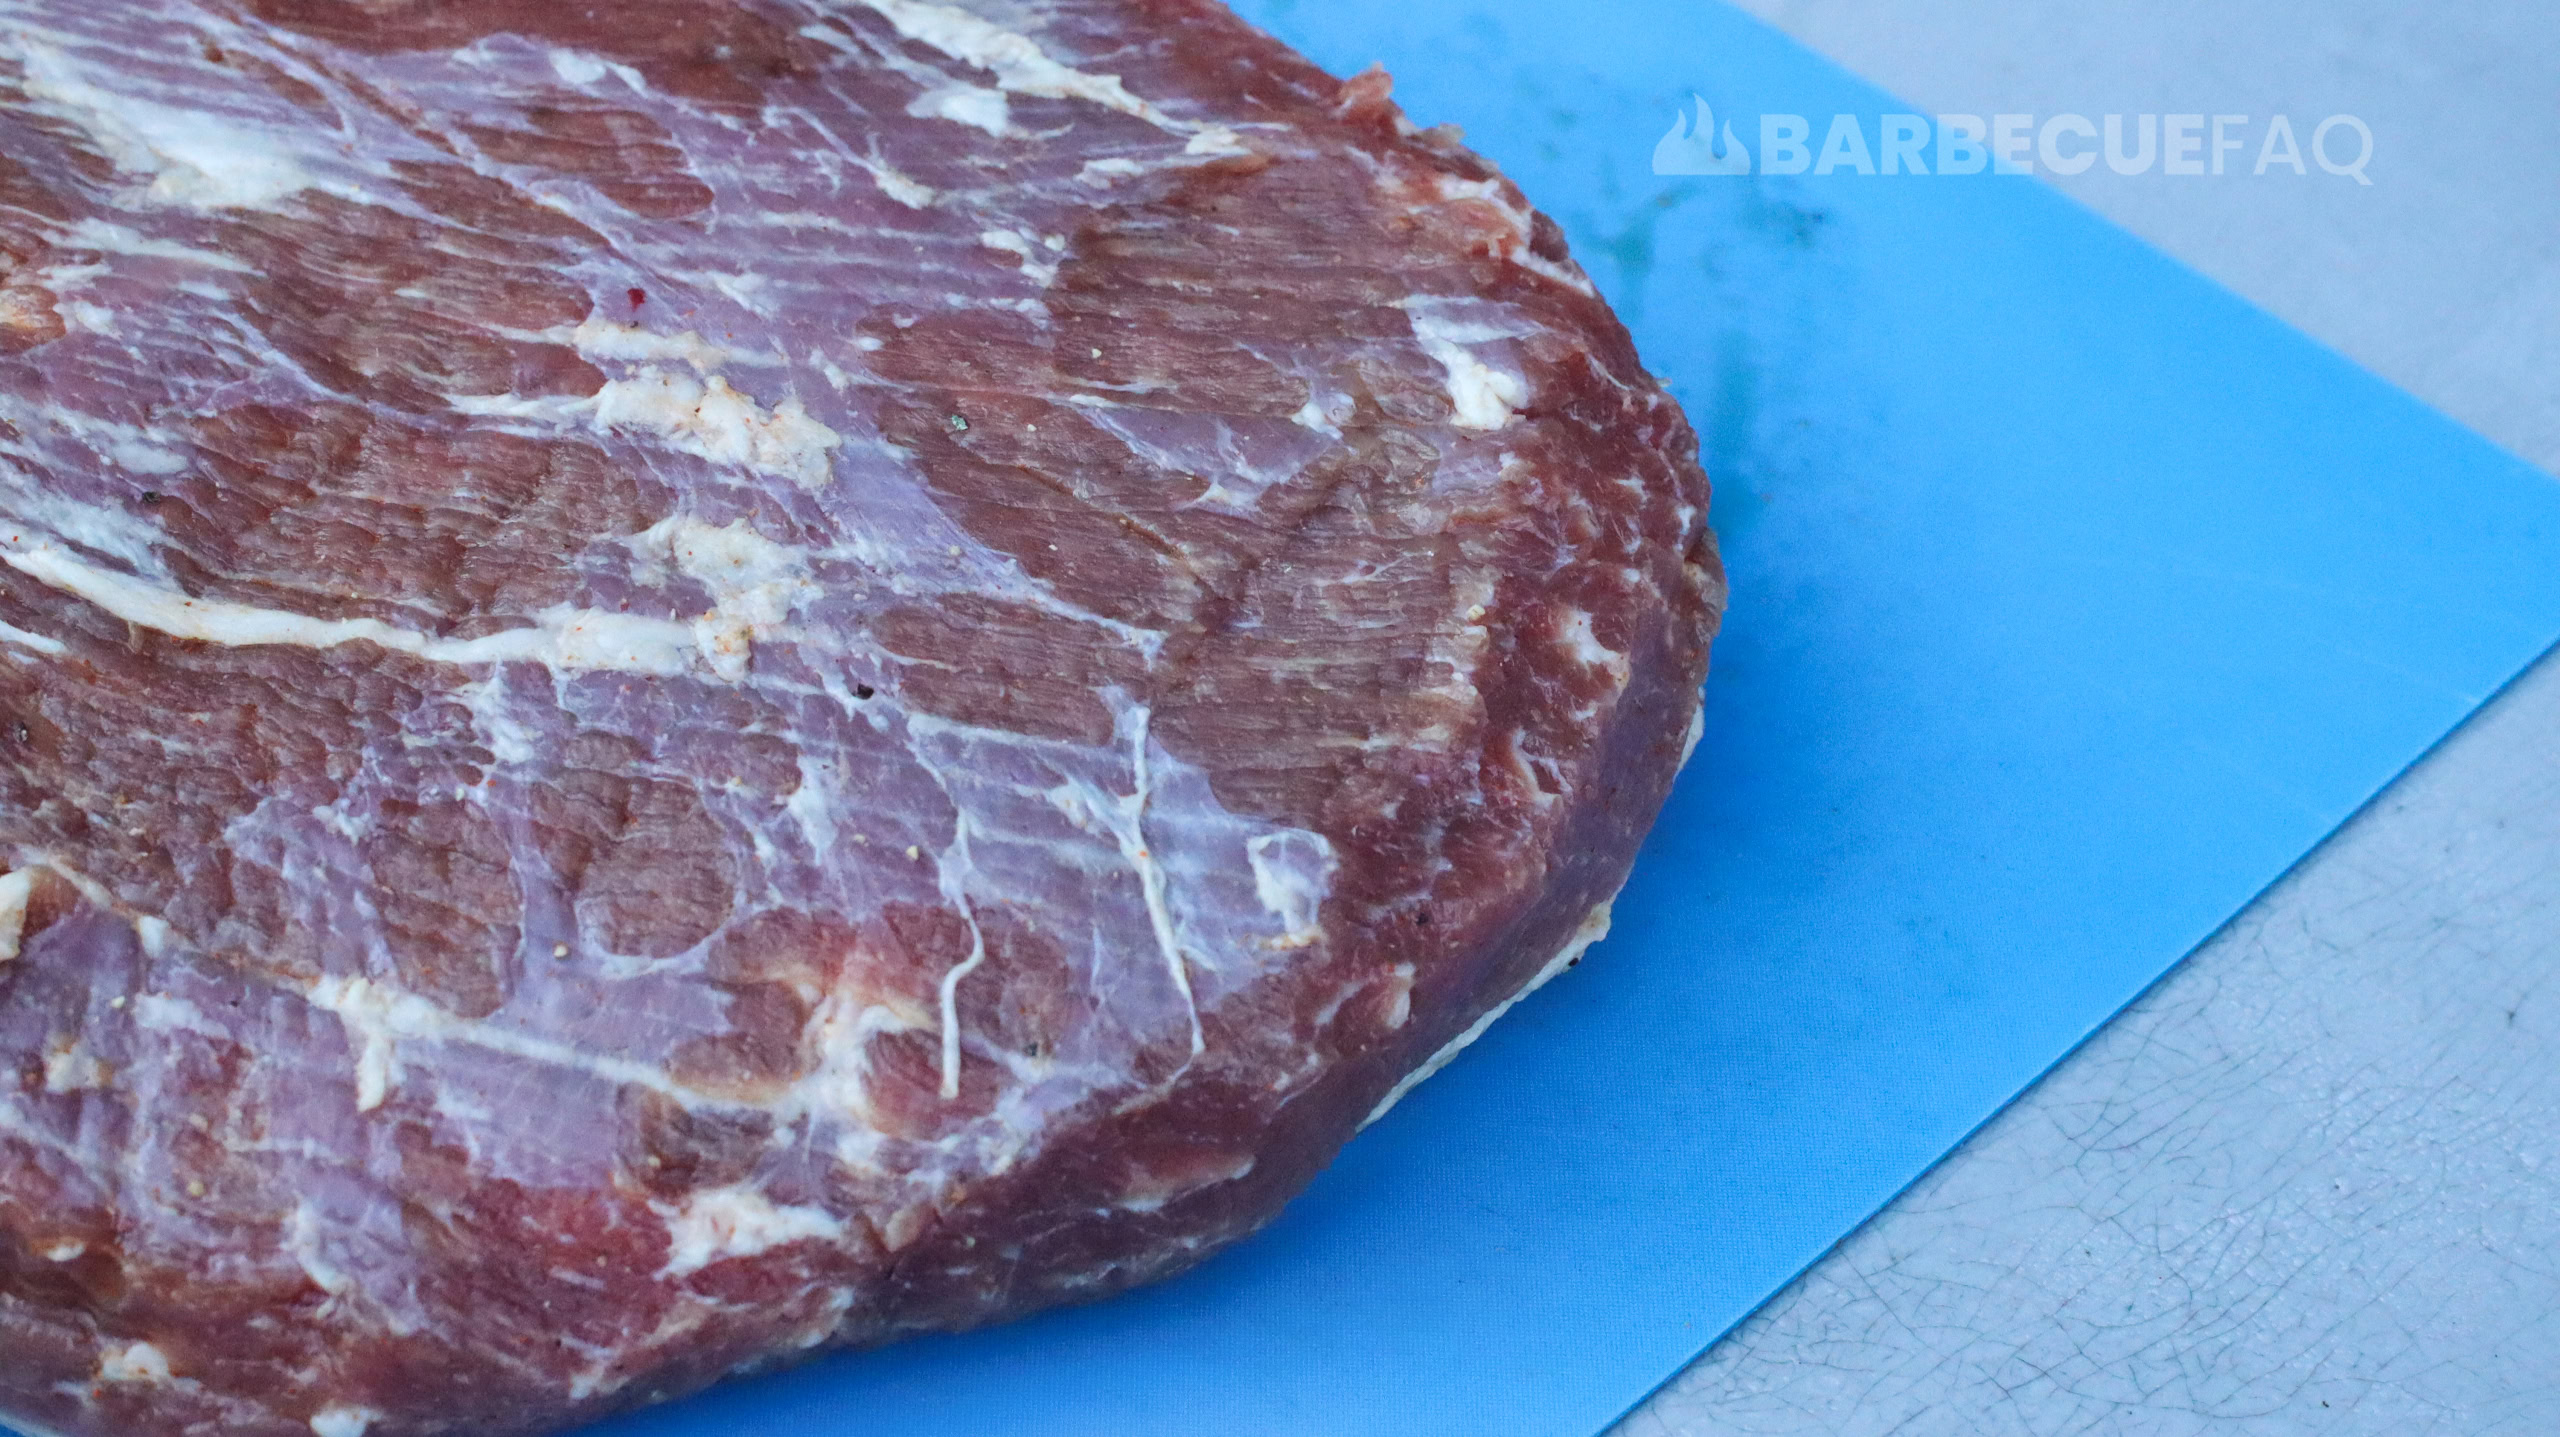
3. Boxy Edges
This is something else that a lot of other articles and videos don’t really touch on and that’s boxy edges.
Edges will typically burn and crisp up. Just angle your knife and round it out.
Brisket Trim Before and After
This typically takes me 5 minutes.
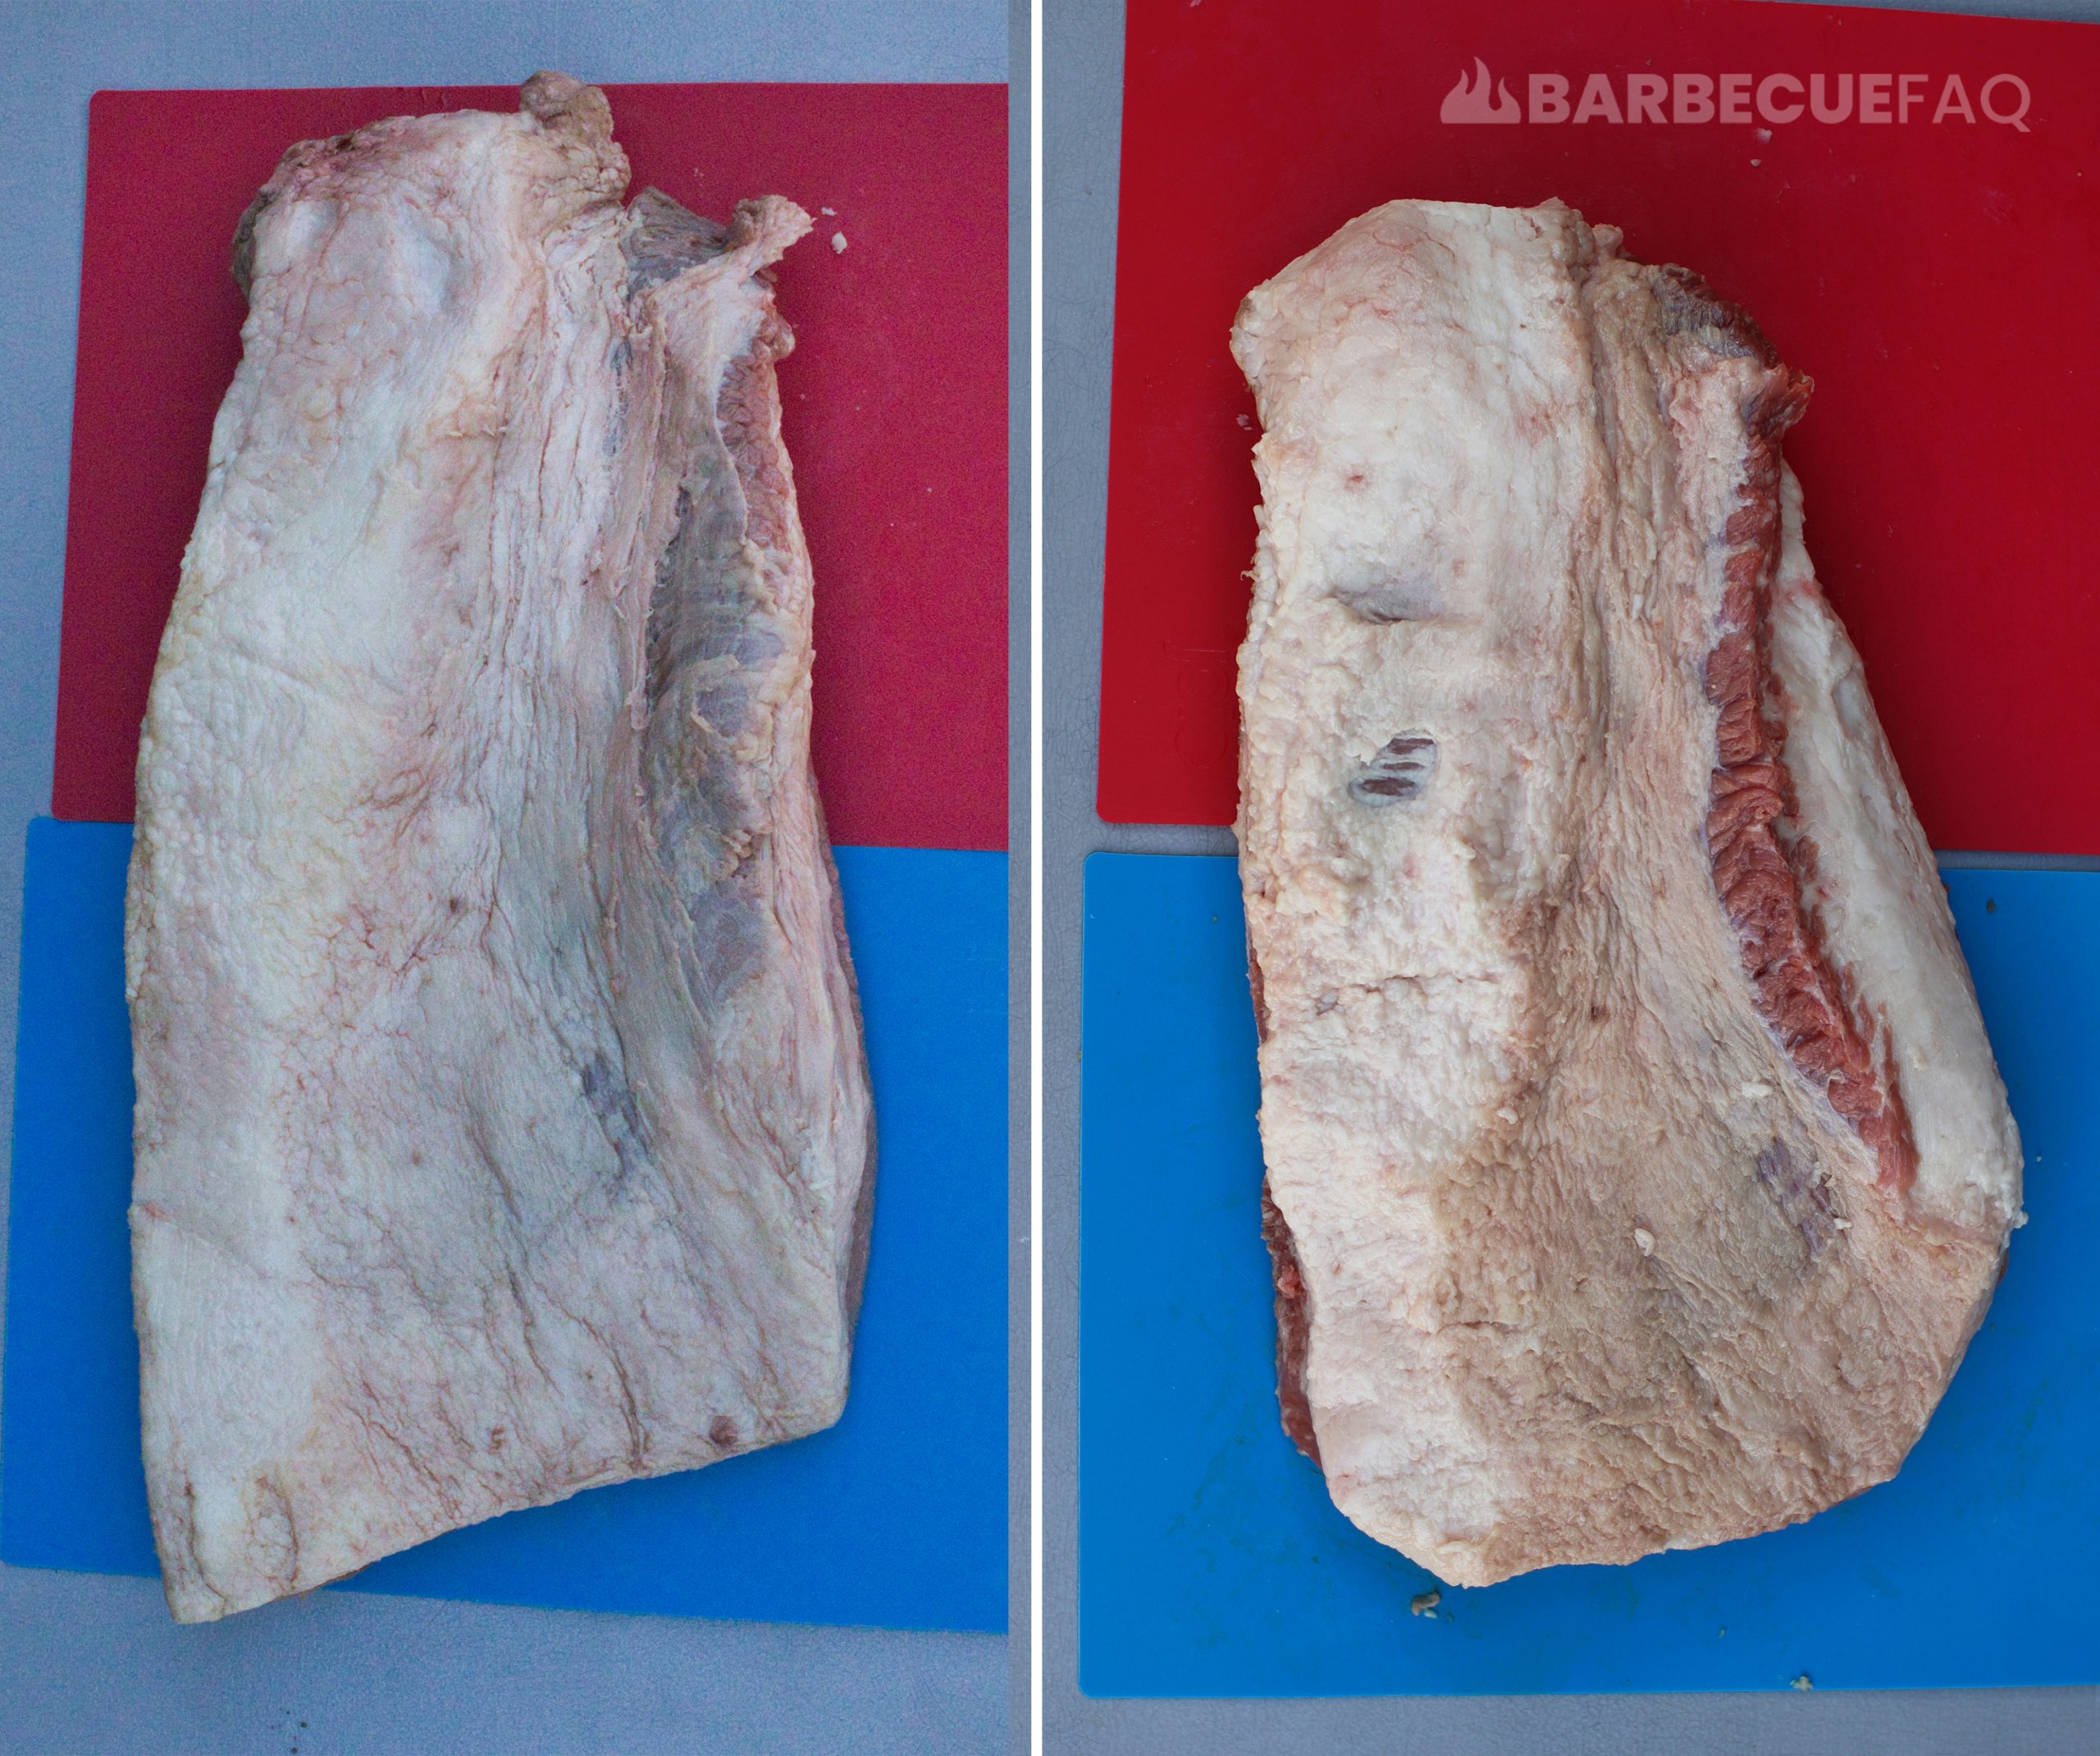
Here’s the fat cap untrimmed and trimmed:
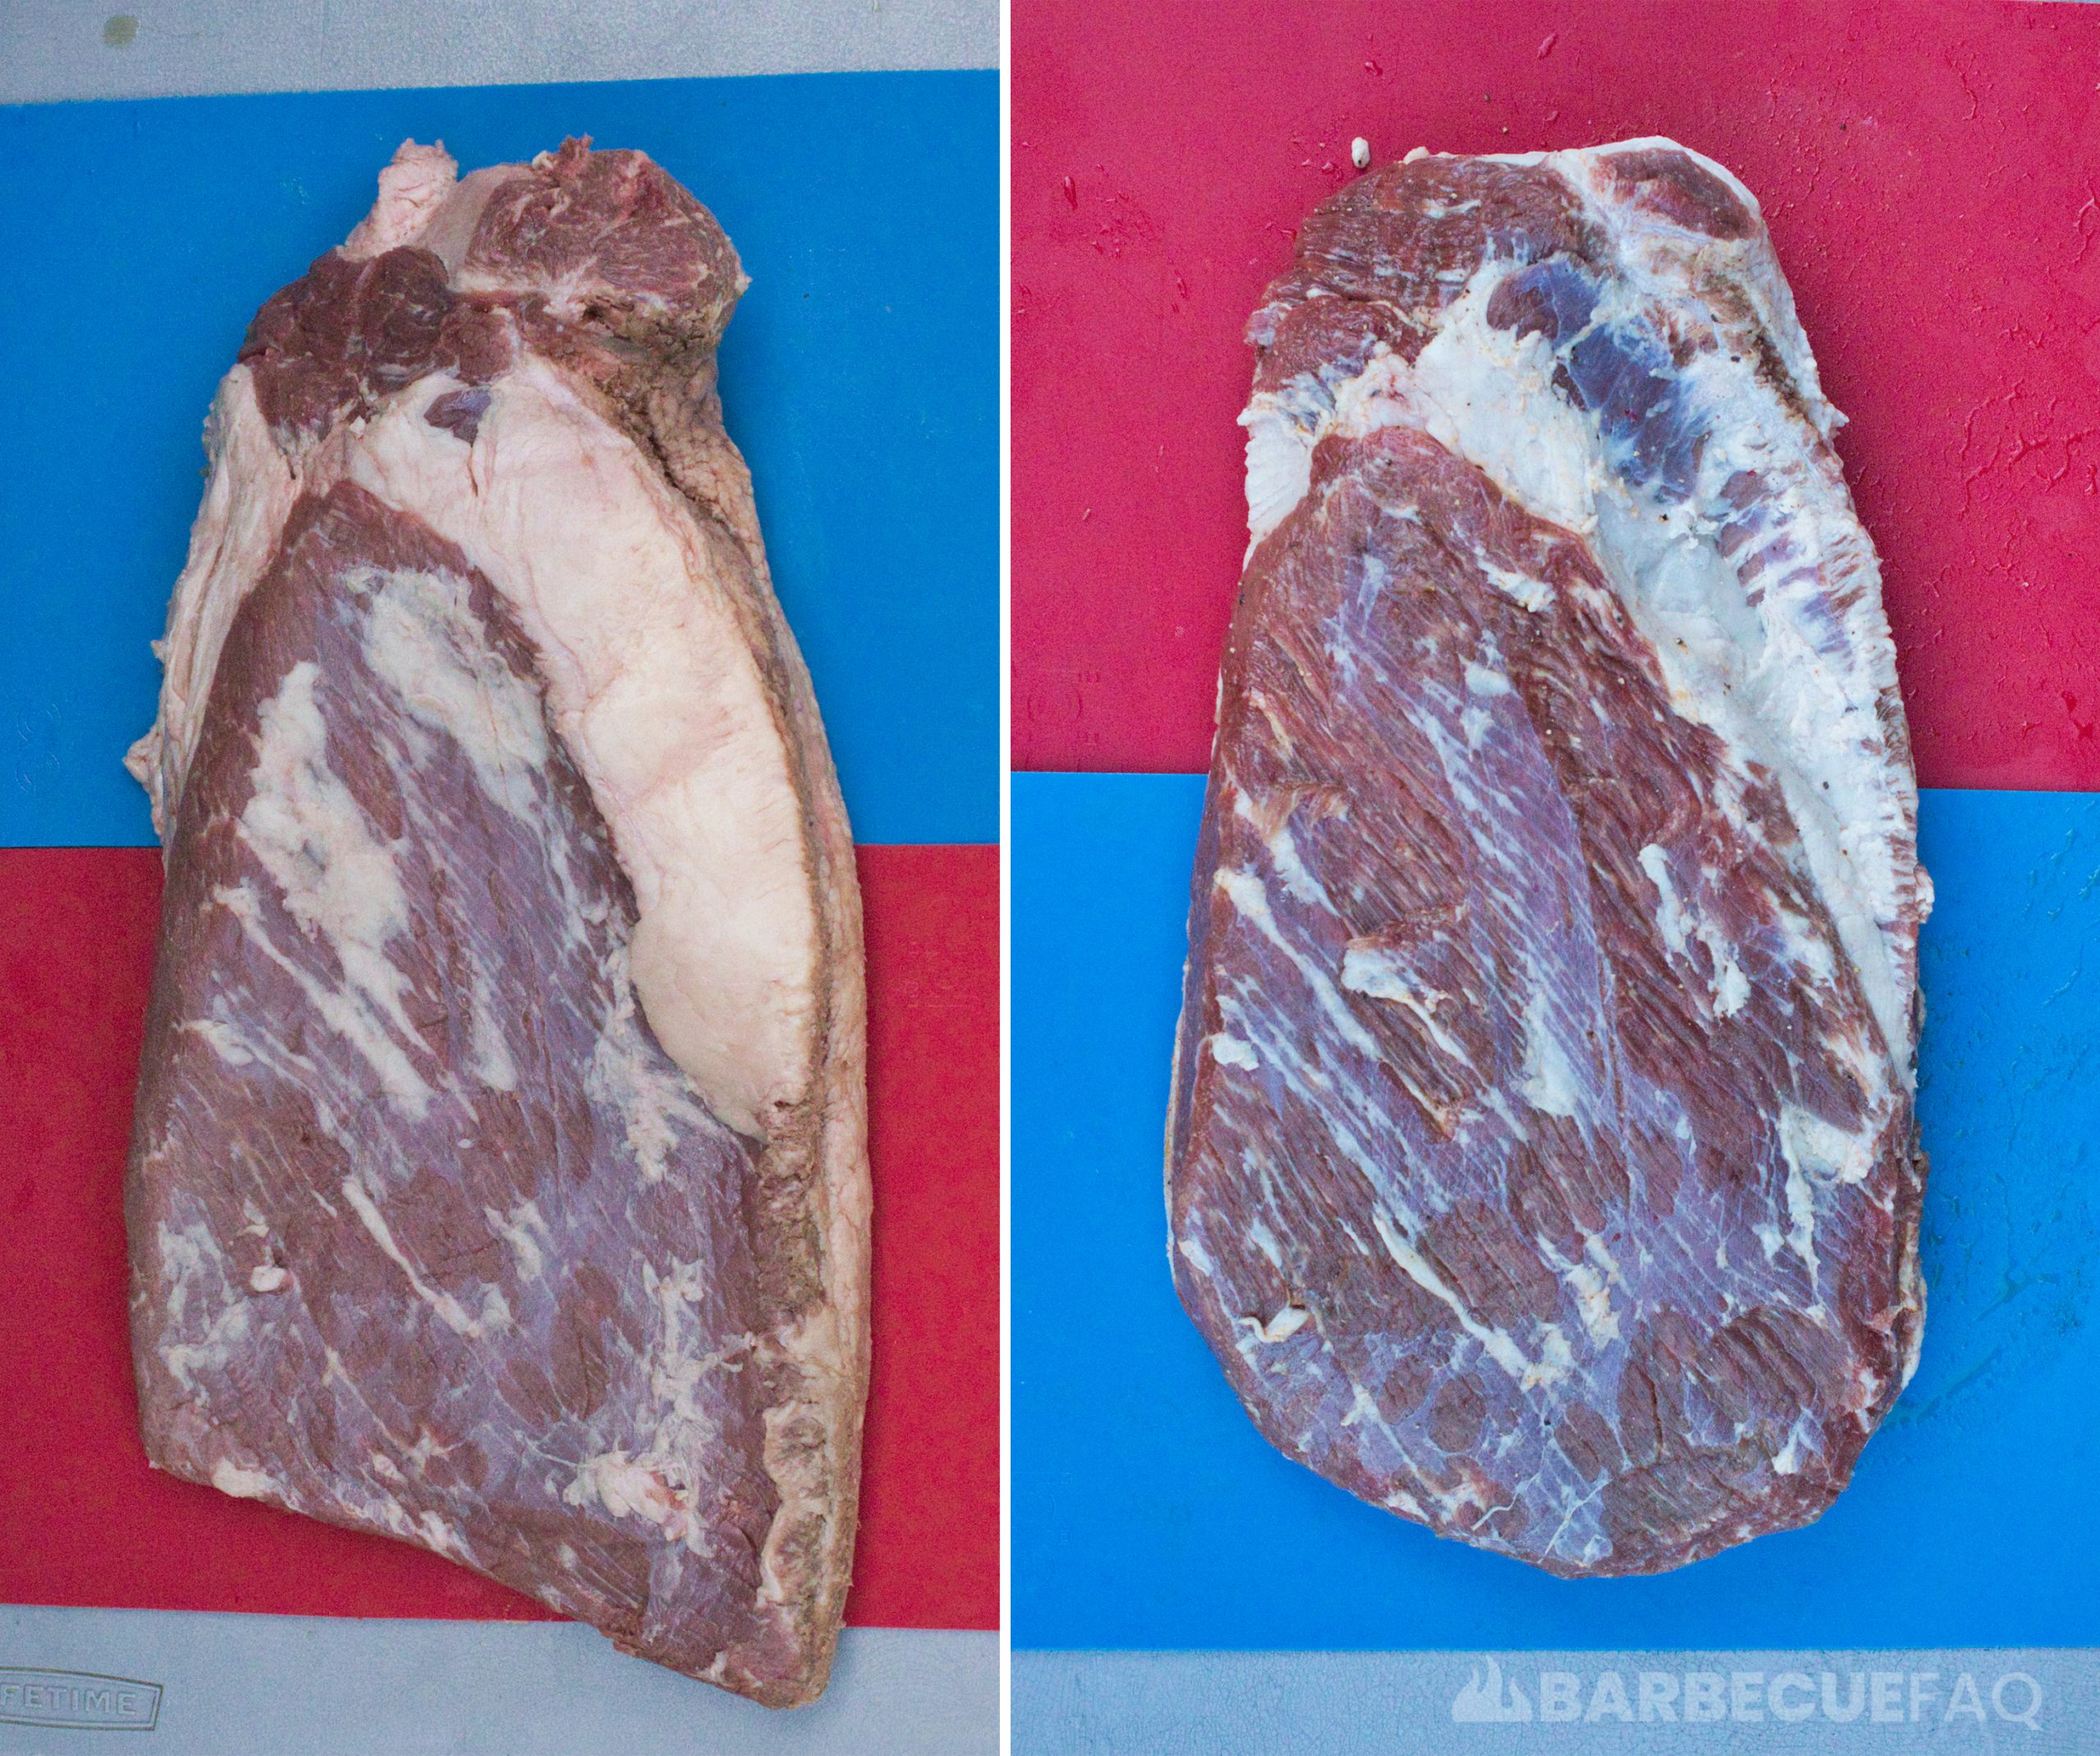
Here’s the meat side untrimmed and trimmed:
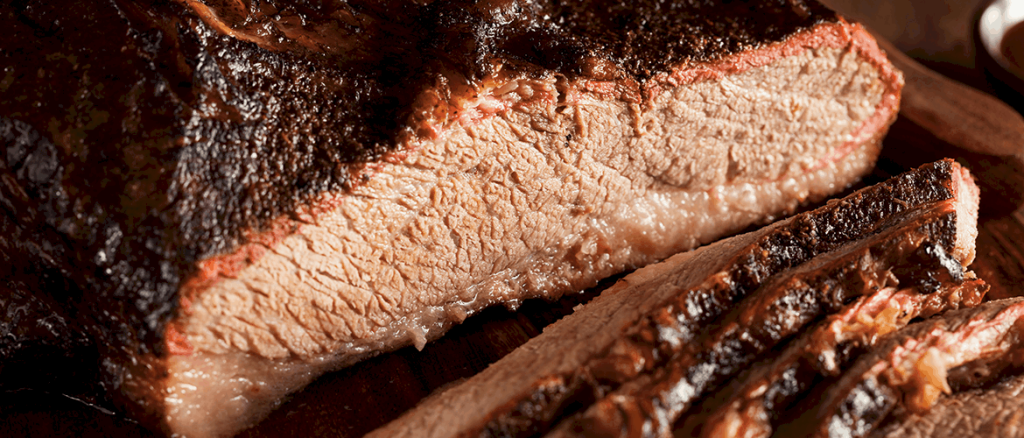
Here’s this brisket after smoking.
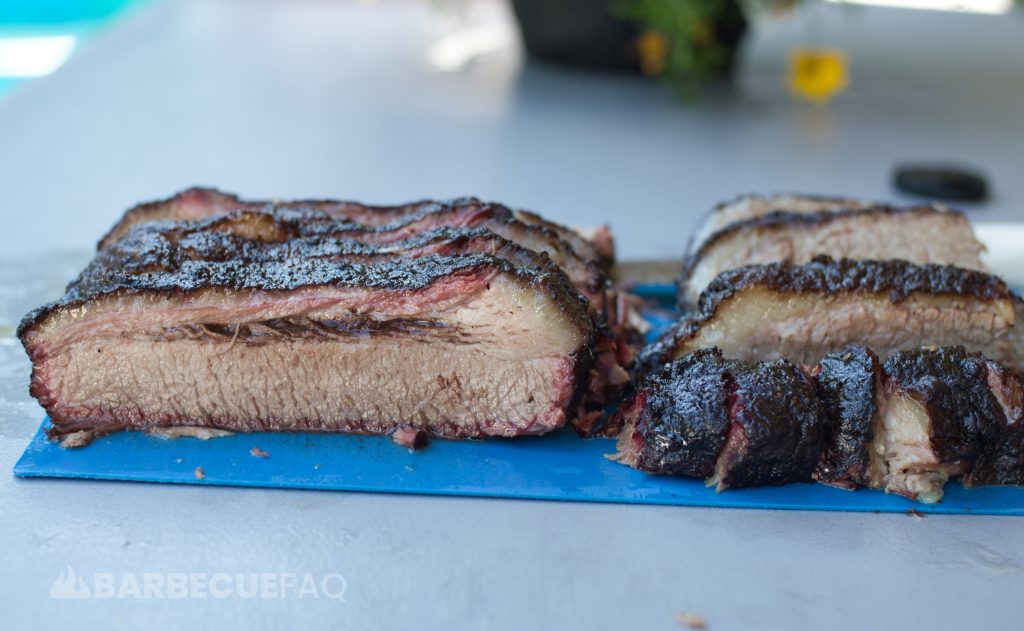
Definitely some spots we could of trimmed more (that right edge) but overall good fat render that melts into the meat – it’s also yellowed and is part of the brisket as apposed to something your Family will trim and throw out.
What to Do with Brisket Trimmings?
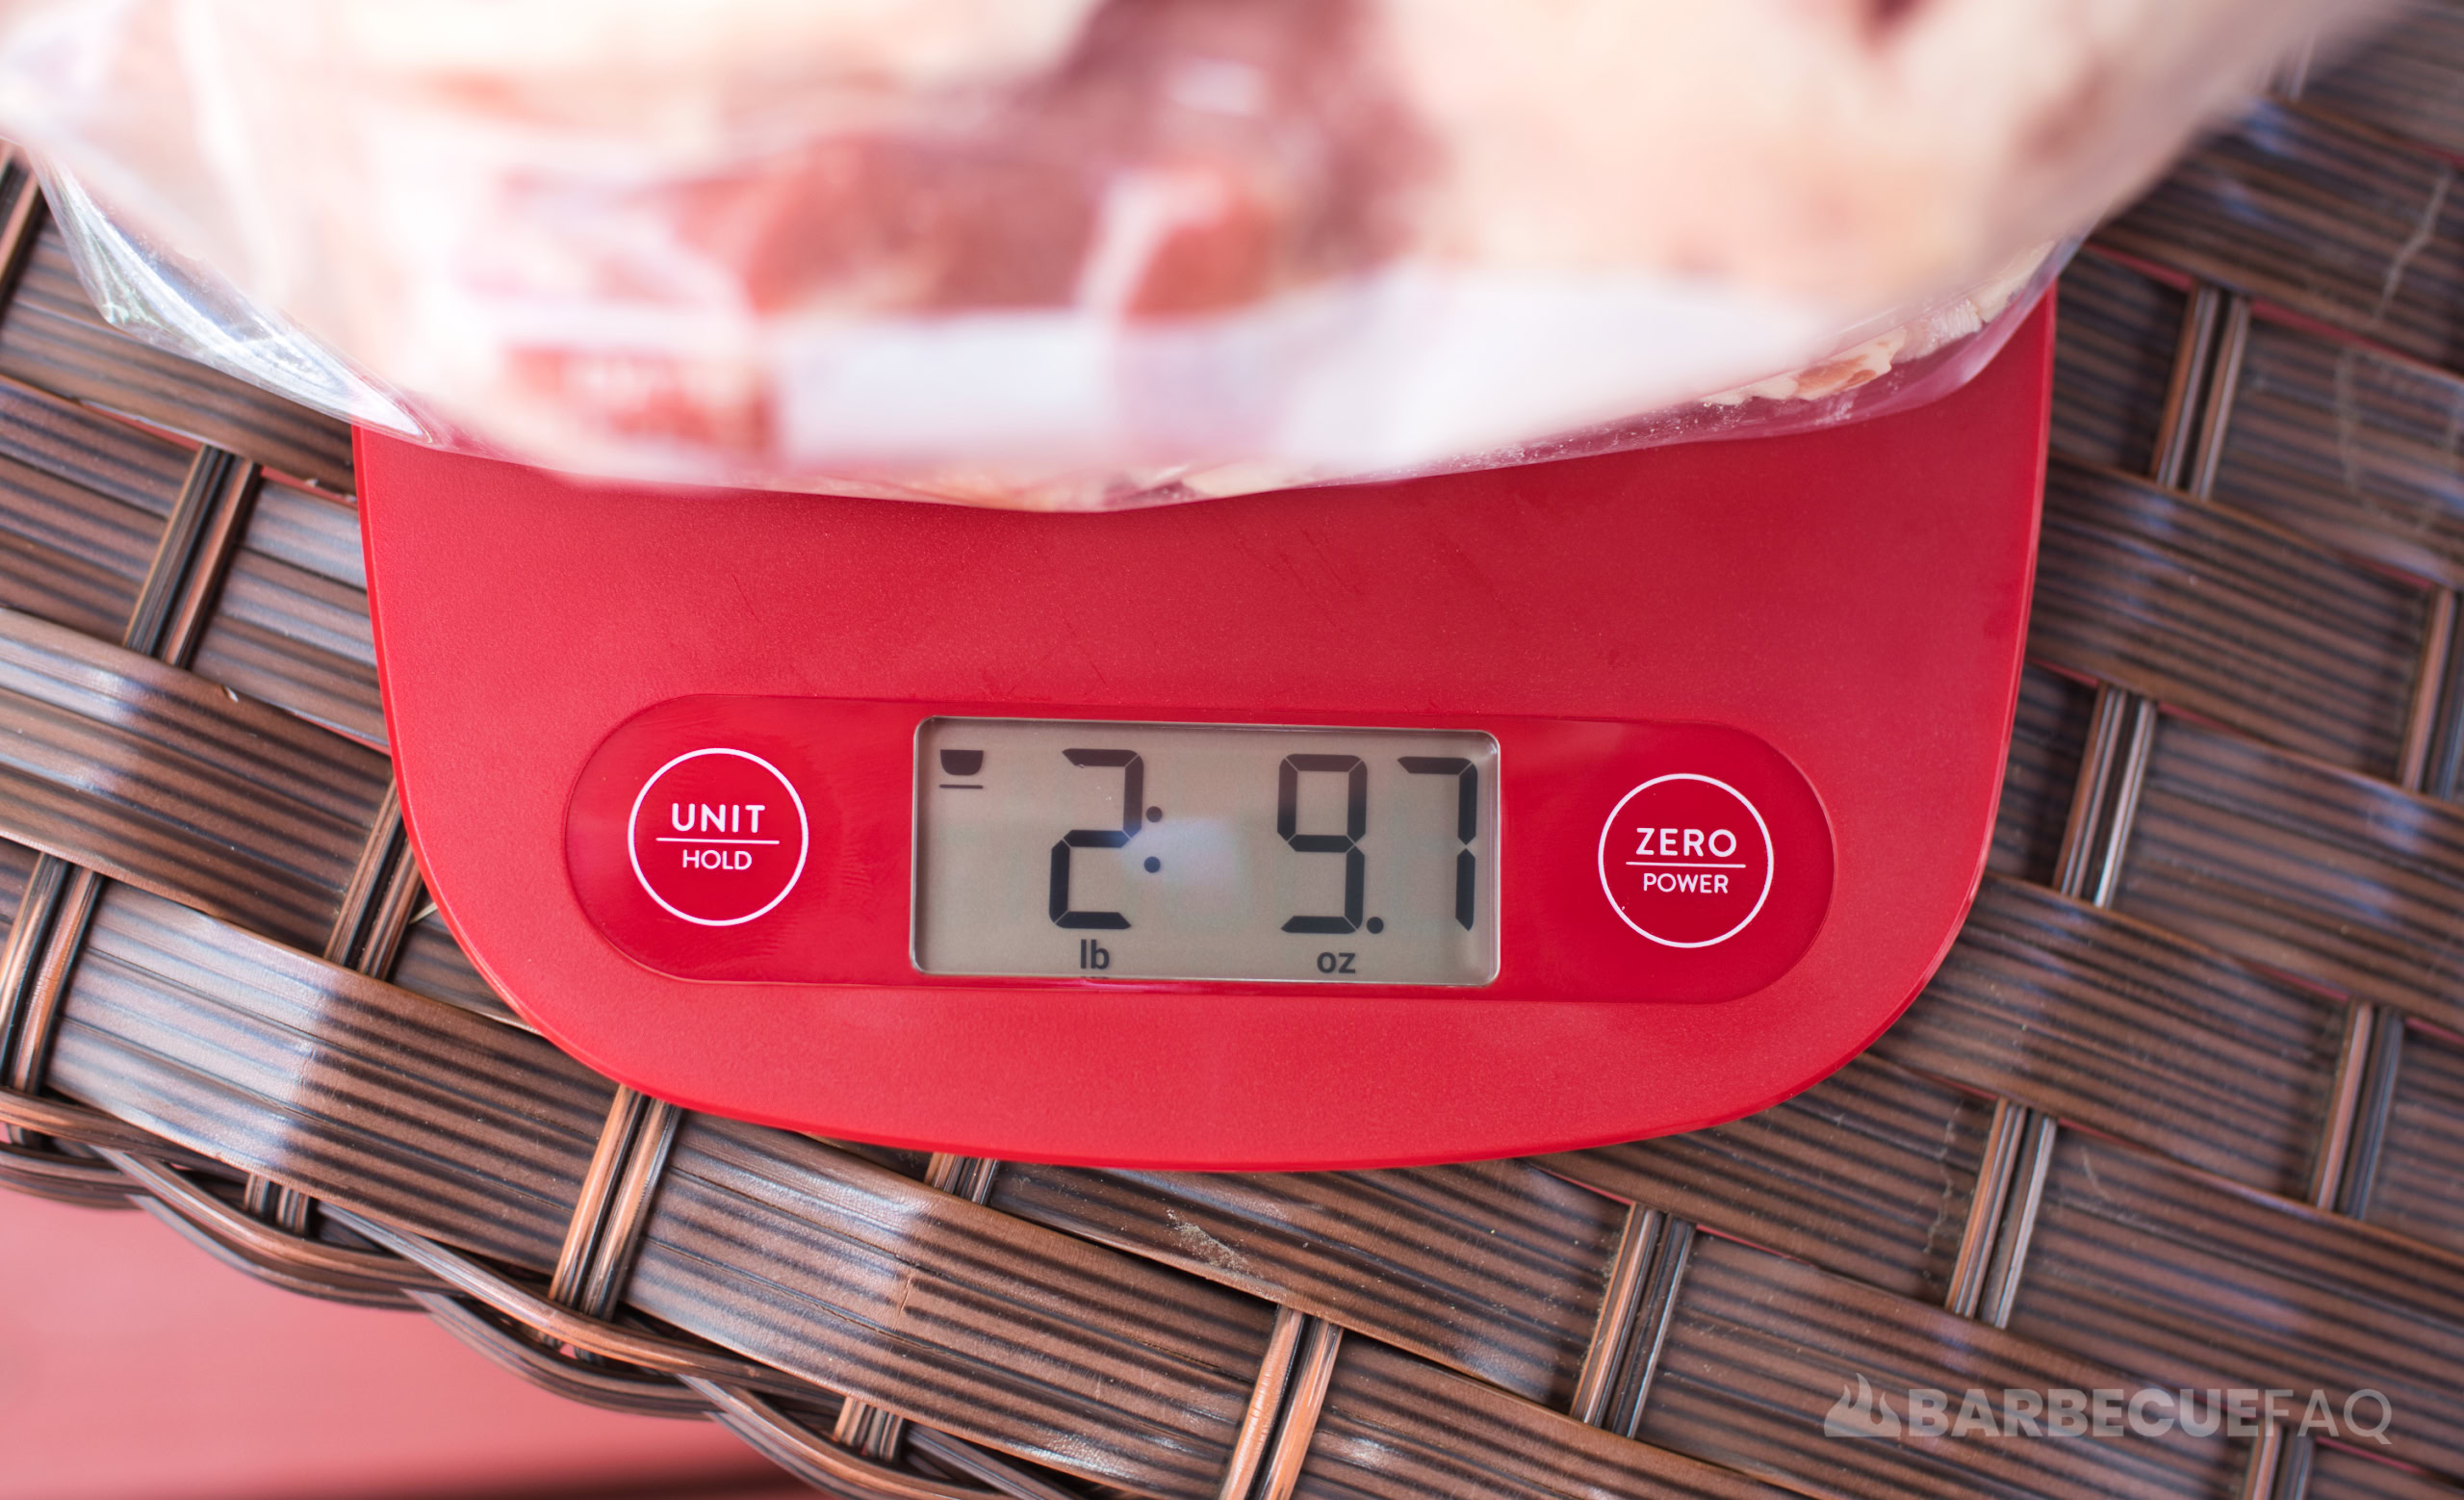
All the above trimmings I put in ziploc freezer bags.
The total trimmed weight was roughly 2 lbs 9.7 oz.
I render the hard fat into tallow to use for cooking.
The lean meat I use for burger grind.



2 comments
Chris
Helpful! Especially the pictures!
Dylan Clay
Happy to help Chris!