Some Stuff to Know Before Hook and Hanging Ribs
As someone who has used this cooker on hundreds of racks of ribs, I can tell you that if you’re only smoking one rack, the ribs can and will burn on the edges.
I’ve heard some folks in videos, on forums, and in articles sort of brush it off and act like they like it – personally, I hate it.
If I’m smoking one or two racks of ribs (which is likely your case too) there are ways to combat this problem.
How to Combat the Charred Edges
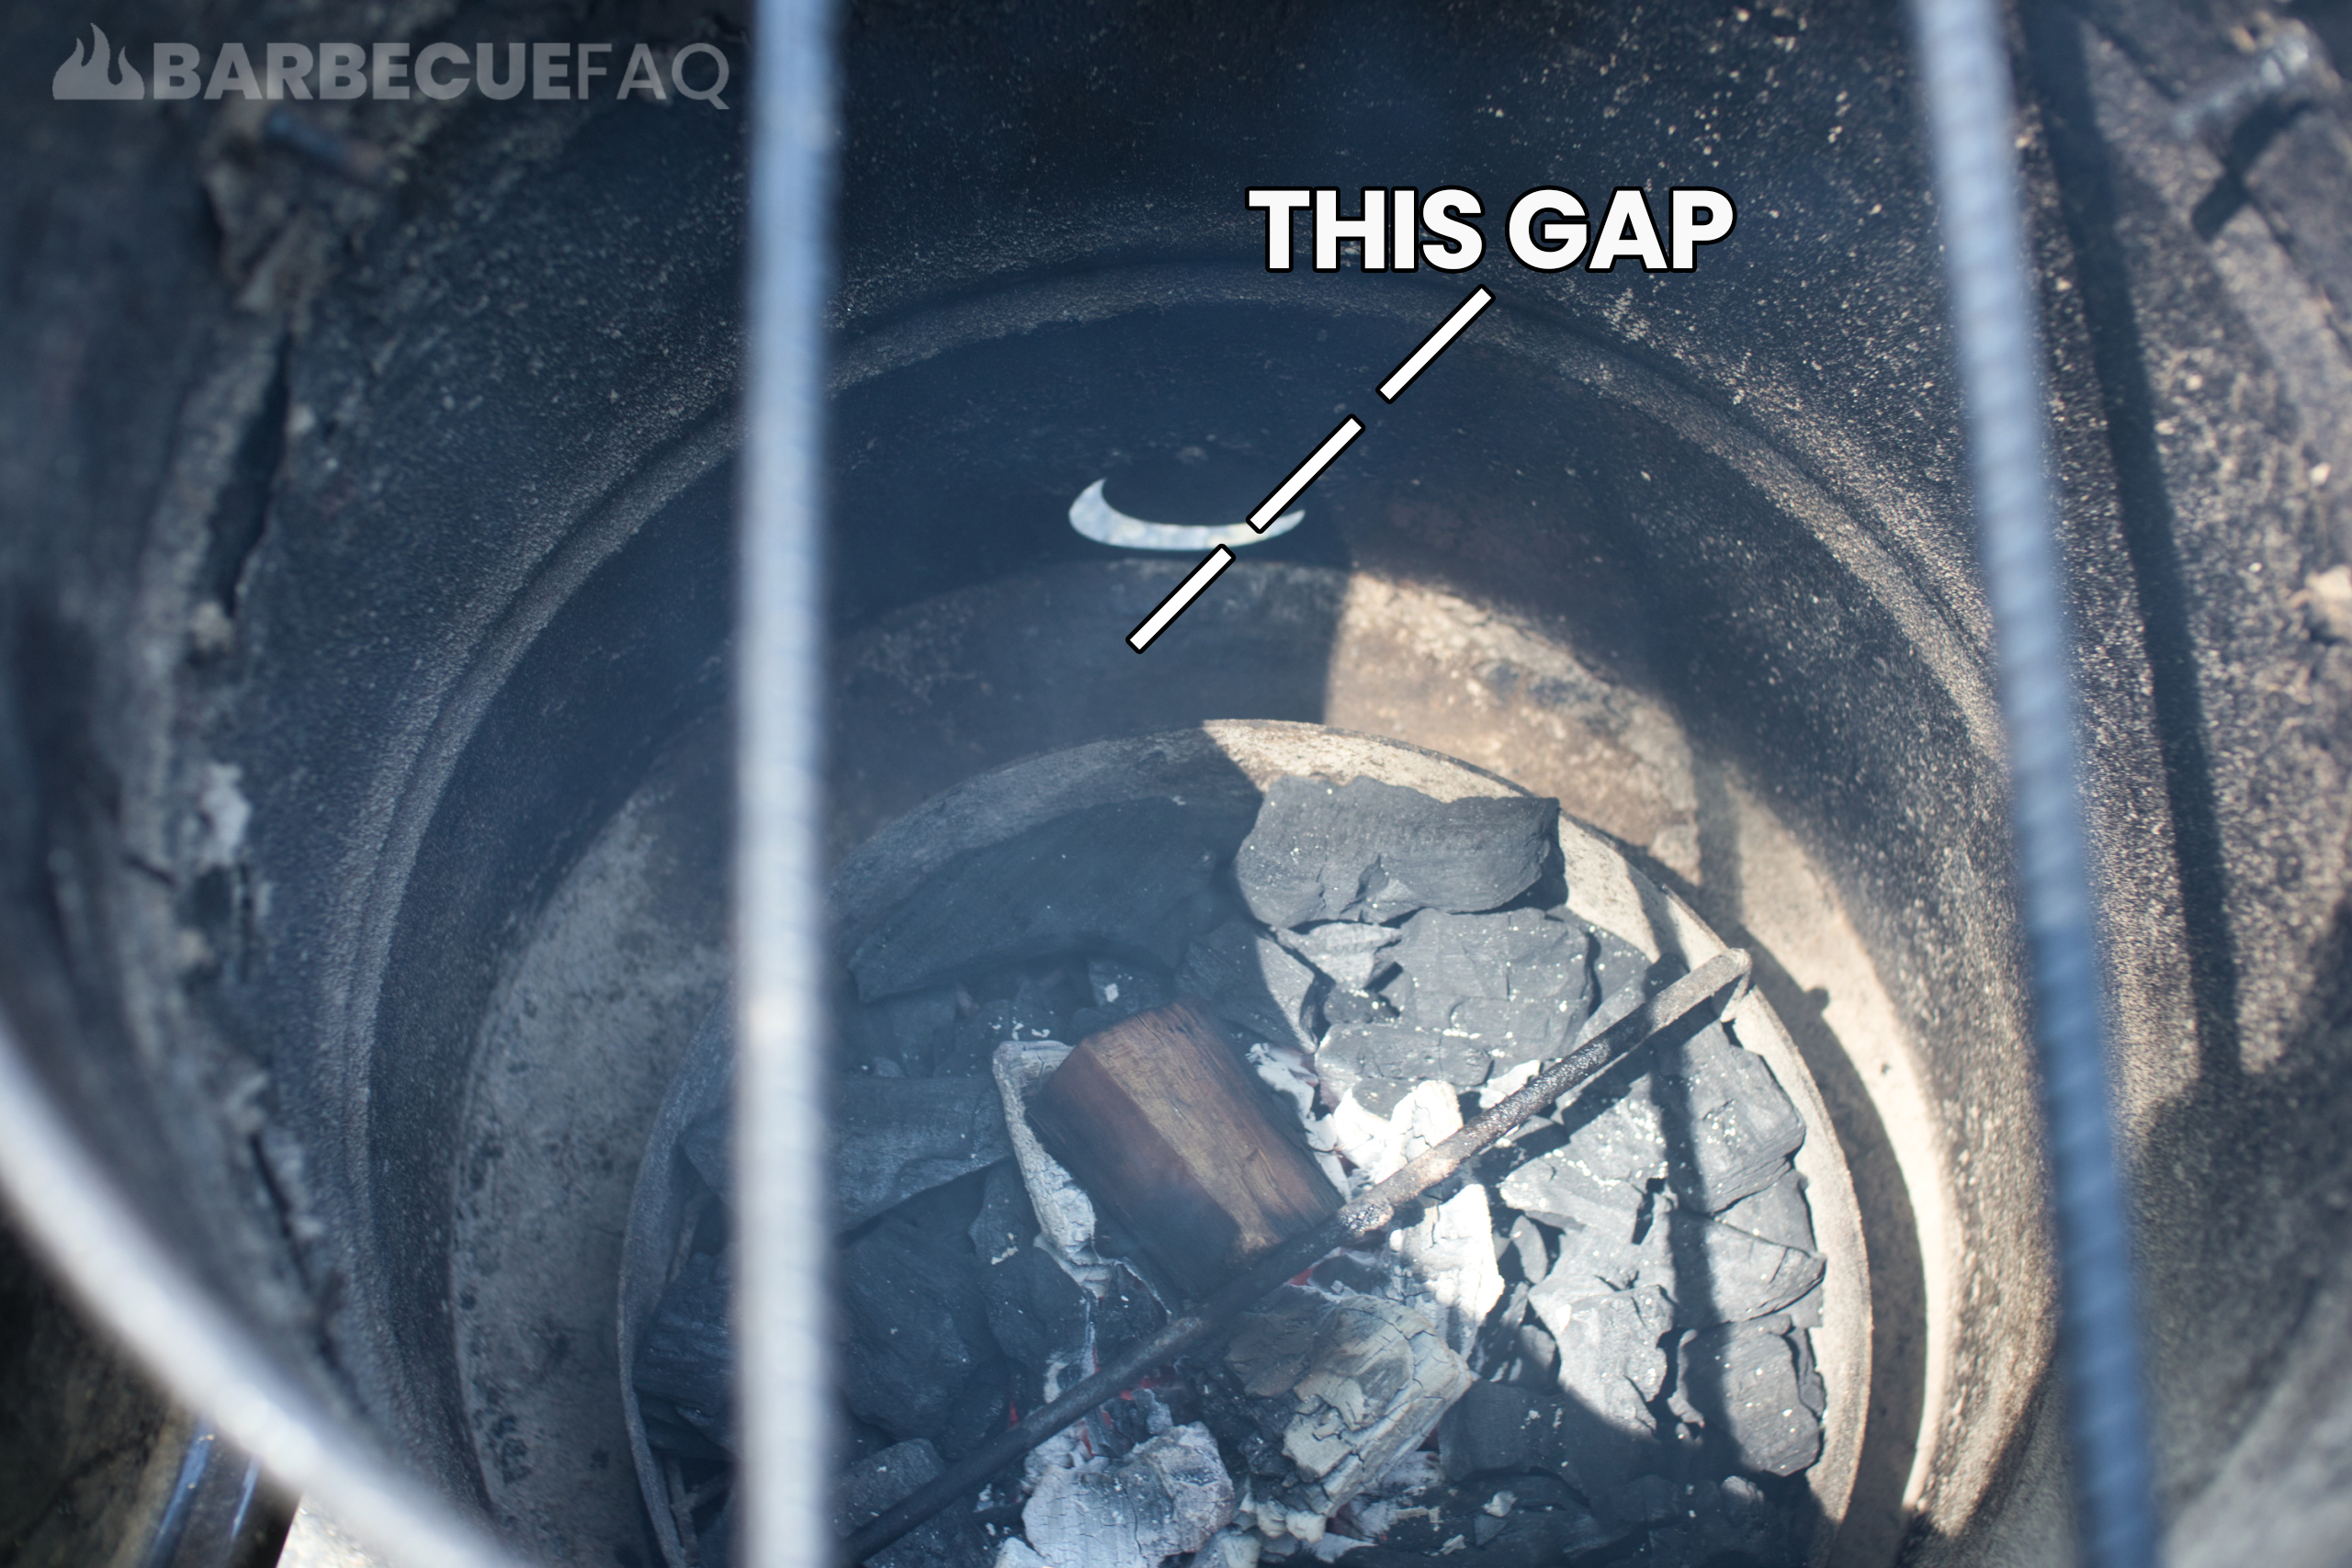
Take the charcoal basket and push it to the back of the PBC – on the opposite side of the intake damper.
This leaves about a 6-8 inch gap between the sides of the barrel and the char-basket.
When it comes time to hang the meat – I put the meat over this gap.
I can hear you now: “BUT DYLAN – the ribs aren’t over the char-basket!”
I know.
If you’re smoking 1-2 full racks of ribs and you hang the meat over the fire, the edge closest to the fire is apt to burn, every. single. time.
This is likely because there is a lack of meat volume and subsequently less rendered fat/water/spices dripping on the coals, which would cool the fire. As you add more racks of ribs, there is obviously more juices dripping onto the coals, which cools the fire even more.
All I know is that if I’m smoking one or two racks of ribs, and I do the above, it fixes the problem.
Take Ribs Out of Packaging and Pat Dry
Either score or remove the membrane.
Simple Dry Rub for Pork Spare Ribs
Combine in a mixing bowl:
- 1 Tablespoon of ground black pepper
- 1/2 Tablespoon of kosher salt
- 1 tsp granulated garlic.
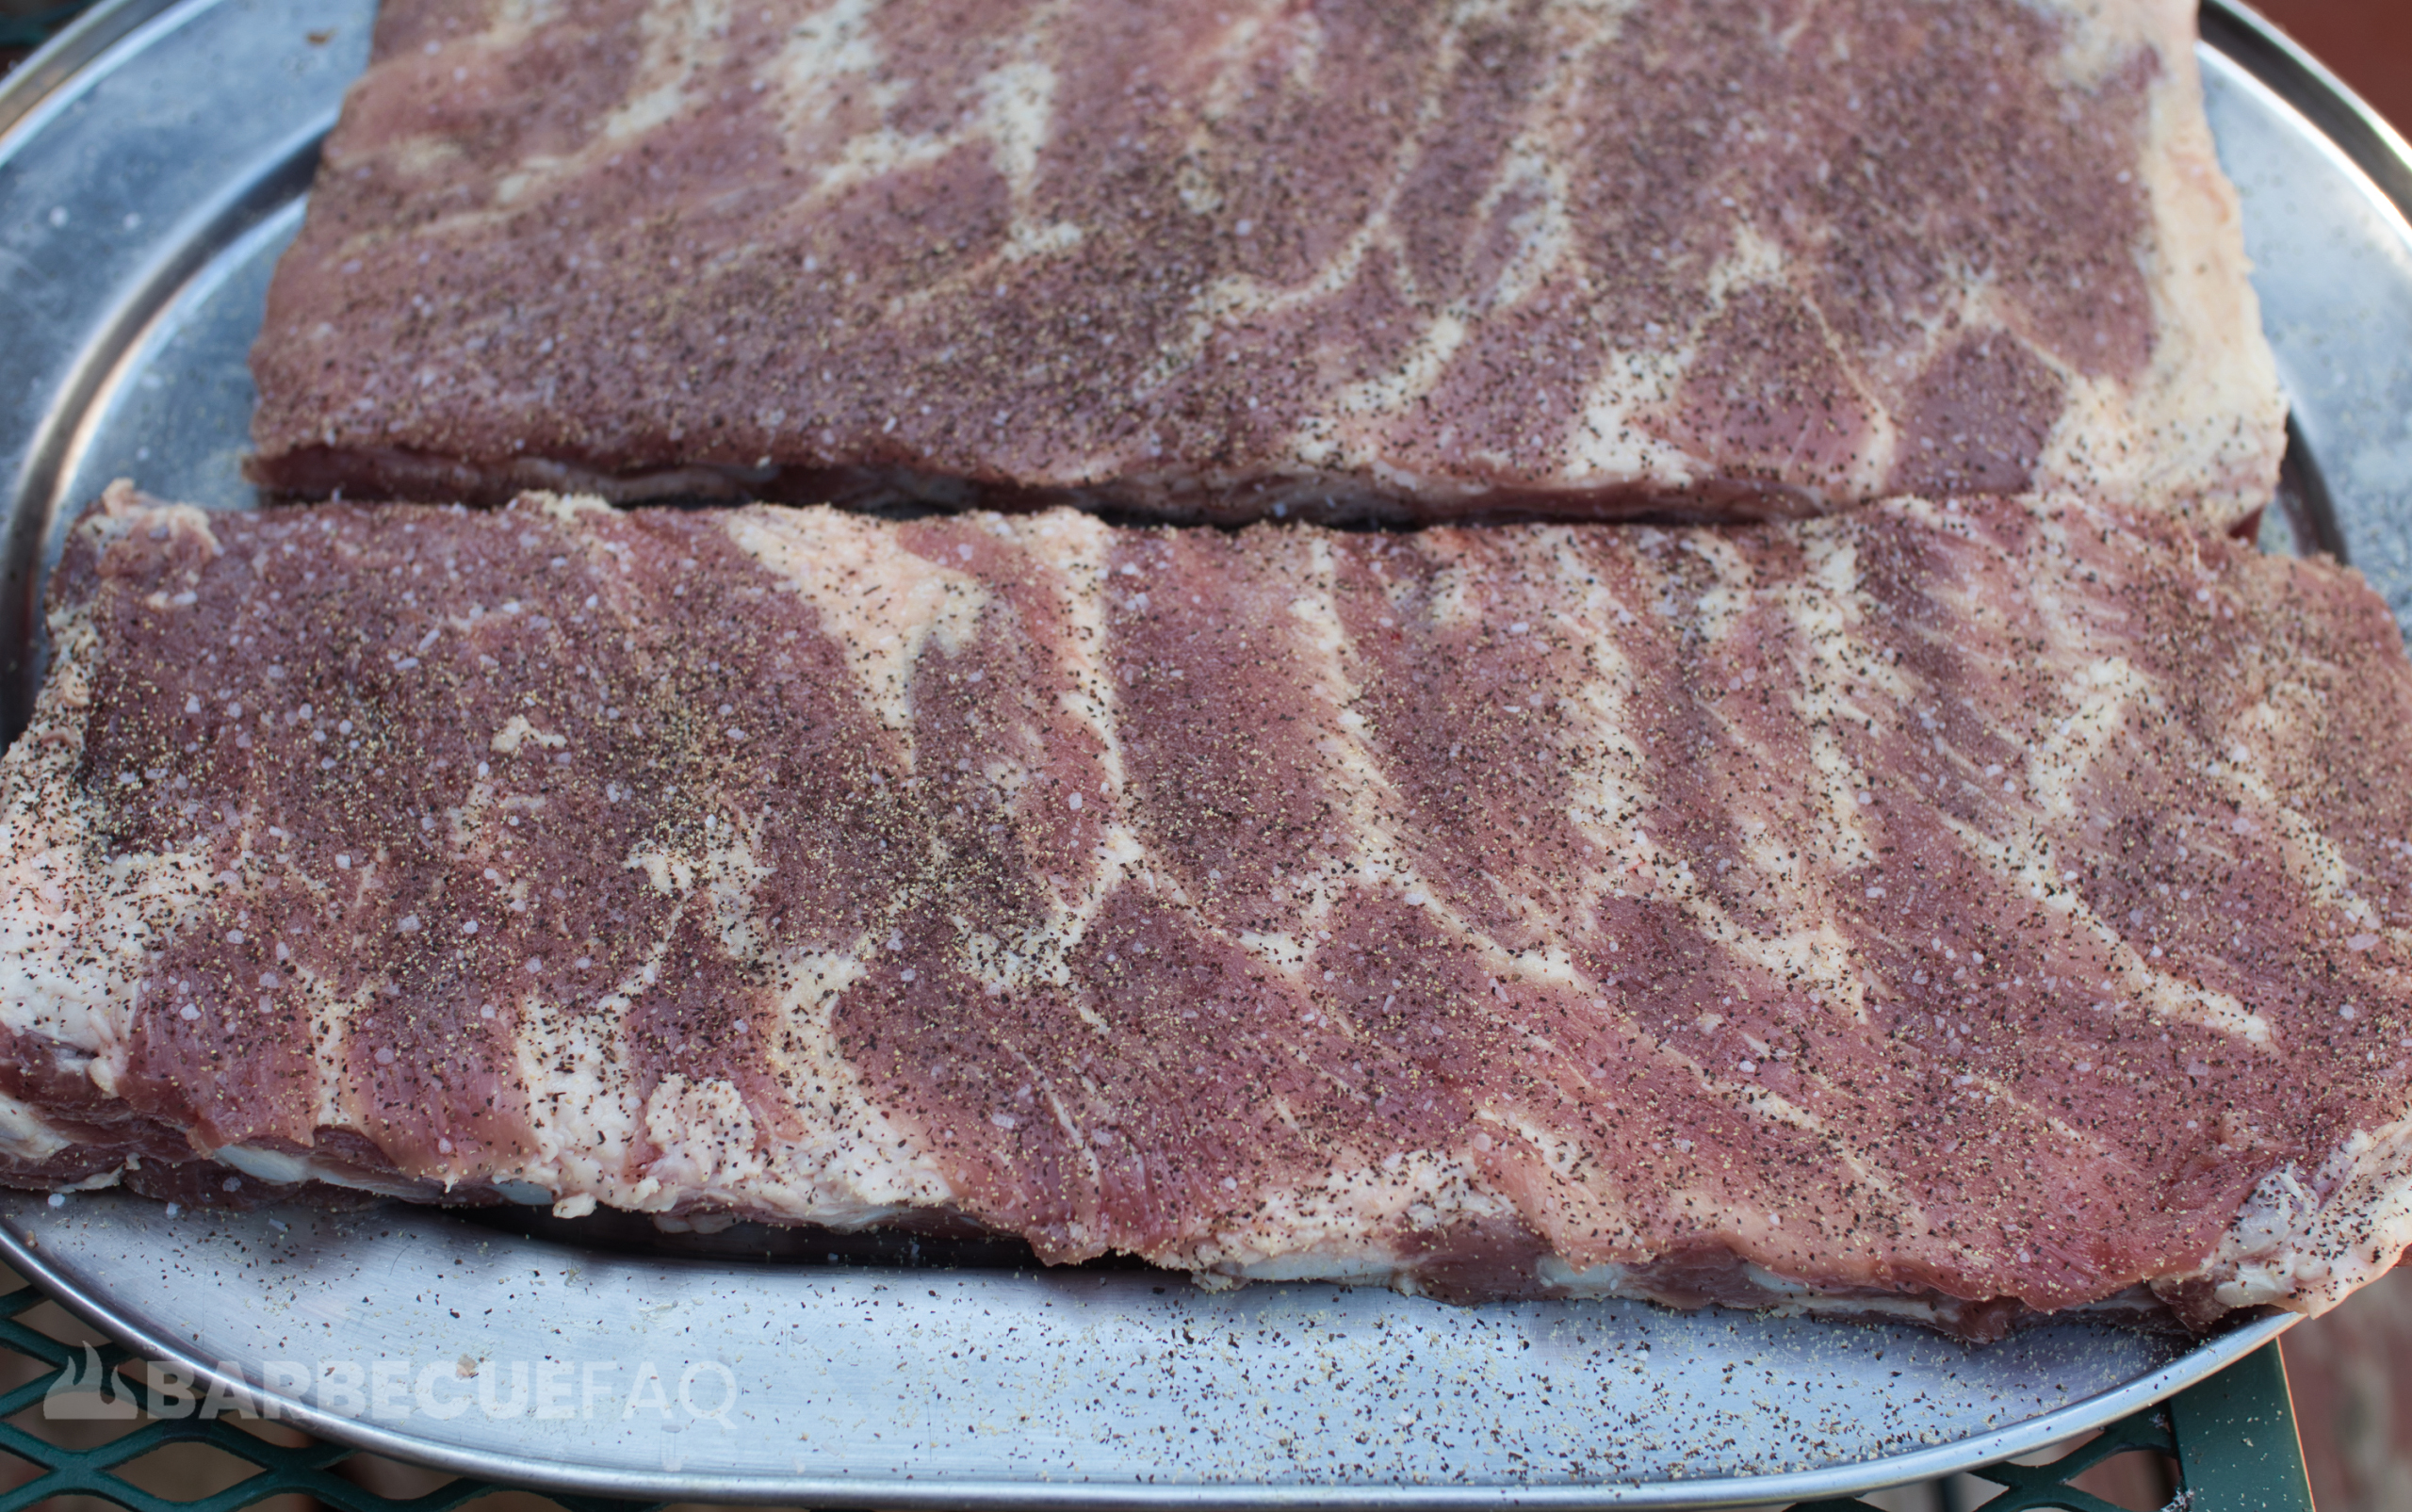
I then applied the rub to the front and back of the ribs. The above is more than enough for both sides.
Setting Up the PBC
The Pit Barrel Cooker works based on the minion method. The basis of the minion method is using a small amount of lit charcoal to passively ignite unlit charcoal.
I simply dumped my Jealous Devil Lump charcoal into the char-basket until it was essentially half-way full. Since ribs are a short cook, you don’t need to entirely fill the char-basket.
I then used my charcoal chimney to light a small amount of lump charcoal.
Once lit, add a few hot coals to the center and place the char-basket in the Pit Barrel Cooker.
Intake Damper Adjustment
There is only one intake vent to adjust on the PBC and it’s opened based on your elevation.
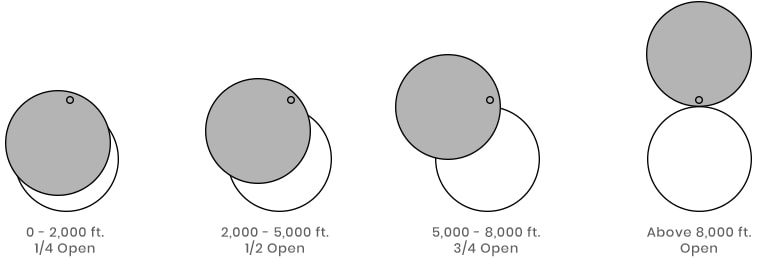
A number of websites exist to check your elevation but Whatismyelevation.com is super straight forward; I’m from New Hampshire and my elevation is 620 ft.
Meaning, my intake damper is 1/4 open.
Hanging the Ribs in the PBC and Adding Wood
Before you hang your ribs, you need to put the meat hooks into the ribs.
Whenever I hang the meat, I want the thickest end closest to the fire; This also further prevents the thin side from burning.
From the thinner end, I count two ribs and then put the meat hook in between the 2nd and 3rd rib. This way the meat is even higher above the fire.
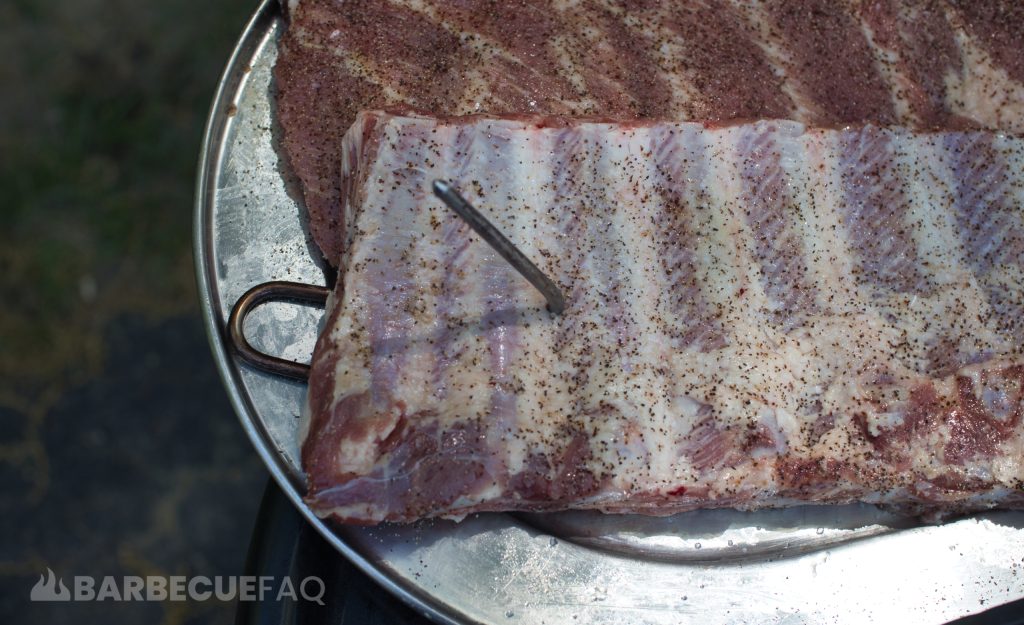
Once the meat hook is in the ribs, you can hang it from the rebar.
Even if you’re only hanging one rack of ribs, you should still setup both sets of rebar. The reason being, these holes act as your exhaust damper.
If you only had one set of rebar setup, you would create more of a draft which would cause the temperature to spike.
Adding Wood
During this time is when I add my wood chunks. I typically add 1 large chunk of hardwood at the start and again after the first hour. In my opinion, cherry wood works best for pork ribs. However, any fruit wood does well – peach is my other go-to if I’m out of cherry.
If you don’t have any fruitwoods, post oak also works quite well.
Spraying with Water After an Hour
After an hour on the smoker, I’ll take the ribs out of the smoker and start to see how they’re coming along.
If you opted to keep it simple and use my rub, it has likely set.
I then opt to spray with water. The reason for doing this is to prevent the bark from drying out and to encourage more smoke particles to stick to the meat. The wetter the surface of the meat, the more smoke will adhere to it.

You can opt to spray with whatever you like. Apple juice or a 50/50 mixture of apple cider vinegar and water are also popular.
In my opinion, water works just fine.
Before putting back on the PBC, place another chunk of hardwood on the fire.
Checking for Color After Two Hours
Since I’m smoking spare ribs, I know the typical finish time on the PBC is around 3-4 hours. Keep in mind though, this is a rough estimate. You should never cook according to time.
After hour two, all I’m looking at is color.
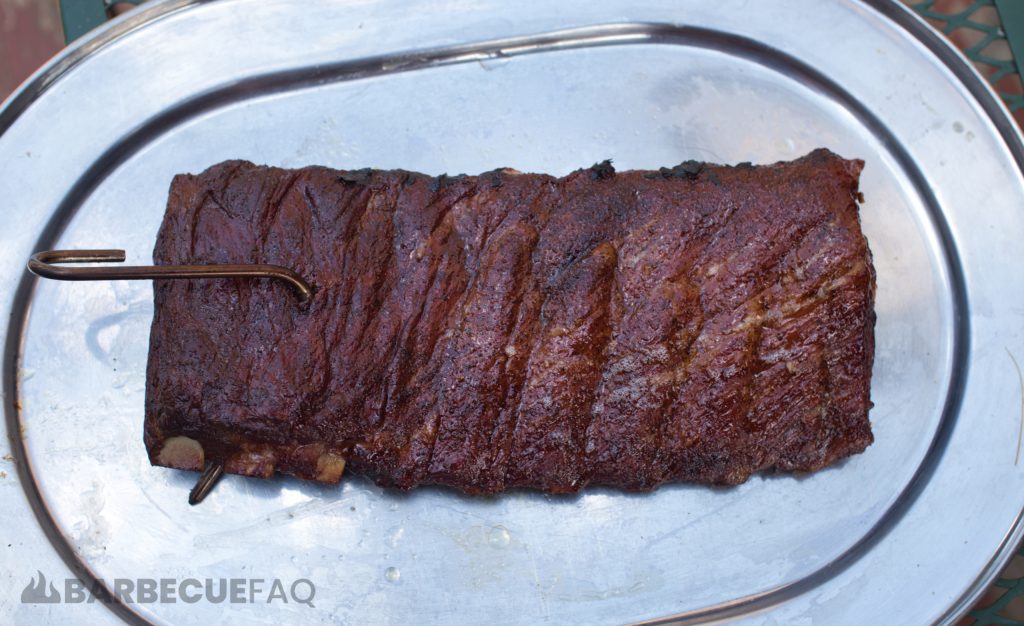
If the ribs are a nice mahogany color, I’ll typically wrap. Usually after 2 hours, ribs have taken on more than enough smoke.
Wrapping Ribs
The goals of wrapping are to do a few things:
- You effectively prevent the infiltration of smoke particles and also protect the meat from burning.
- You’re preserving color while also increasing moisture in order to speed cook time.
I’ve tested wrapping in aluminum foil – which is also called Texas Crutching – I’ve wrapped in butcher paper, and I’ve also opted to not wrap my ribs.
After testing all of these, my preference for ribs is butcher paper for pork ribs.
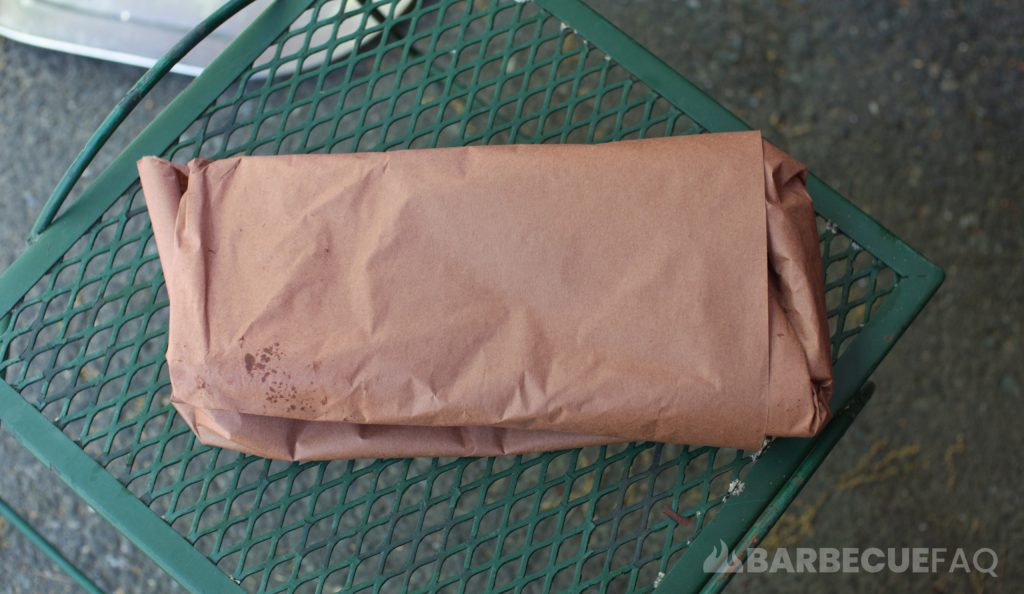
You essentially get the best of both worlds – you speed the cook time by trapping moisture, albeit, way less than aluminum foil. However, less moisture means you also preserve the bark – but to much less of an extent than no-wrapping would yield.
Wrapping ribs is fairly straightforward:
- Lay out two sheets of butcher paper, overlapping in the middle by 4-6 inches.
- Spray the surface with water
- Lay the ribs meat side down on the paper.
- Start wrapping the meat like you would a Christmas present – keep the seams tight.
Once wrapped, place back on the PBC, meat side down.
Checking for Tenderness
After 3 hours, you can start checking for tenderness.
There are a number of tests that you can use to determine when ribs are done, however, my personal preference are the bend and tear tests.
These can be hard to explain as they’re more so visual queues but if you can tear near the edge of a rib bone and the meat will cleanly pull away from the bone, the ribs are nearing doneness.
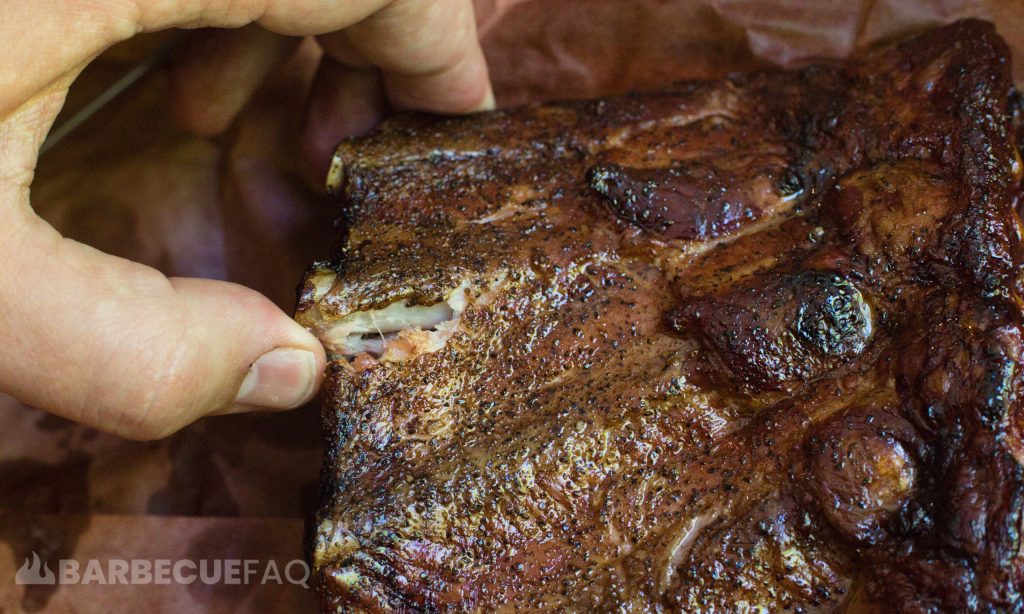
Another great test is the bend test. If the ribs can bend and start to tear near the center of the bones, they’re likely done.
Once I’ve done that test, I’ll use my meat thermometer to probe between the bones. If it slides through like hot butter, they’re likely done.
If you’re someone who likes to use temperature, ribs typically finish somewhere between 195 – 205F.
Saucing the Ribs
When the ribs are at tenderness, you can technically dig in and eat. Personally, I quite like to sauce my ribs with barbecue sauce – usually combined with a vinegar sauce.
For this recipe, I opted to use my favorite barbecue sauce, Sticky Fingers, Carolina Sweet. It tastes great (sweet with a slight heat) and is usually the cheapest sauce on the shelf.
I like to use a basting brush to paint on the rub.
A lot of people like to return the ribs to the smoker at this point in order to glaze the ribs. I’m not a big fan of doing so and don’t really find it necessary.
Slicing the Ribs and Serving
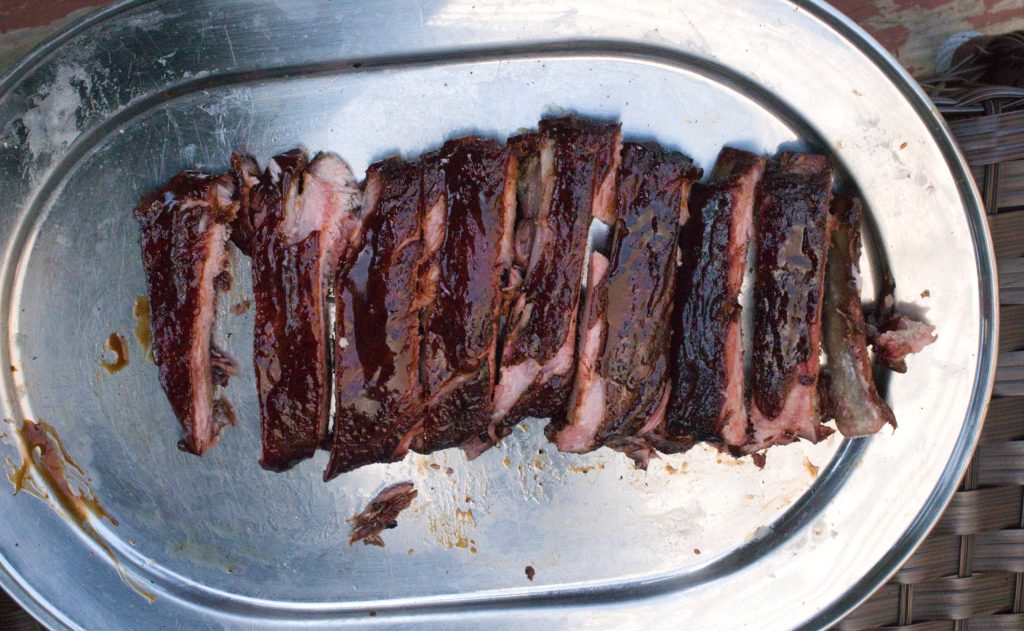
Once sauced, you can slice between the bones and serve them to friends and family. This rack of ribs was rather small but spare ribs typically offer 3-4 servings per person (3 to 4 ribs).
When doing these recipes, I almost always forget to take a picture of the final product. Even in this case I had already eaten half the rack and managed to remember taking a picture of the bite I just took.
Perfect tenderness for me.
The meat pulls cleanly off the bone when you bite it but doesn’t fall off the bone when holding the rib.

Pit Barrel Cooker Ribs Recipe
Ingredients
- 1 rack Spare ribs
Dry Rub
- 1/2 Tbsp Kosher salt
- 1 Tbsp Granulated Garlic
- 1 Tbsp Ground Black Pepper
Sauce
- 1/3 Cup Sticky Fingers Carolina Sweet Barbecue Sauce
Instructions
- Remove the spare ribs from the vacuum packaging and discard it in the trash.1 rack Spare ribs
- Don't rinse the meat in the sink. Pat dry with paper towels.
- Remove the membrane using a butter knife to lift and a spoon to further lift the membrane until you reach the other side. Then use your paper towel to grip and rip the membrane away from the bones.
- Apply dry rub ingredients to both the meat side and the bone side of the spare ribs.1/2 Tbsp Kosher salt, 1 Tbsp Ground Black Pepper, 1 Tbsp Granulated Garlic
- If smoking the same day, allow the ribs to sweat in the refrigerator until the smoker is ready. If smoking the next day, place in a container to dry brine overnight.
Getting the Pit Barrel Cooker Setup
- Put some charcoal in the char basket. Ribs are a rather short cook and you only need roughly a half basket of unlit charcoal. With your charcoal chimney, light a small amount of the lump charcoal. Once lit, place a few lit coals in the center of the basket.
- In order to prevent the charred edges (outlined above), push the char basket to the back of the away to create a 6-8 inch gap between the char basket and the intake damper.
- Add your hardwood to the fire. I prefer cherry wood with pork ribs.
- With the ribs, identify which side is thinnest and count 2 ribs towards the center. With your meat hook, put it between the 2nd and 3rd rib bone.
- Bring the ribs outside and hang from the rebar. Again, ensure that the ribs hang over the gap you created between the intake damper and the charcoal basket.
- After one hour of smoking, spritz the surface of the ribs with water. Put back on the smoker. At this point, every 30 minutes you should be spritzing with water until you reach a desired color. This process took me another hour.
- At this point you can wrap the ribs. I prefer to use butcher paper in order to preserve the bark as much as possible. Lay out two sheets of butcher paper and overlap them in the center. Spritz the paper with water and put the ribs meat-side down on the paper. Put grill grates on the PBC. Put the ribs back on the smoker meat side down (facing the fire).
- After 30 minutes start to check doneness. I usually use the twist/tear method with a center bone to see if the meat is pulling away from the bone. After another hour of smoking, the ribs were done.
- Bring inside to rest for 10 minutes.
Saucing the Ribs
- With your basting brush, sauce the ribs. You can be as liberal as you want with the sauce.1/3 Cup Sticky Fingers Carolina Sweet Barbecue Sauce


