How to Butterfly or Spatchcock a Whole Chicken (with Pictures!)

Last Updated:
December 8, 2023

To butterfly a chicken simply means to remove the backbone so that the bird can lay flat on your cooking surface.

The purported benefits being more exposure of the chicken skin and even cooking of the legs/thighs and the breast meat.

How to Butterfly a Whole Chicken

In order to spatchcock or butterfly a chicken, you will need:

  • Plastic cutting board or disposable work surface (like Butcher paper)
  • Kitchen shears or a sharp knife*
  • Paper towels

*I personally don’t recommend using a knife to butterfly a chicken. Maybe you’re more skilled than I am but I’ve had a few close calls when removing the backbone/going through ribs with a knife.

1. Remove the Giblet Bag and Pop-up Timer
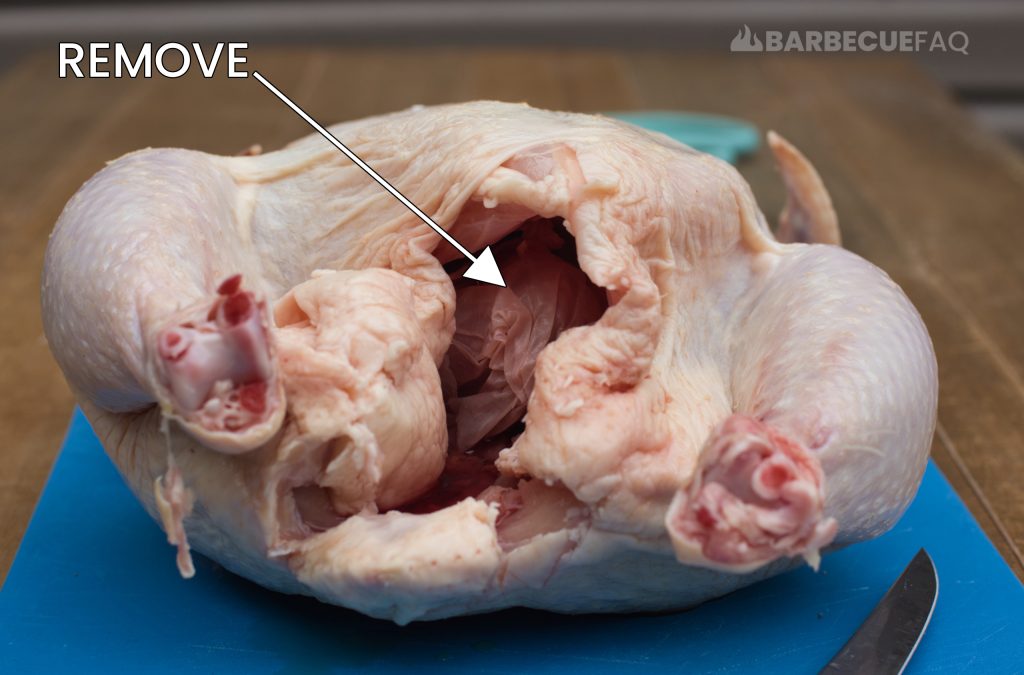
The first thing I always do is check the inside of the bird for the giblet bag.

giblet bag

The giblet bag contains parts of the chicken that most folks would consider offal – namely the gizzard, mechanical stomach, liver, heart, etc.

Keep in mind: The giblet bag that’s found in your Chicken isn’t from the original Chicken.

USDA

Even if you opt to cook the giblets, the bag should be removed to prevent the packaging from melting or being altered. If melted, the packaging can leach harmful chemicals into the surrounding meat.

Similarly, I also remove the pop-up timer if the bird has one in it.
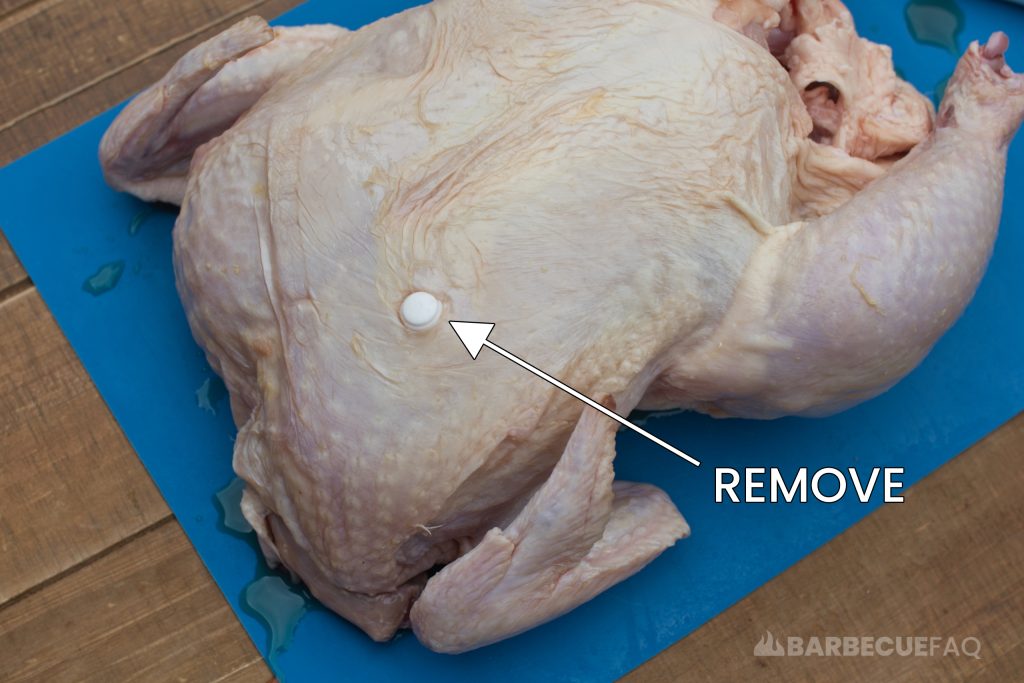
pop-up thermometer

This is as easy as pulling the pop-up timer out of the bird.

Both of these may not be present in your bird. However, they’re pretty common with Roaster chickens (which are around 5+ lbs). With a bird like a fryer or broiler they’re less common (which are around 2 – 4.5 lbs).

2. Pat Dry the Surface of the Chicken

The next thing I always do is pat dry the surface of the chicken. Aside from making the chicken easier to work with, it also helps with achieving crispy skin.

whole chicken pat dried

The reason for this is because the surface moisture needs to evaporate before browning can happen.

This same concept is true for steak and developing a desirable outer crust.

With chicken something that a lot of people struggle with is achieving:

  1. Breast meat that is cooked evenly with the rest of the bird.
  2. Crispy skin.

Pat drying and butterflying can help to address these issues.

3. Remove the Backbone

Start with the whole chicken so that the breast is facing the cutting board and the backbone is up. The bird should look like this:

whole chicken backbone side

I prefer to cut from the tailbone end towards the neck (the side with the drumsticks and thighs).

chicken tailbone

You then want to use your kitchen shears to cut parallel to the tailbone – both on the left and right of it – to remove the backbone.

cutting tail bone

I find that alternating between both sides is helpful. Mainly because the ribs keep the backbone straight, which makes cutting easier.
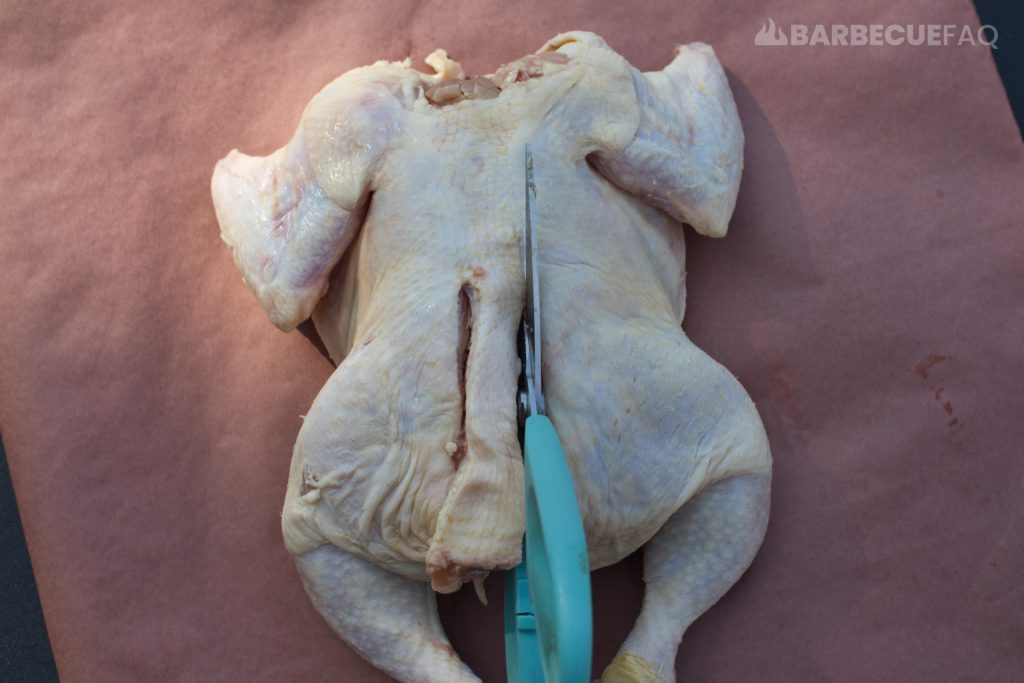
removing backbone

When one side is cut at a time the backbone gets pushed to the side that isn’t cut and you’re left trying to cut on an angle.

4. Clean the Inside

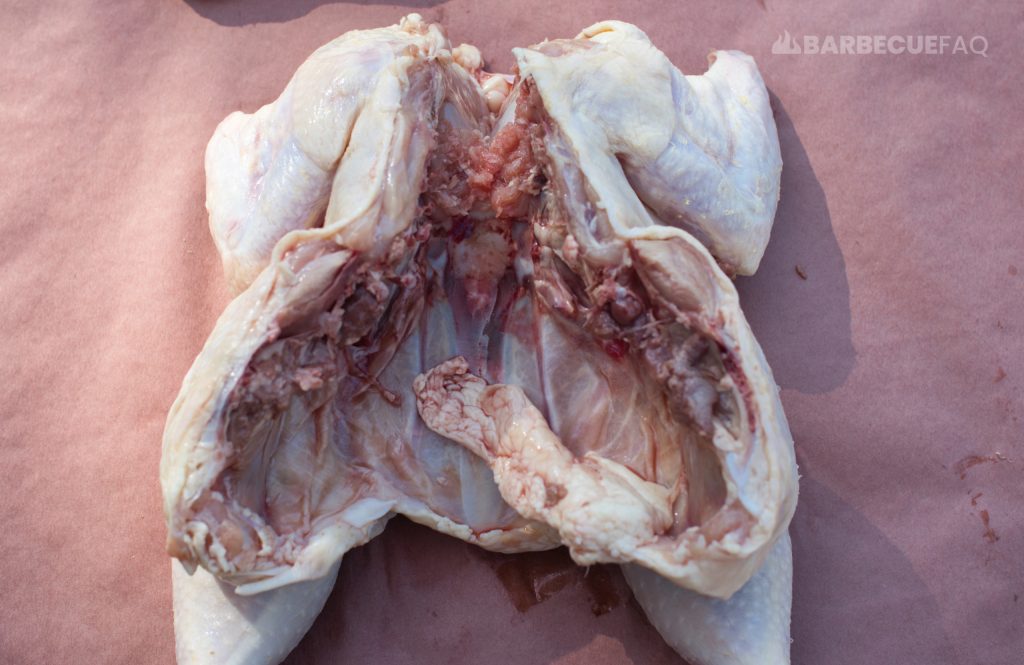
Now that the backbone is removed, the inside of the chicken will be exposed and laid open:

backbone removed

Sometimes the inside of the bird will have entrails that I prefer to remove, namely parts of the kidney that are left near the thigh meat.
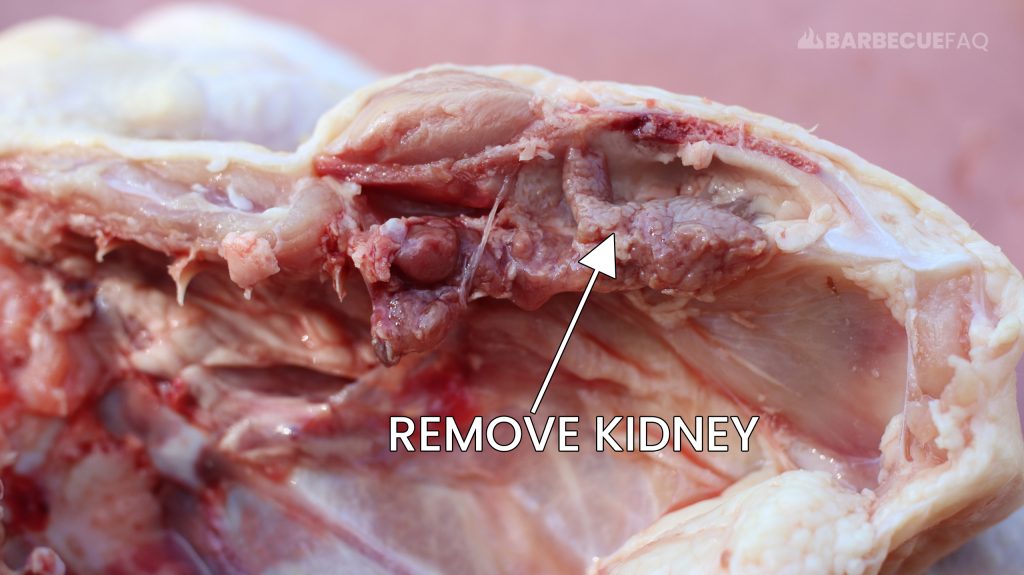
remove chicken kidney

I find that paper towel works well to take the remnants out.

If they’re giving you a hard time, you can use your knife to scrape them out.

5. Remove Fat Globules and Scraggly Skin

With the inside exposed, I like to do a quick trim of the fat globules and scraggly skin.

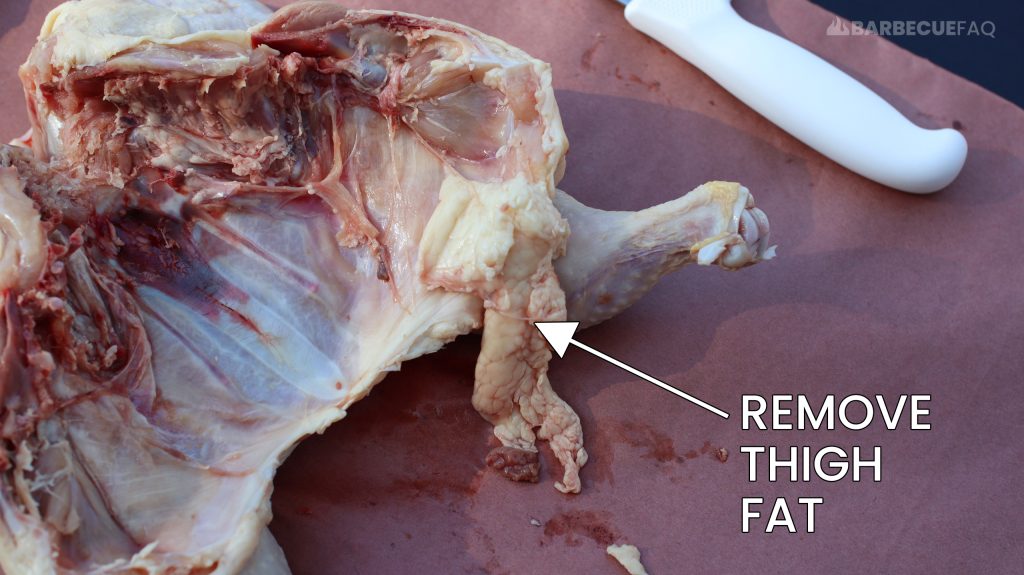
Typically the thighs will each have a large piece of fat that extends from them (my bird only had it on one). You can use your hands to tear this fat off and it will cleanly pull away from the thigh.

remove chicken thigh fat

If it doesn’t, use a sharp knife or kitchen shears to remove it.
Similarly, the breast will typically have scraggly skin and exposed fat near where the neck would of been; Use a sharp knife or your kitchen shears to remove this.
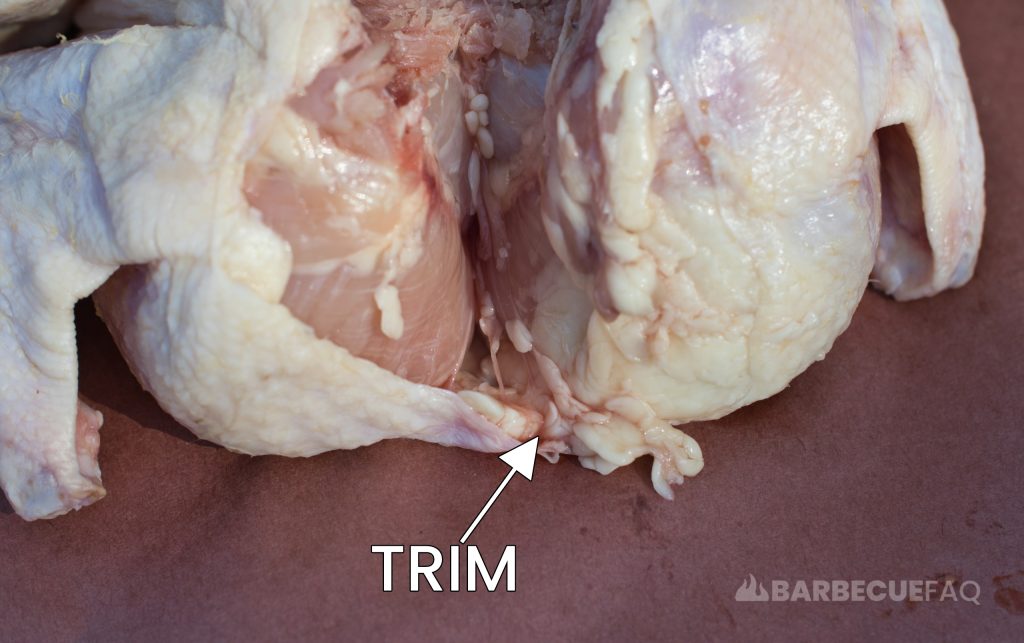
neck skin

You want enough skin so that it covers each breast; Any excess fat also isn’t necessary and likely won’t render.

The small bit above I trimmed with my kitchen shears.

Here’s the inside of the bird with the excess fat and kidneys removed:
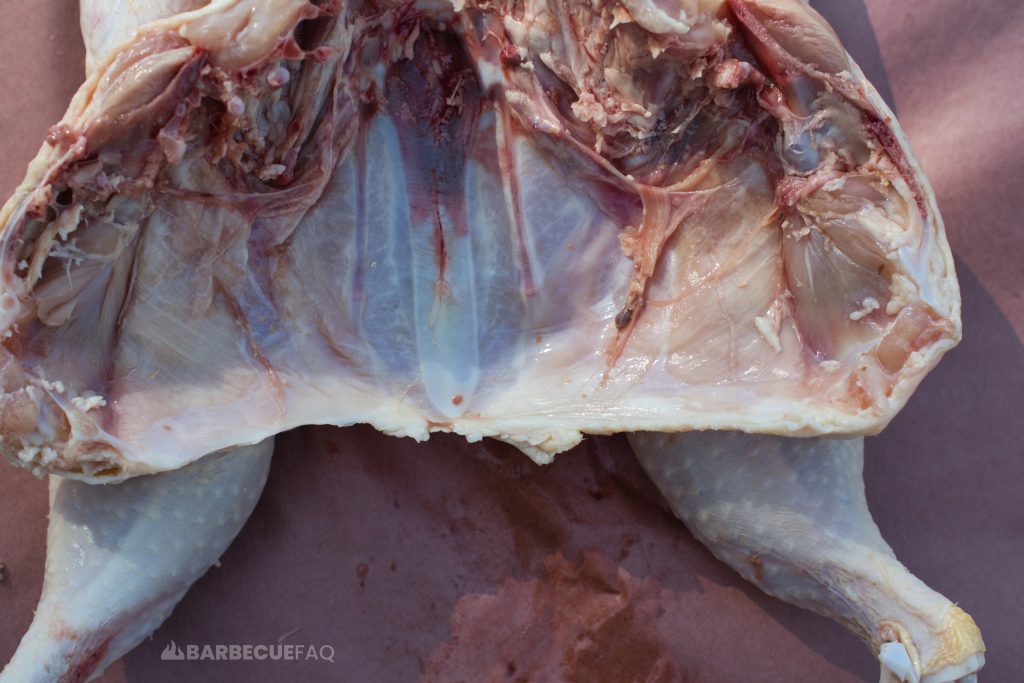
chicken thigh fat and kidneys removed

5. Flatten the Chicken

There are two popular methods people use to flatten the chicken.

  1. Pressing your hands into the breast meat until you hear an audible crack from the clavicle breaking.
  2. Breaking the clavicle with kitchen shears.

I personally find that using kitchen shears to break the clavicle (wish bone) is the most consistent. Since we already have the bird facing down, it’s also right there and easy to do.

I first like to make an incision with a sharp knife into the meat. As indicated by the dotted white line:
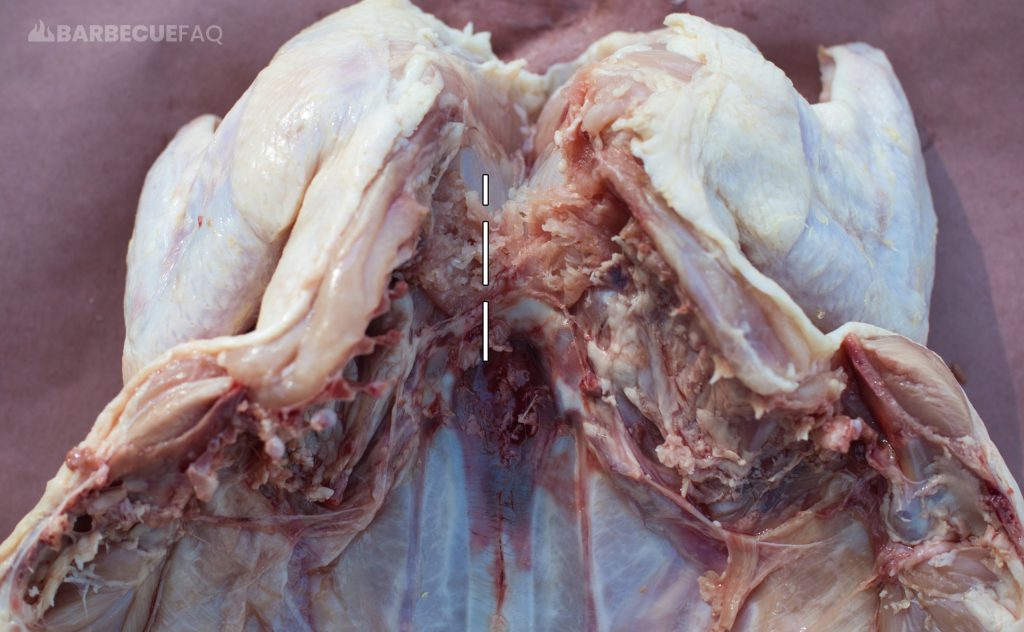
breast bone whole chicken

This helps expose the clavicle so that I can get under it with my kitchen shears.
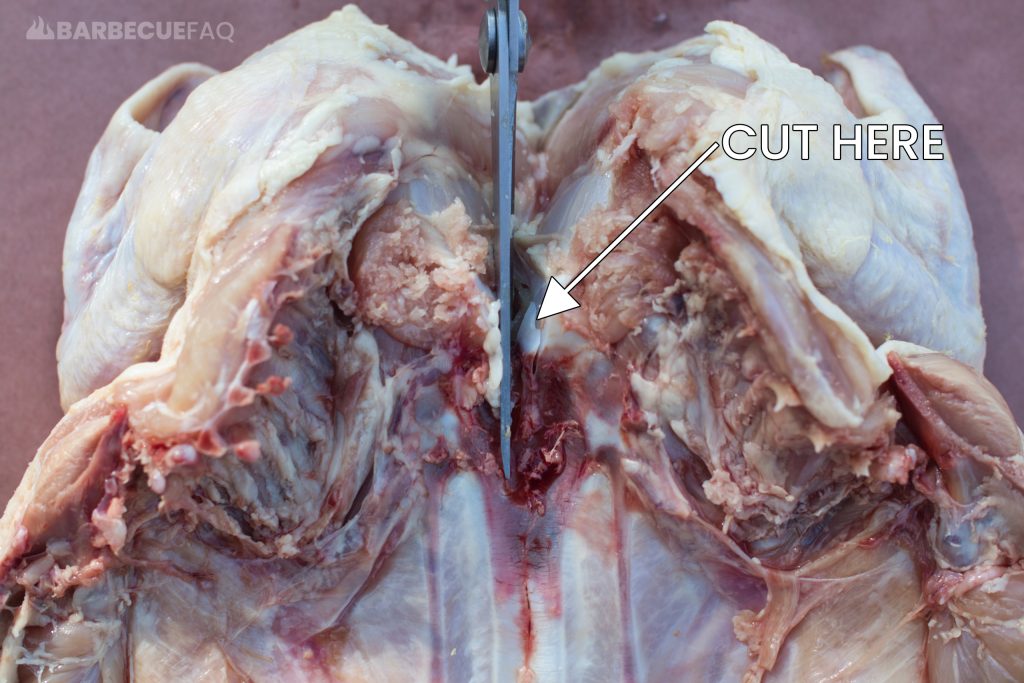
breaking clavicle

Just to get a better visual of what this looks like:
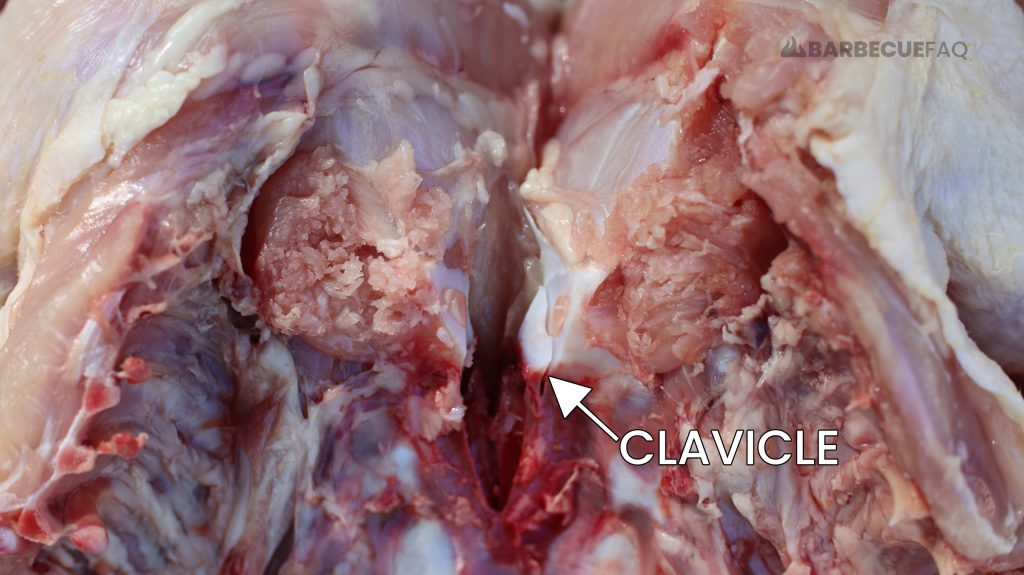
clavicle broken

We can now flip the bird over to verify that the bird is laying flat and that it’s spatchcocked:
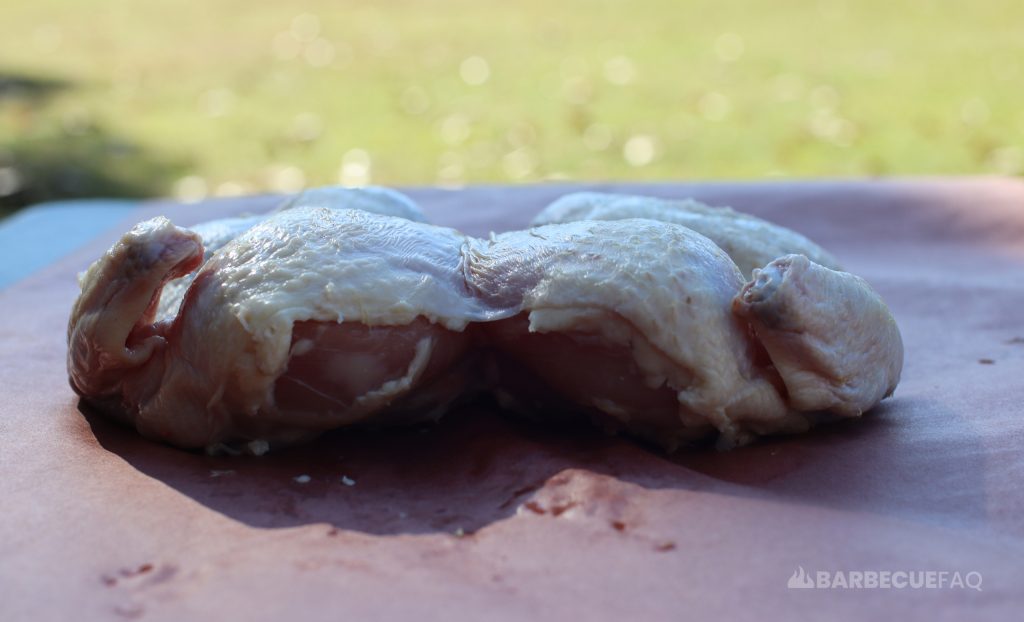
spatchcocked bird is now laying flat

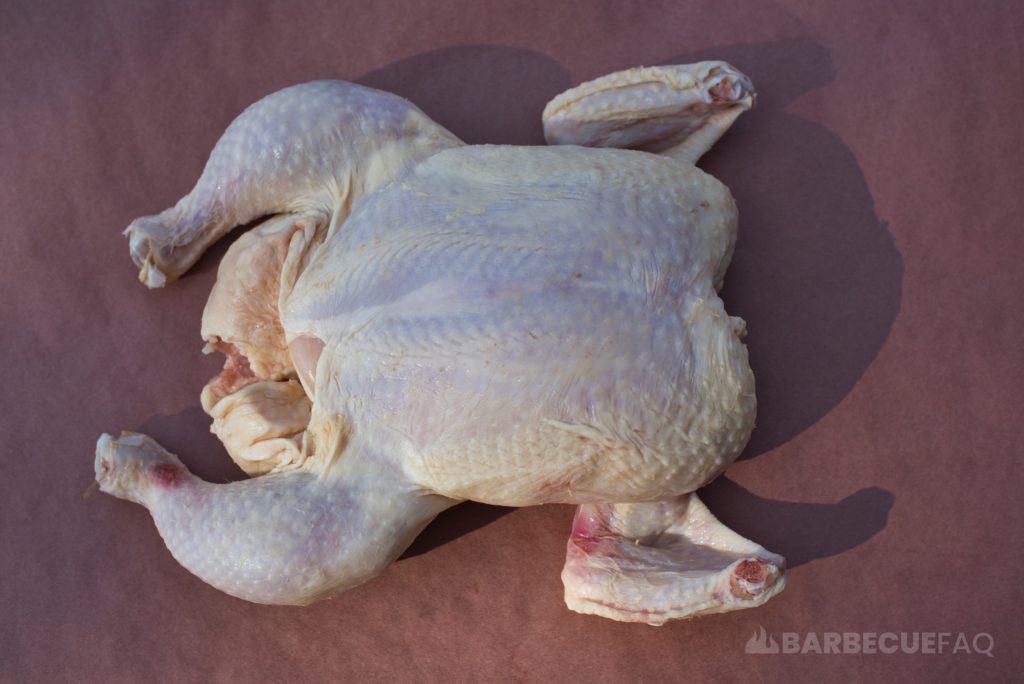
The bird lays flat and is now considered spatchcocked or butterflied.

Here’s an alternative view of the bird – top down:
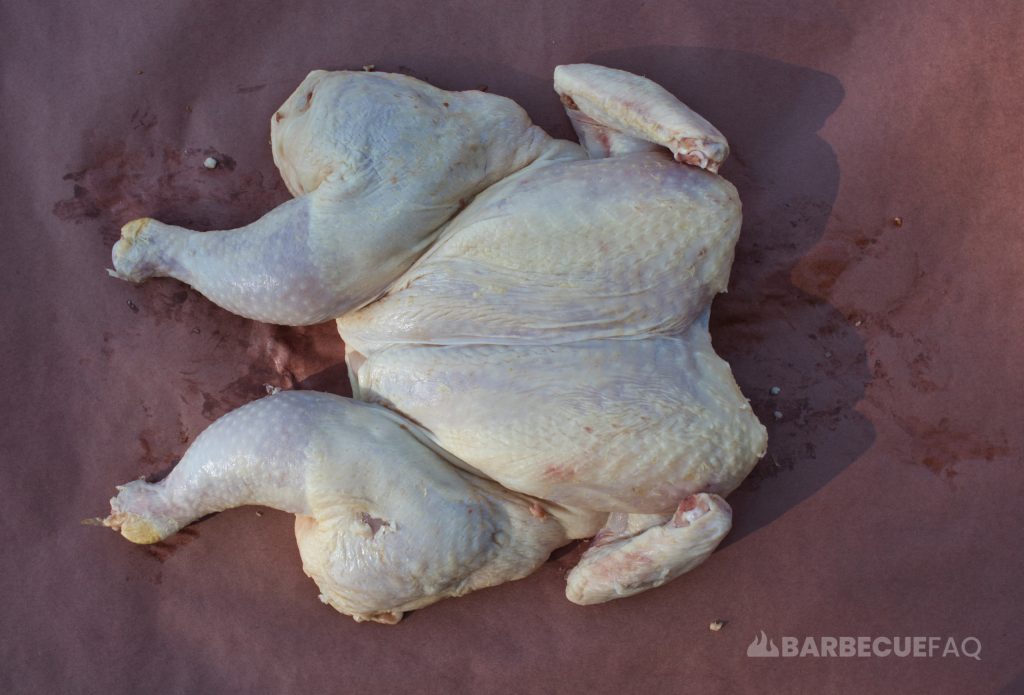
spatchcocked chicken
dylan bio profile picture
Dylan Clay
Dylan Clay is a pitmaster based in New Hampshire, with over 17 years of experience in grilling, smoking, and dehydrating meat. Throughout this time, he has worked with nearly every cut of meat. In 2019, he launched the Barbecue FAQ website to share his extensive knowledge about all things meat, aiming to assist others in making better barbecue at home.

Leave a Reply

Your email address will not be published. Required fields are marked *

magnifiercrossmenu linkedin facebook pinterest youtube rss twitter instagram facebook-blank rss-blank linkedin-blank pinterest youtube twitter instagram