The grain of chicken breast isn’t uniform, rather it will bend and curve.
Note: I did my best to roughly outline the grain direction.
As you can probably guess, this makes it somewhat hard to cut exactly against the grain because your knife doesn’t curve.
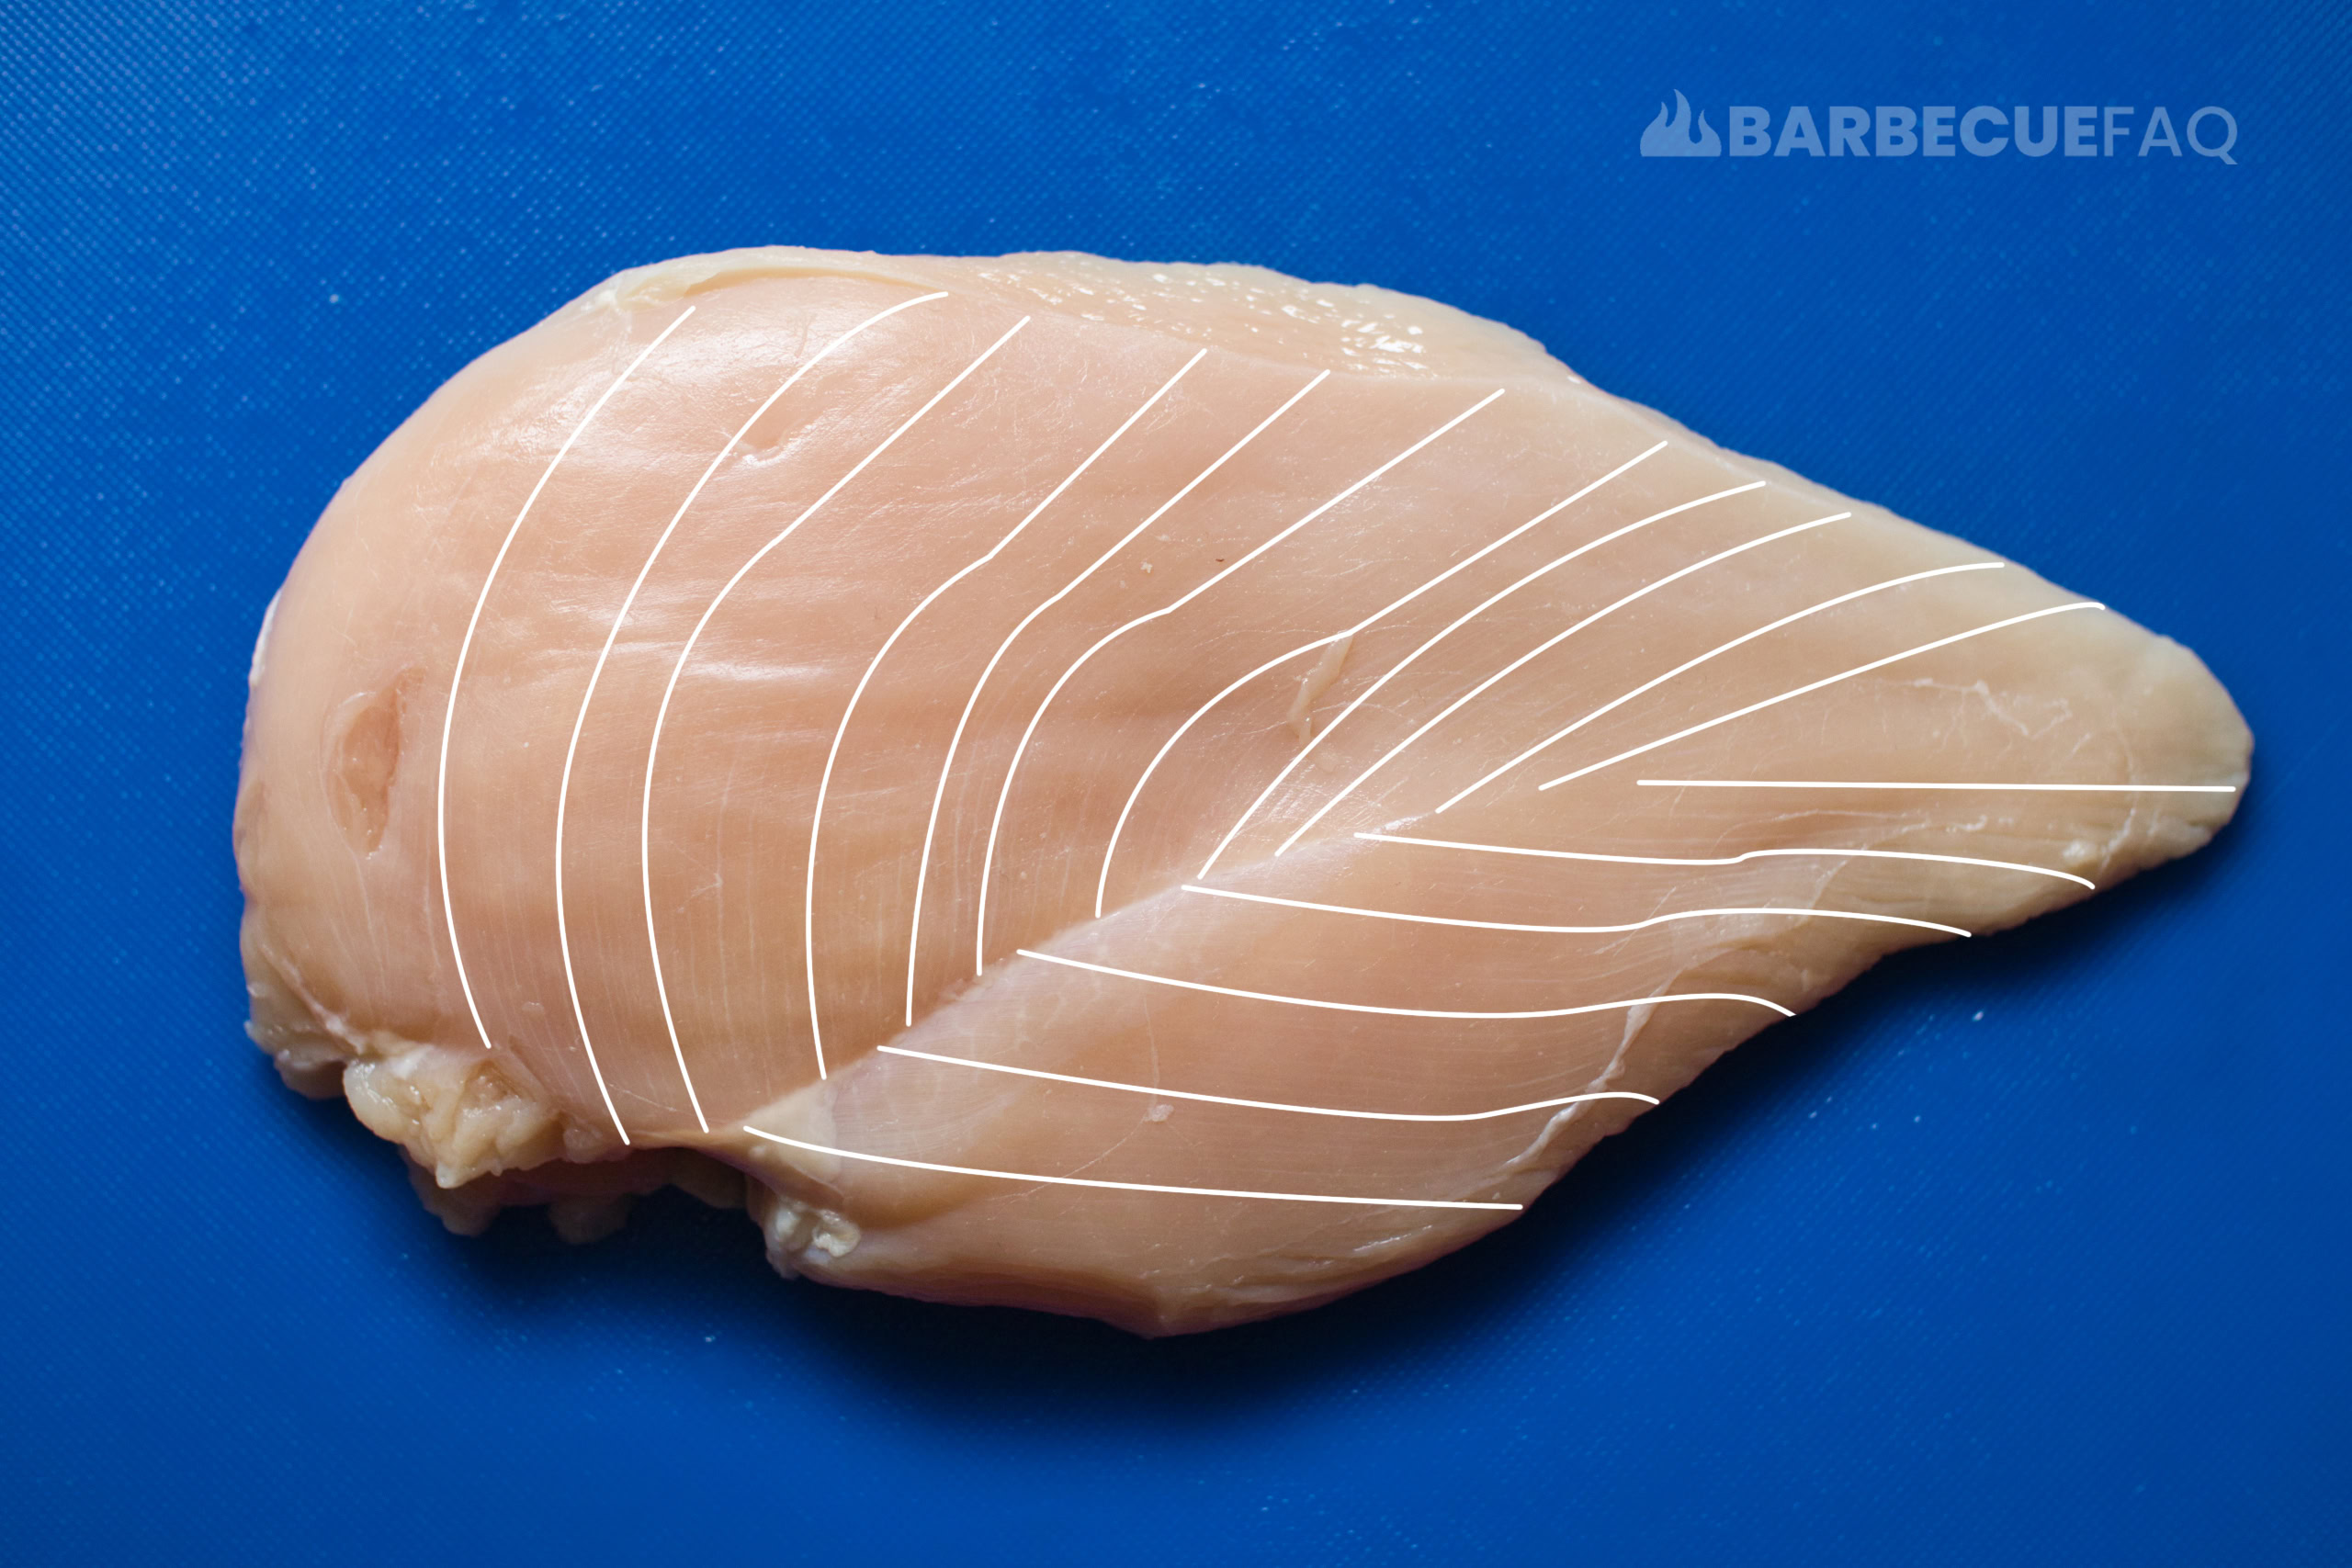
The “Optimal Way” to Slice Chicken Breast
When looking at chicken breast you can see the musculature has a white tendon that runs through it.
Here’s a picture of what I’m referring to:
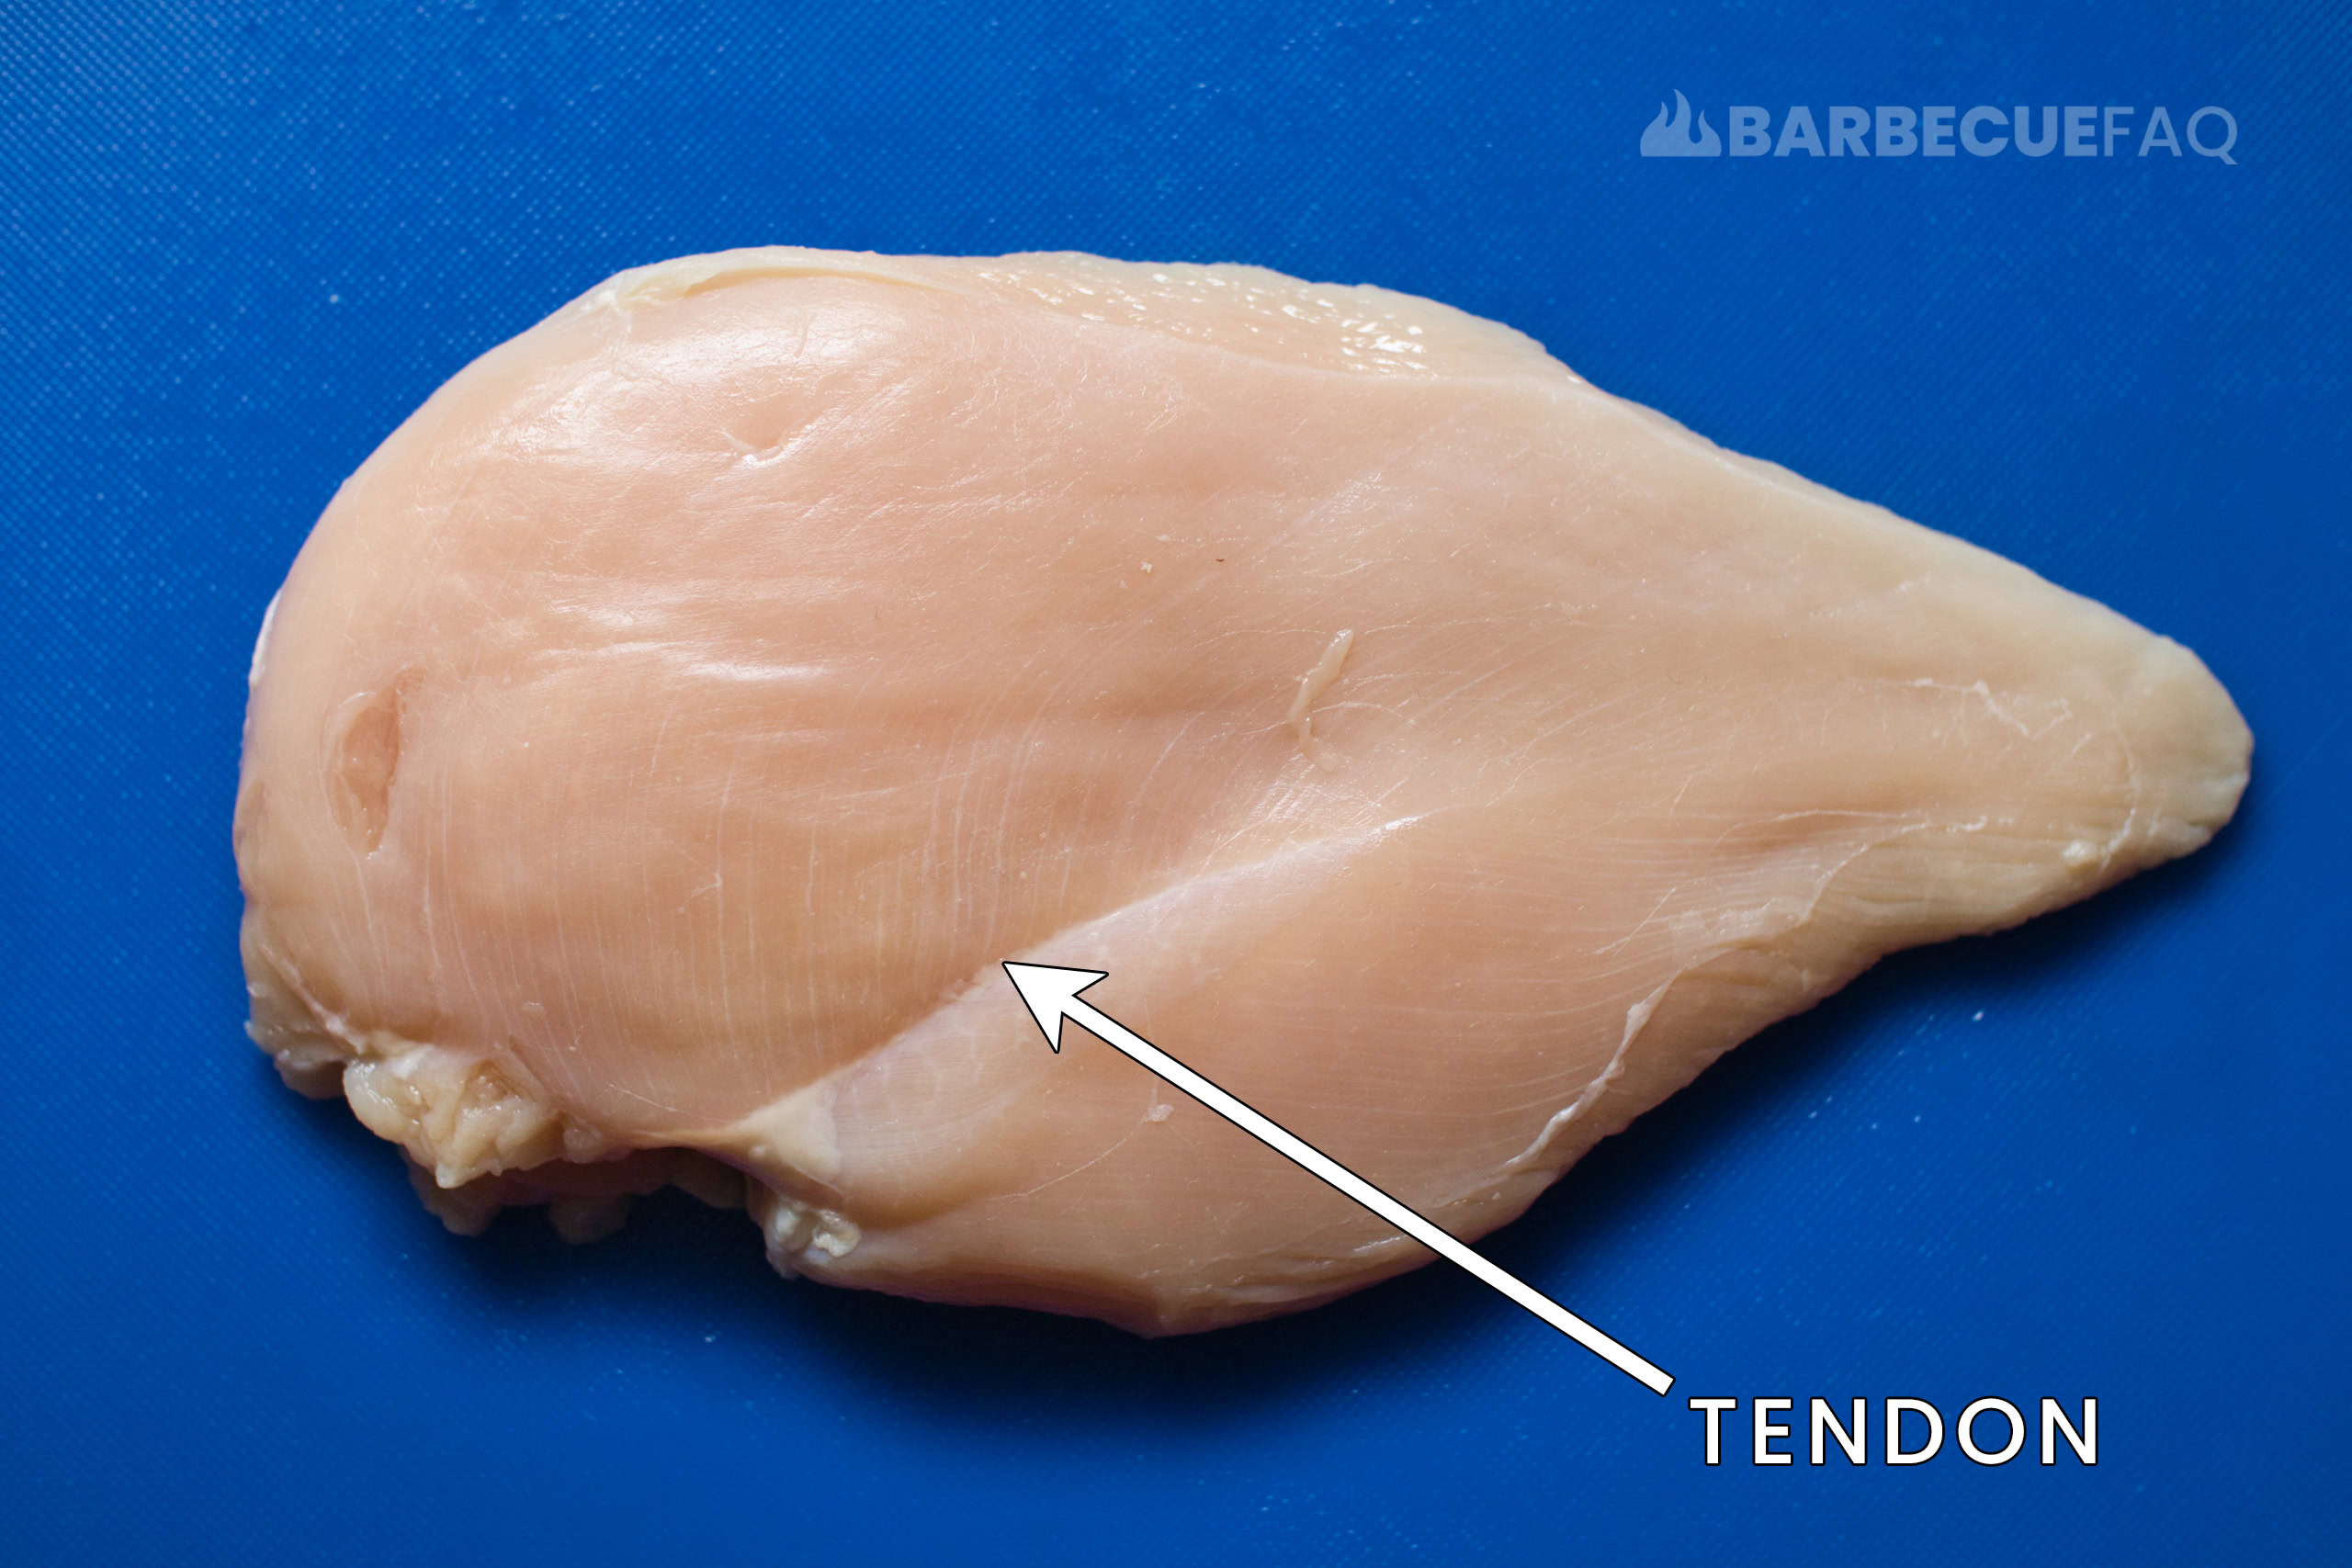
At this tendon is where the grain “shifts” or “fans out.”
Rather than attempting to slice the chicken breast whole and compensating for the angle (a near impossibility), you can slice the breast in half at this tendon after cooking:
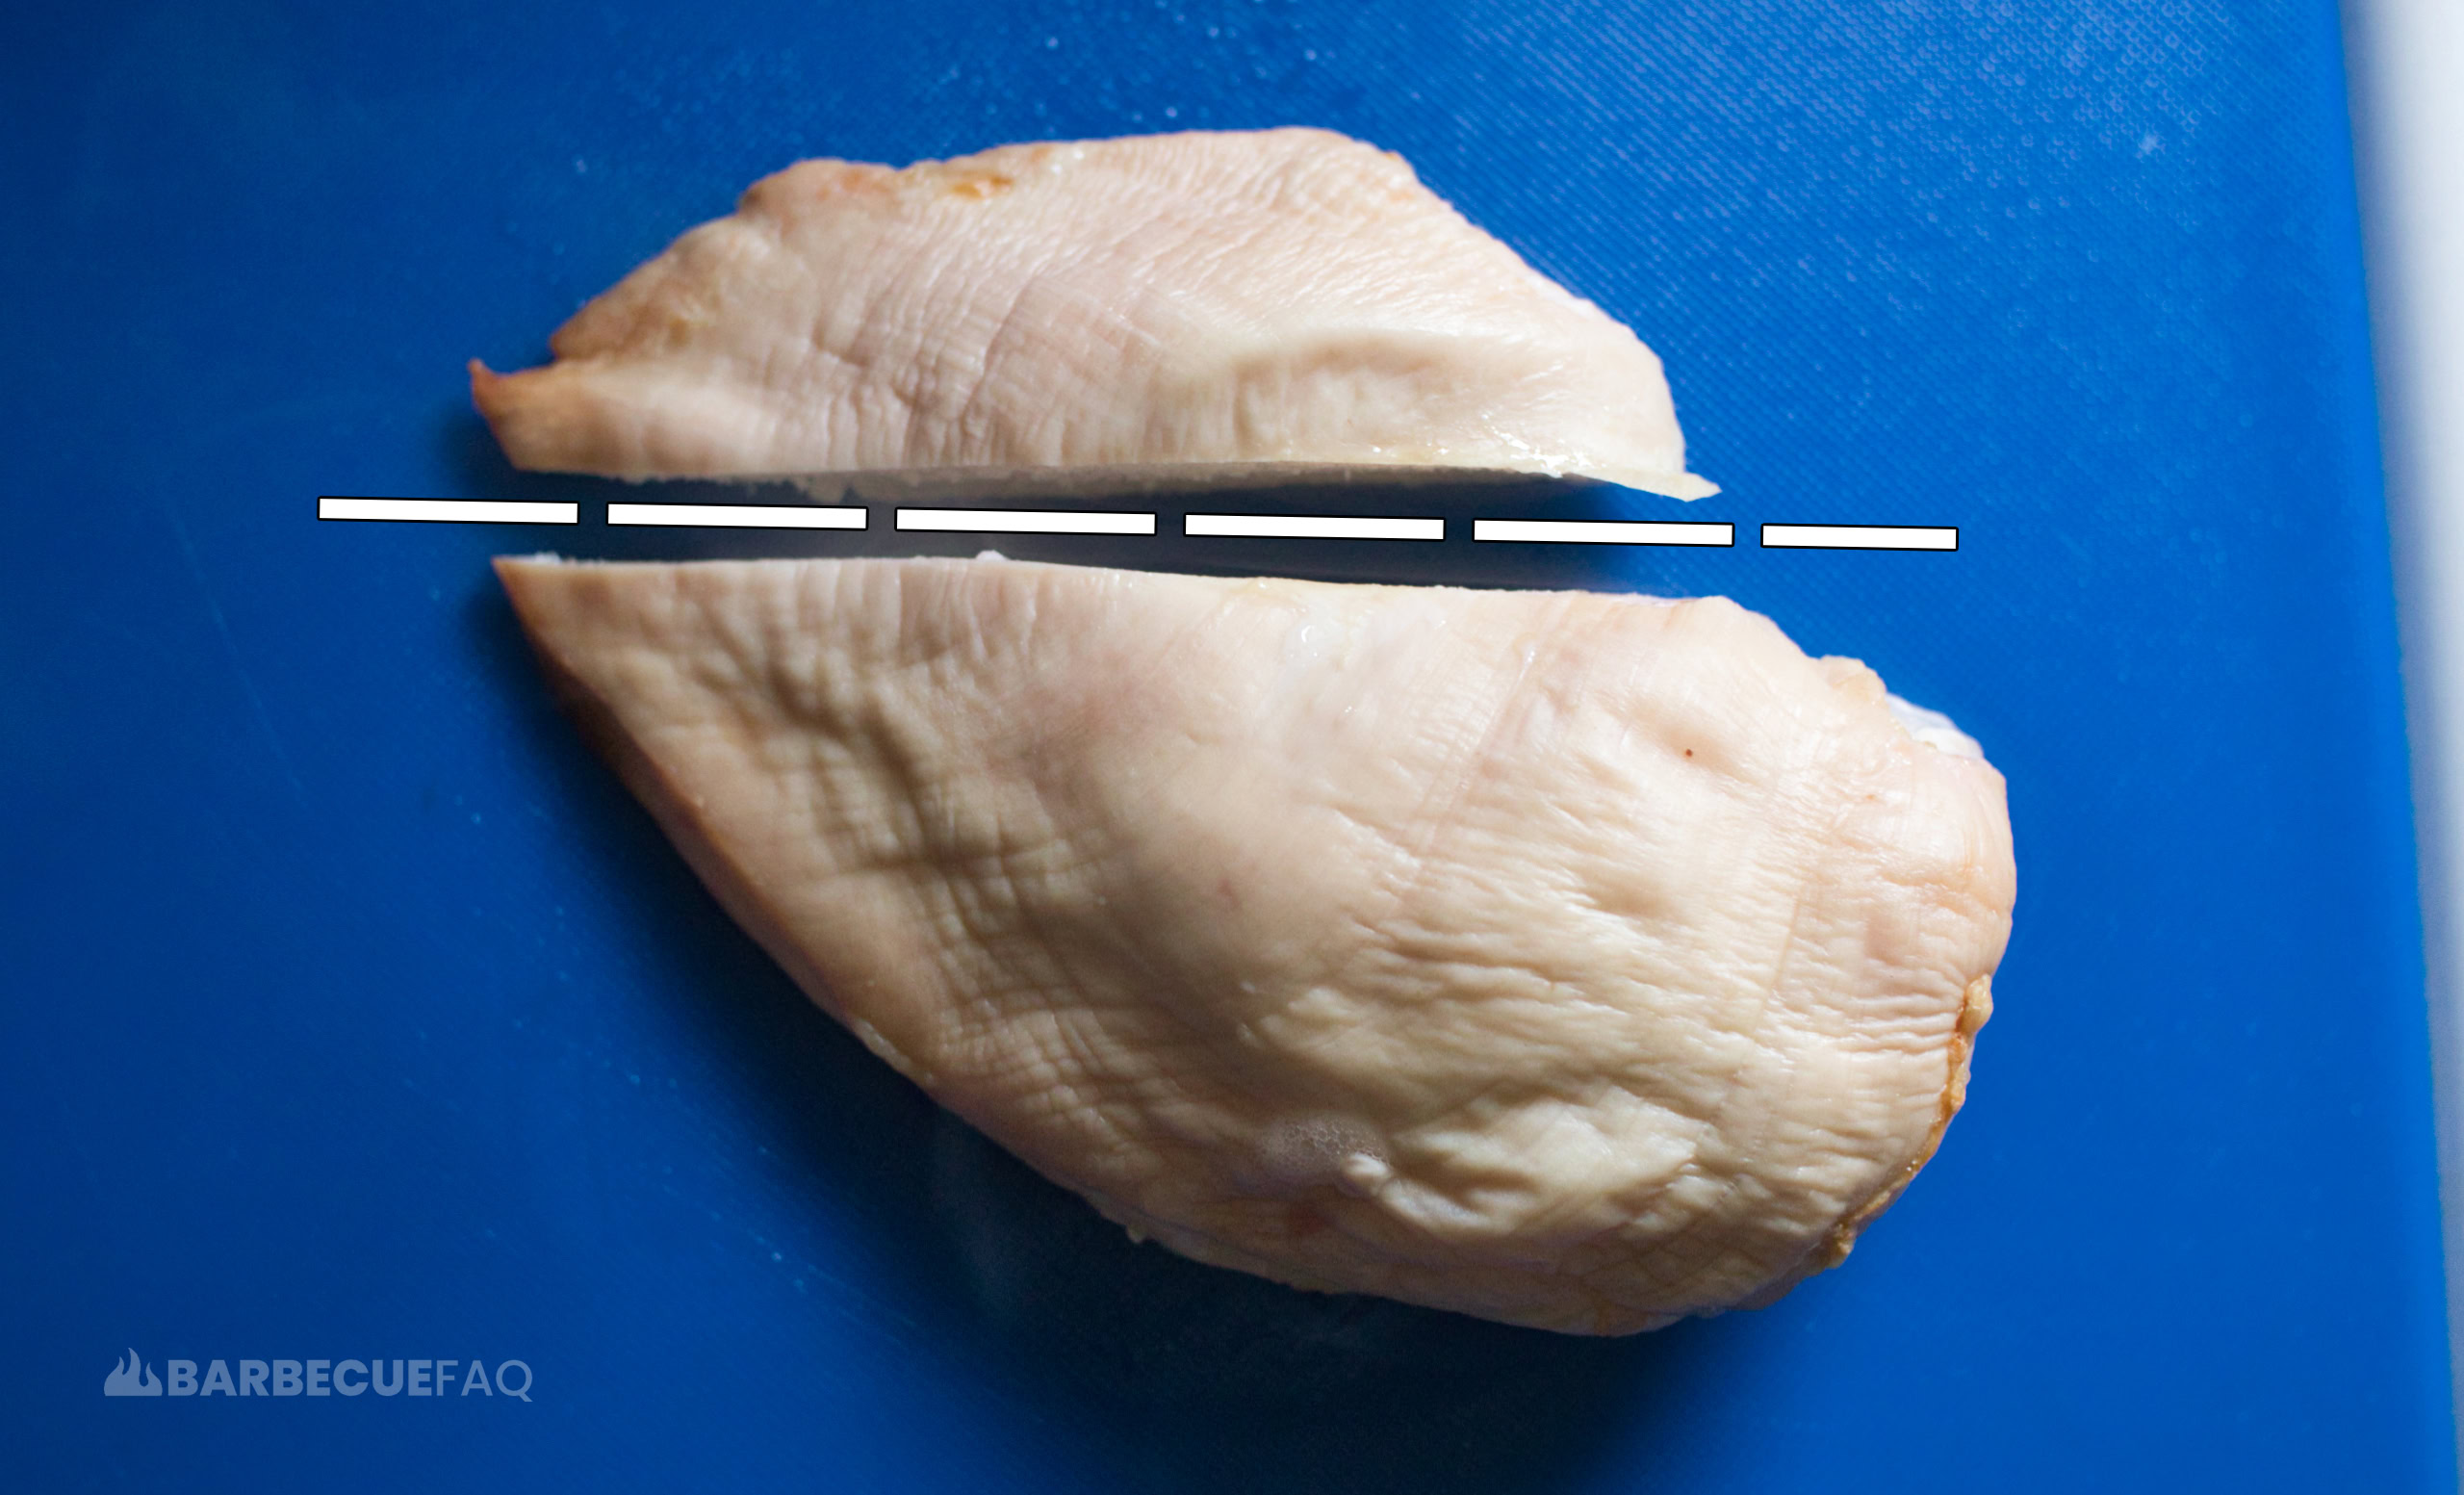
By doing this, I can look at the cross section or a reference photo (above) to see what the grain looked like.
After separating the two pieces, you can attempt to cut along their respective grain.
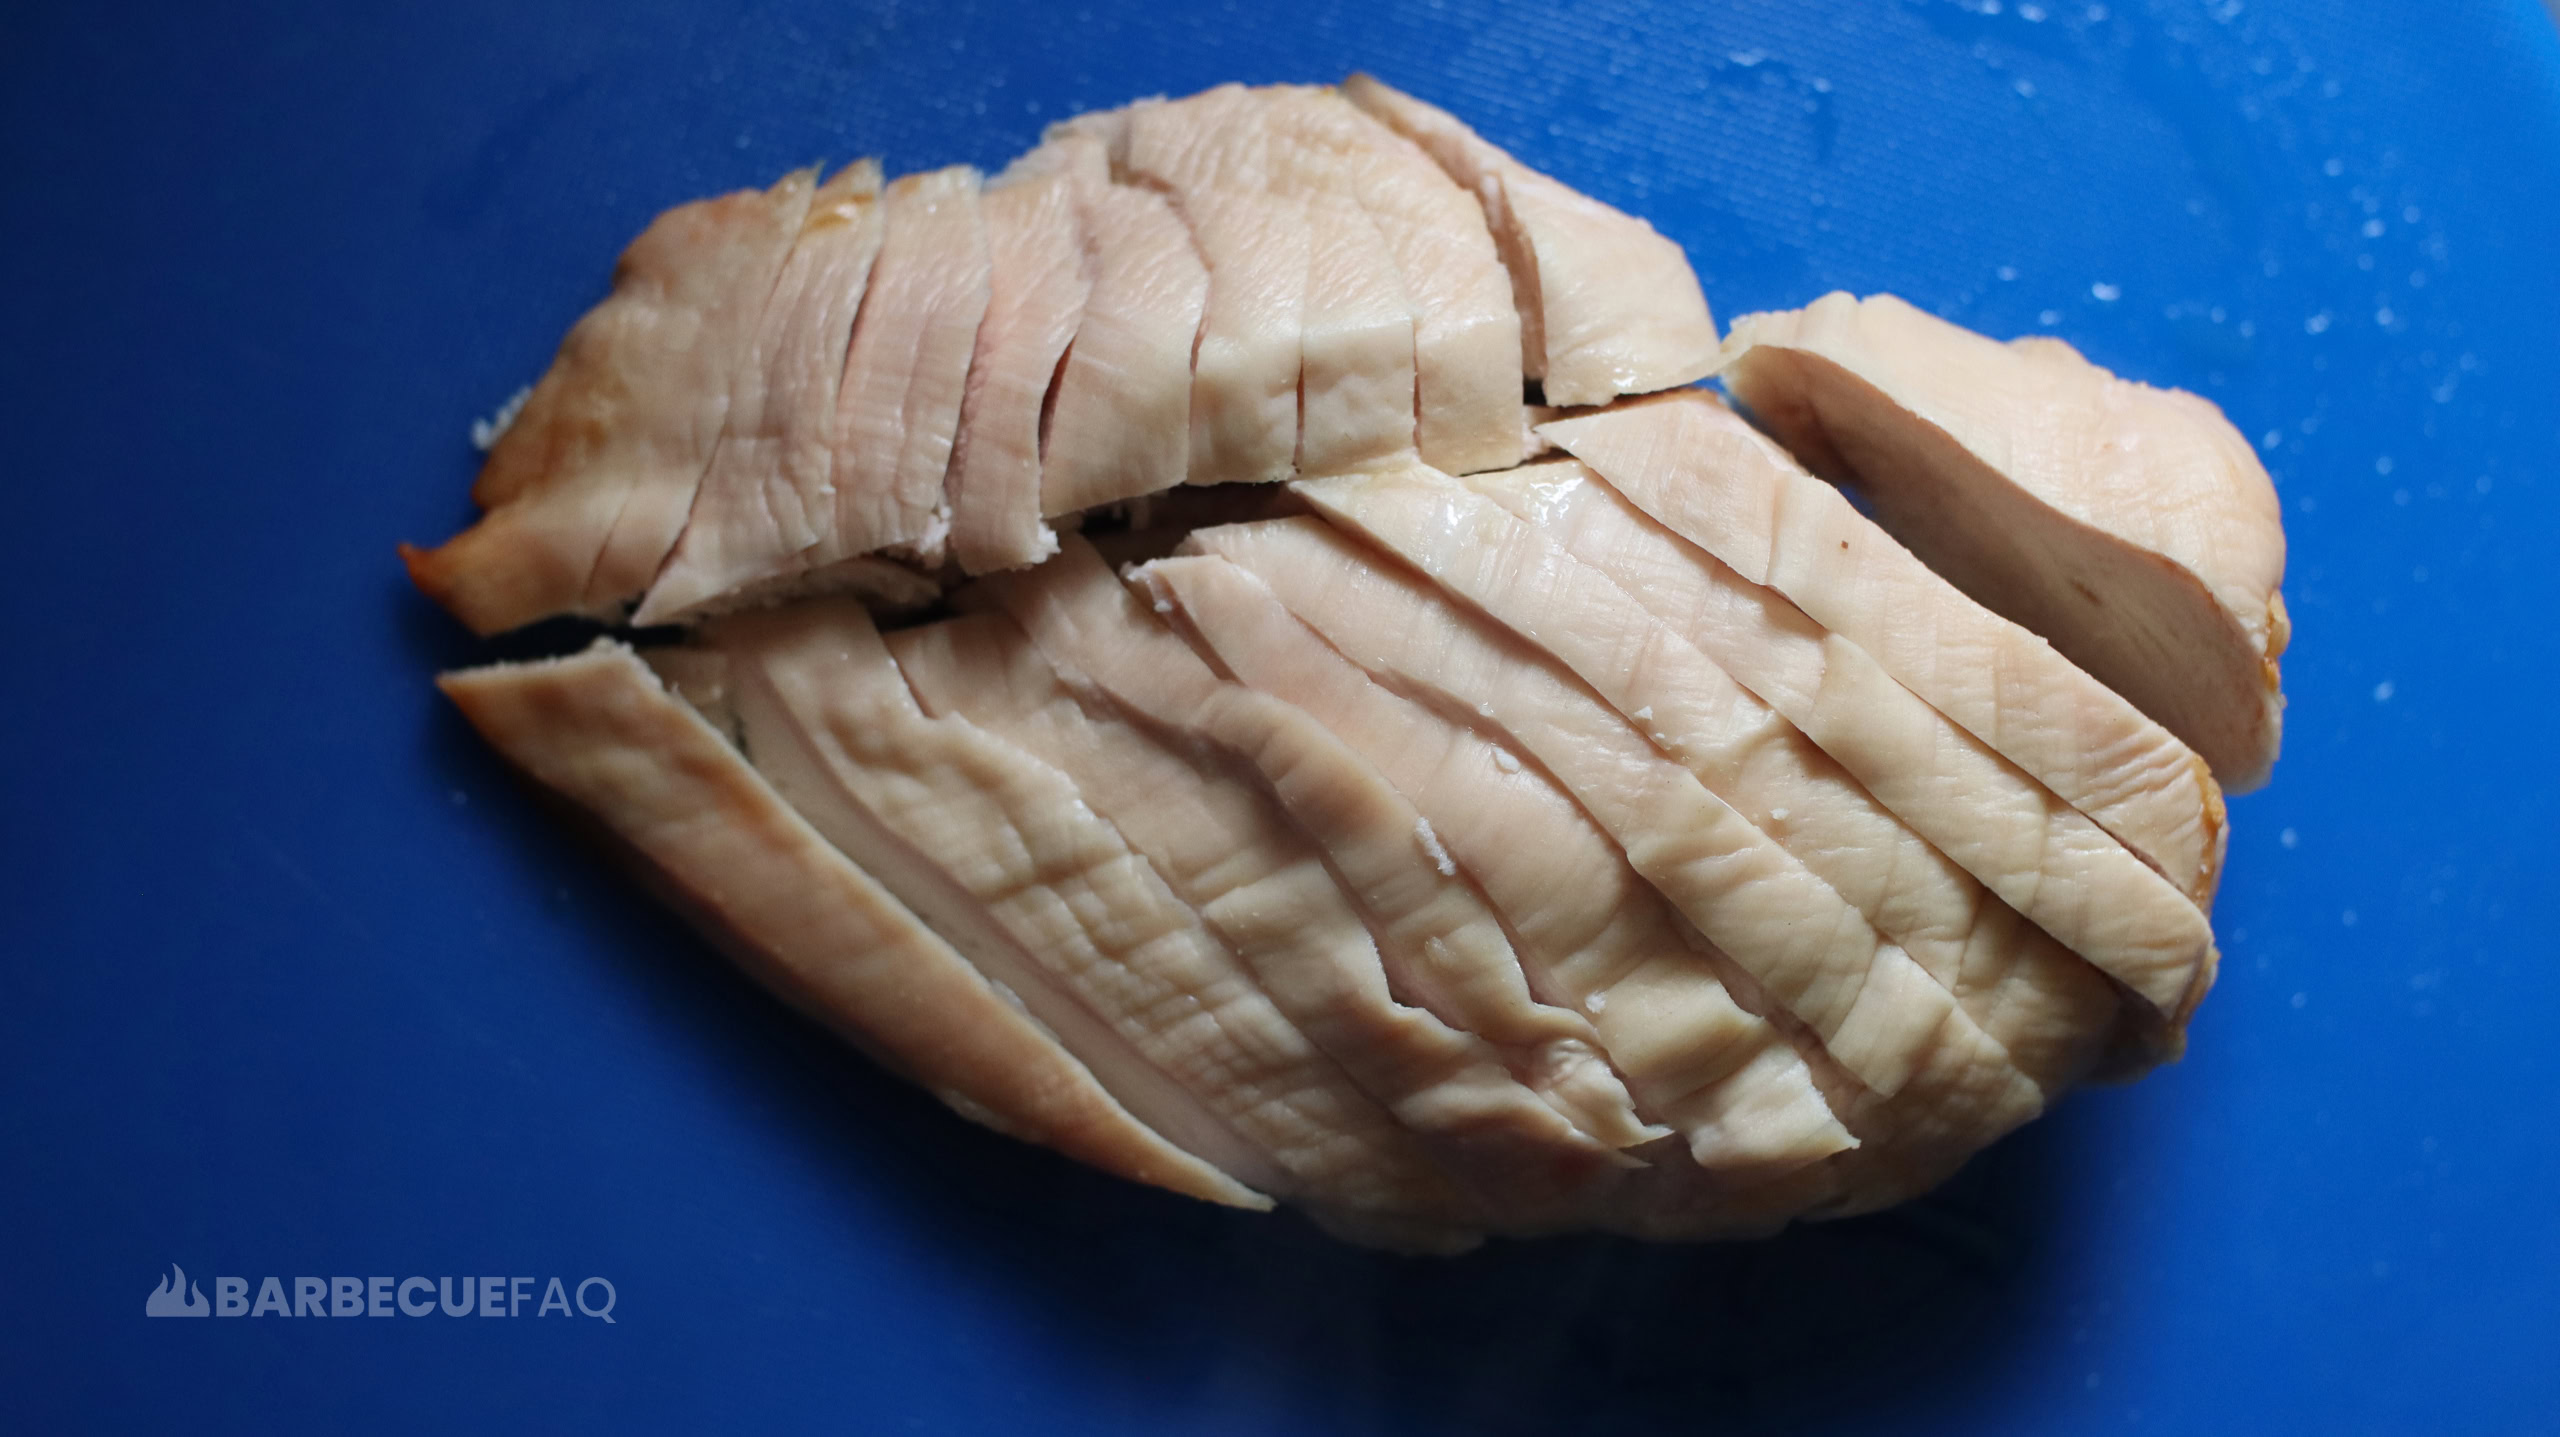
Here’s these pieces post-slicing:
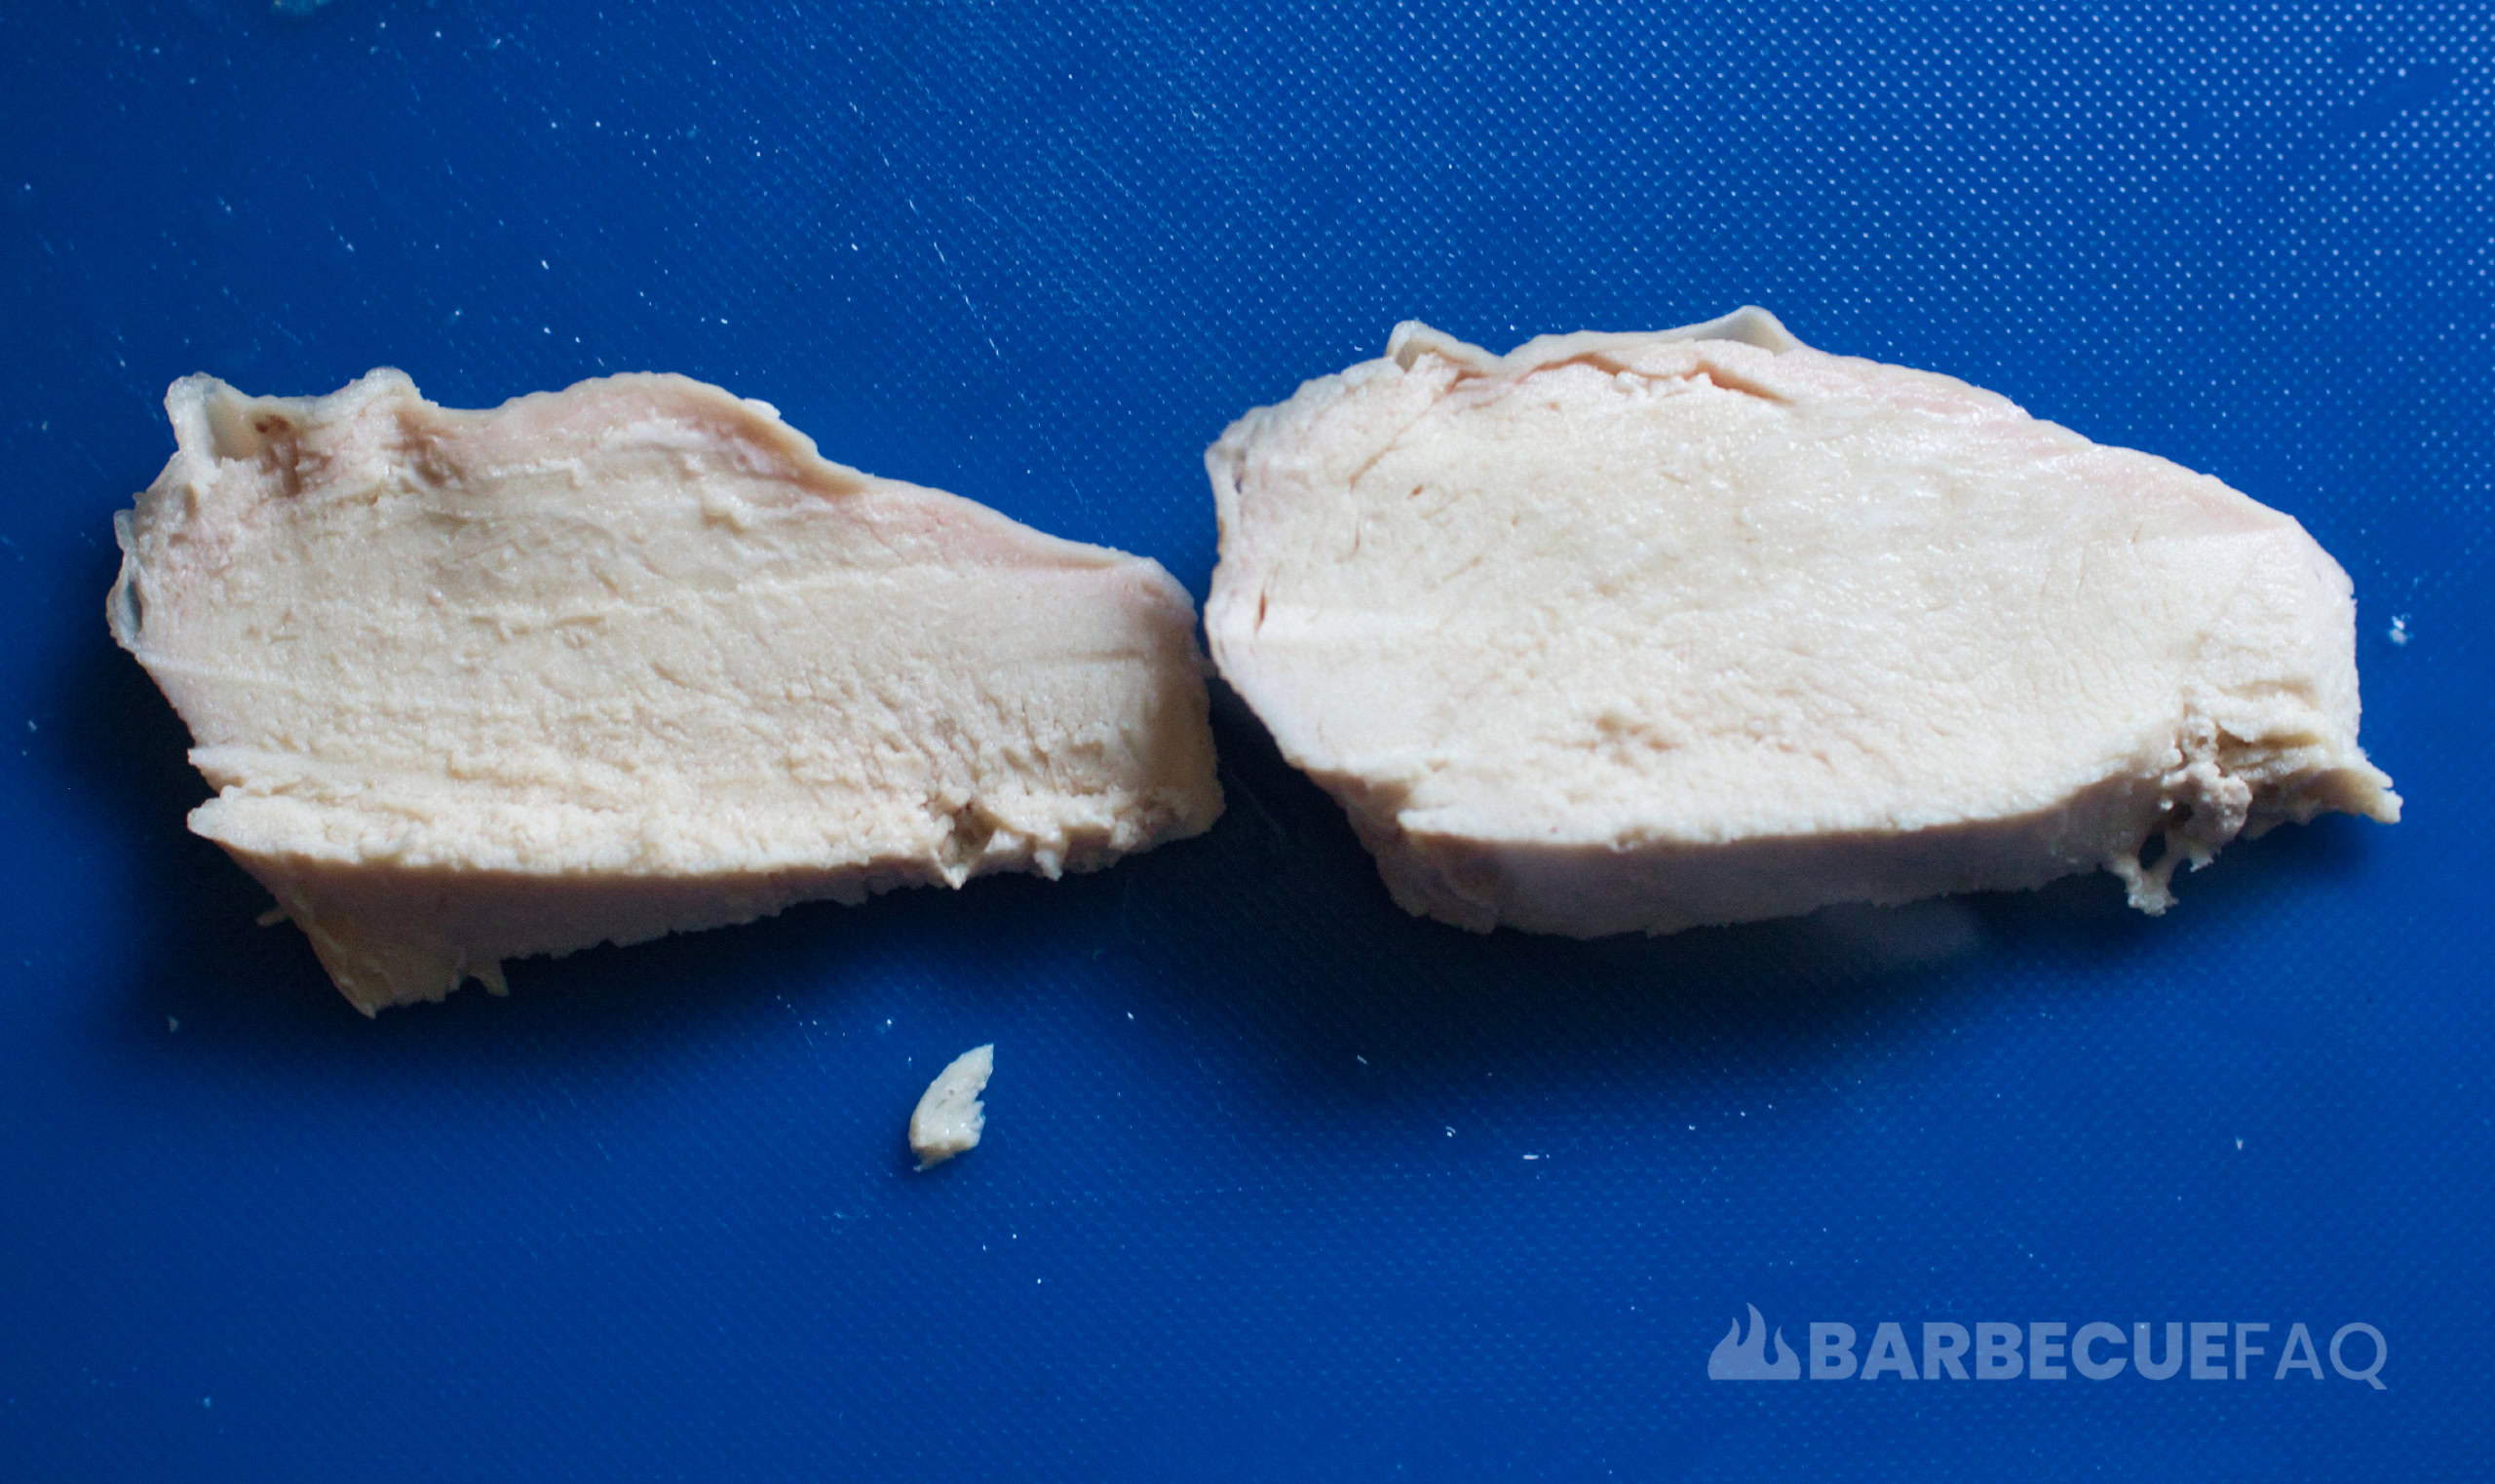
I then applied slight horizontal outward pressure to tear the meat apart:
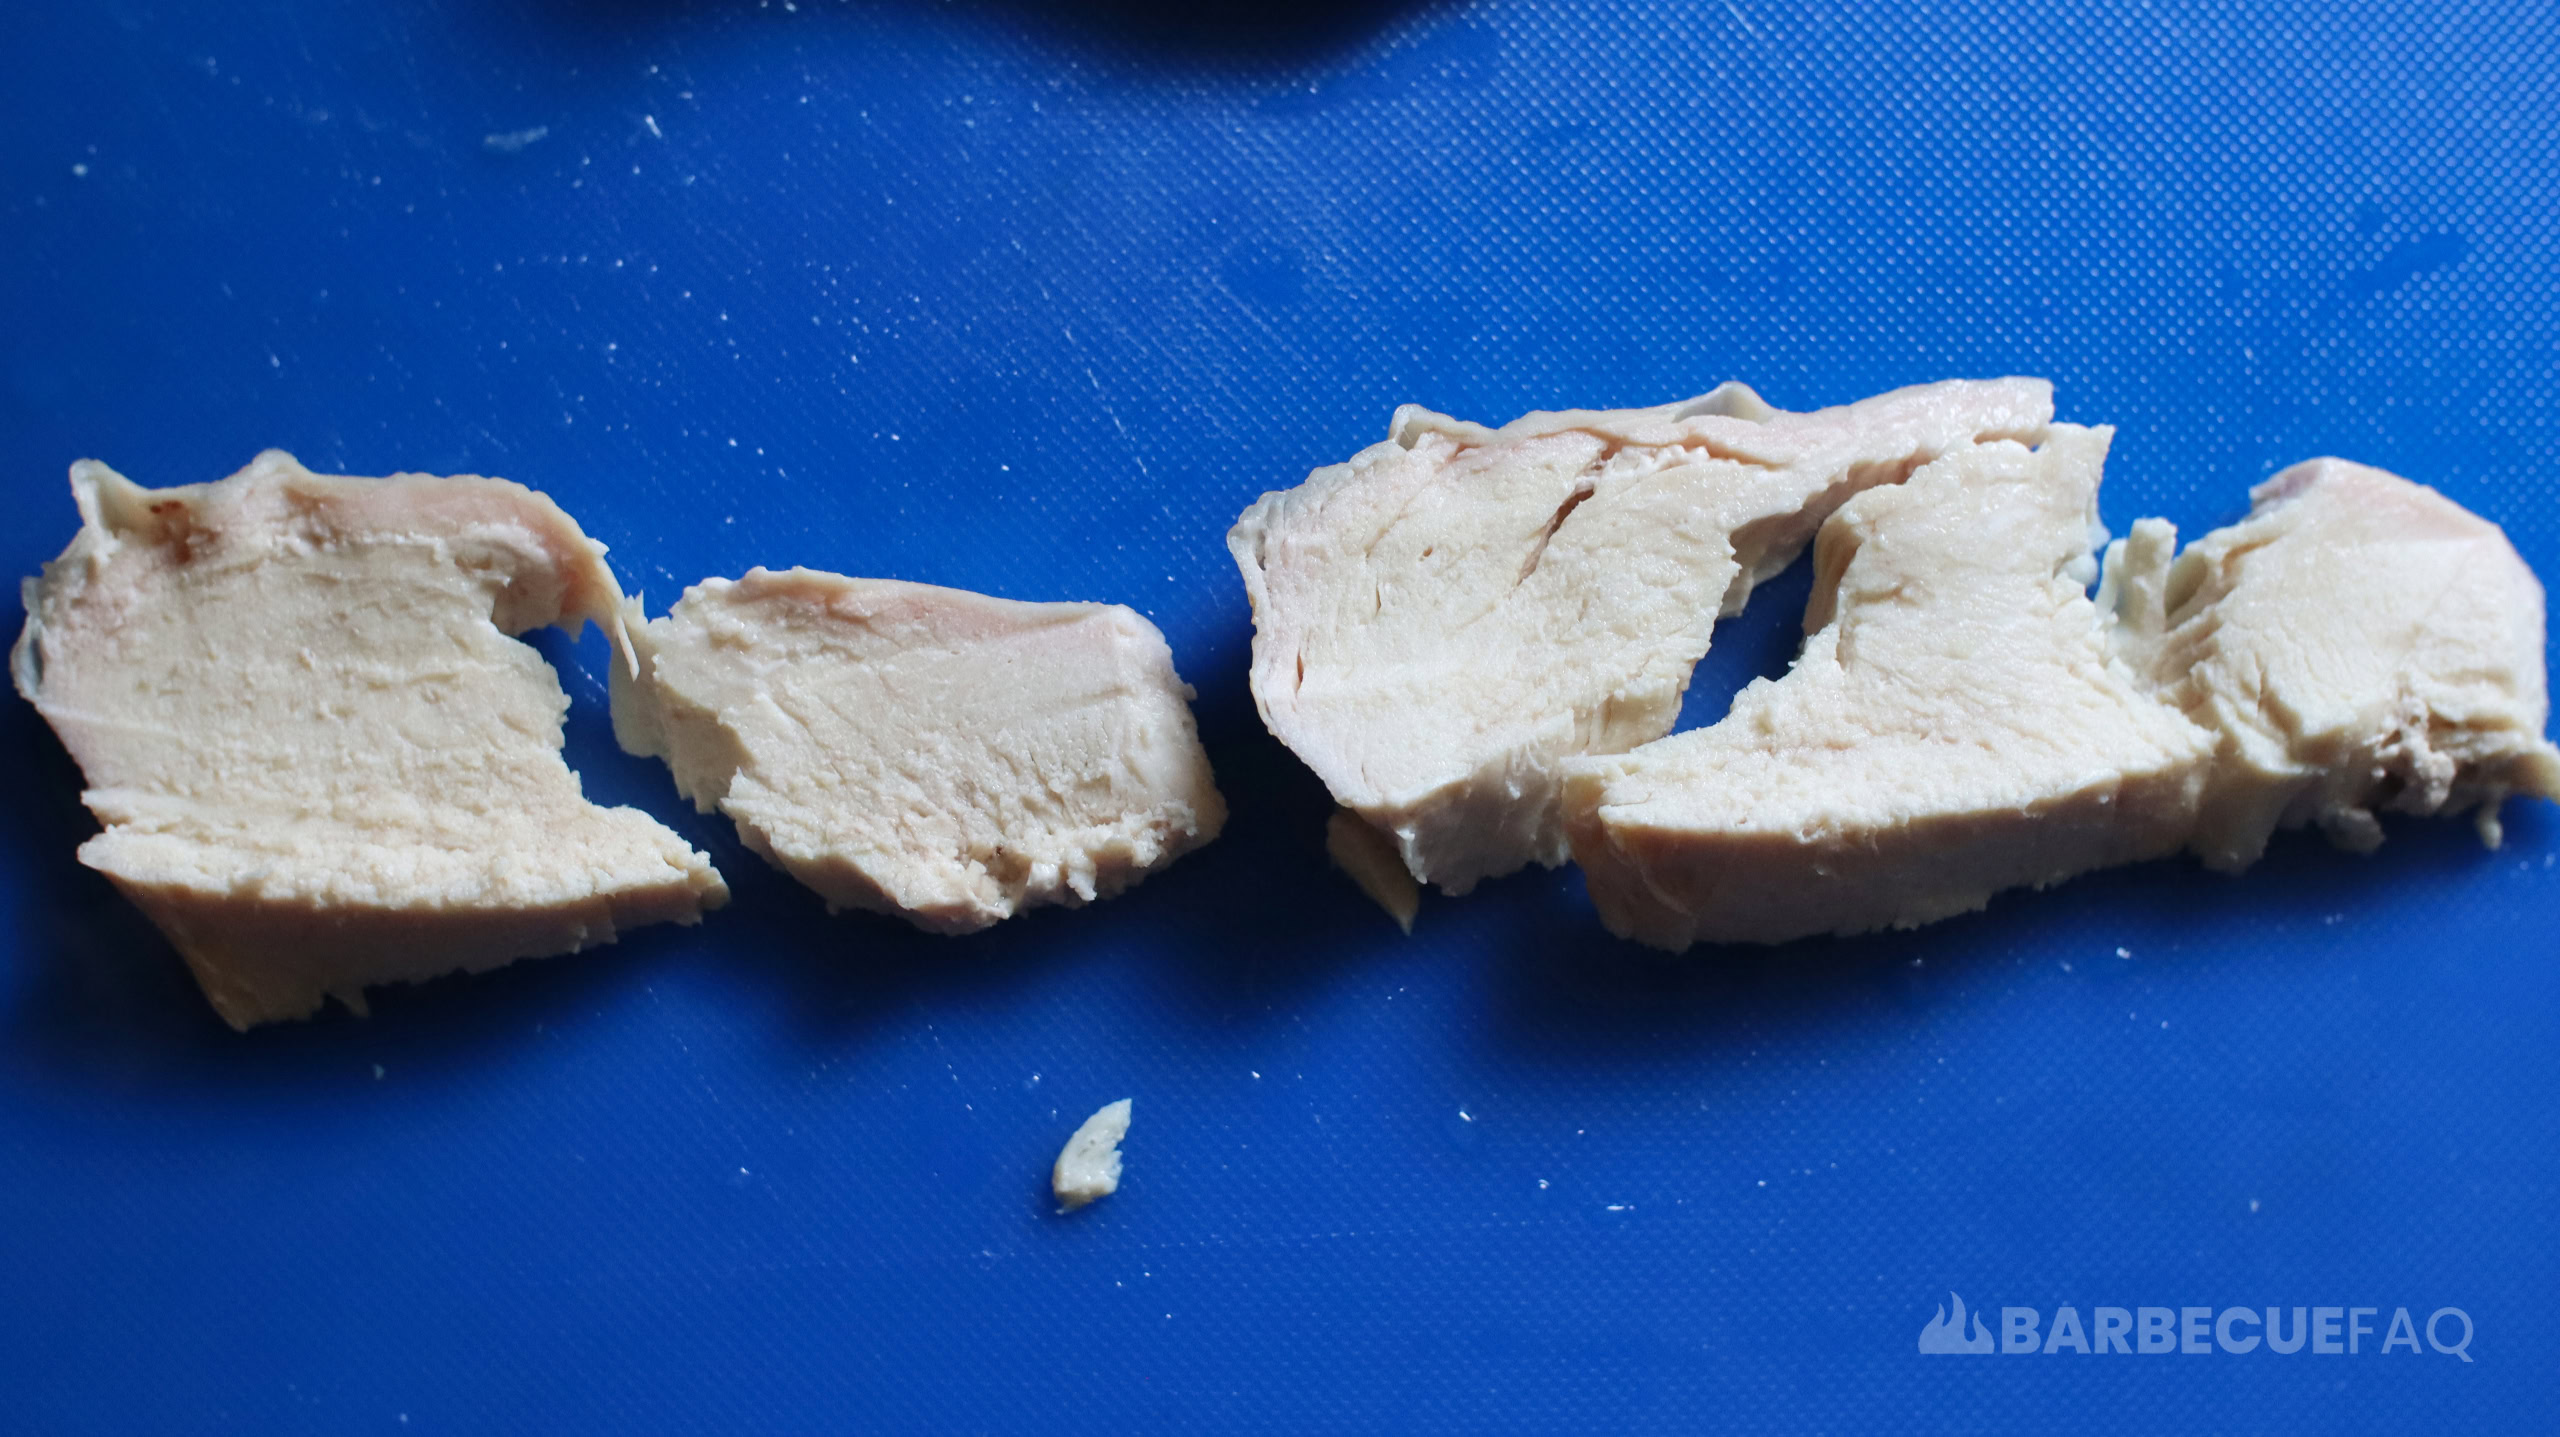
As we can see, the meat naturally tore across it’s grain.
I could of definitely sliced more optimally but again your knife isn’t a fluid object. All you can do is do your best to orient it roughly against the grain.
The Realistic Method for Slicing Chicken Breast
To preface:
Chicken breast has a relatively loose grain structure – this is the reason chicken breast is cooked to 165F – which is for pathogen lethality; Or it’s cooked with certain time-temperature specificity (pg 37.).
So it’s naturally pretty tender.
The only reason I bring the above up is because in most cases it doesn’t really matter how you slice; Even if you were to slice with the grain, most people wouldn’t bat an eye.
Here’s a chicken breast cut in half:
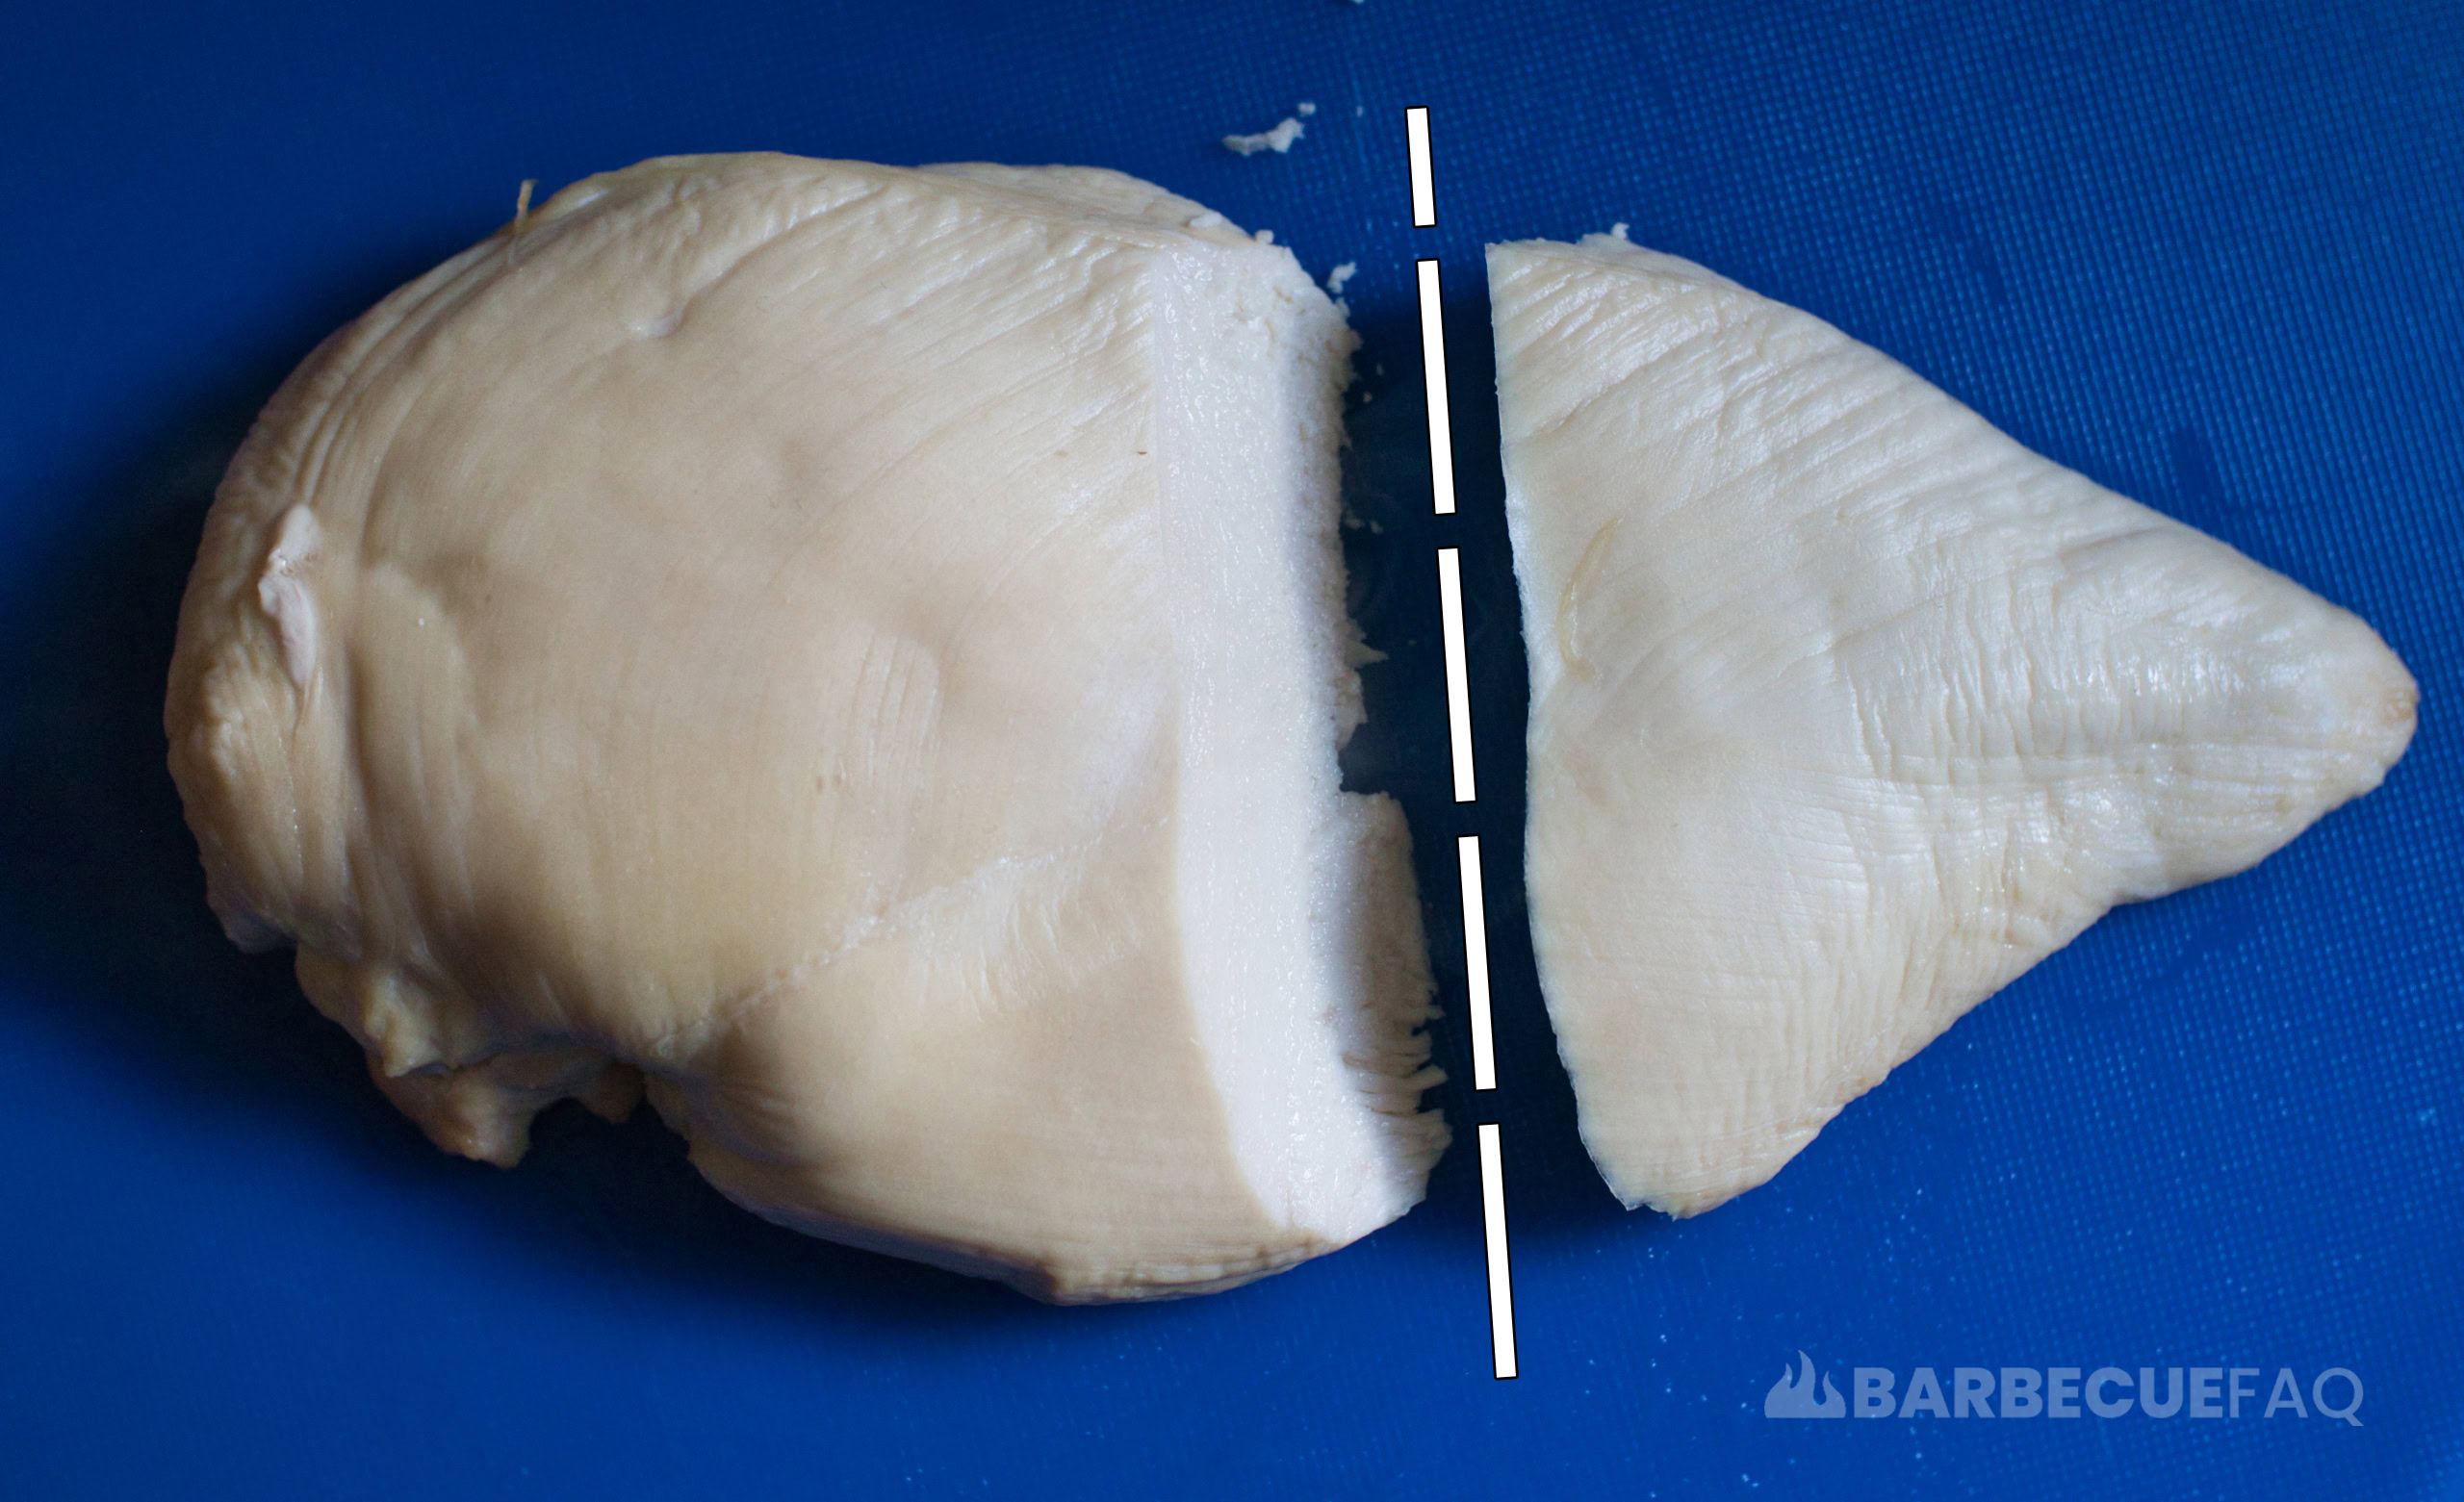
I then cut vertically and horizontally on the two halves – just to prove it doesn’t really matter much.
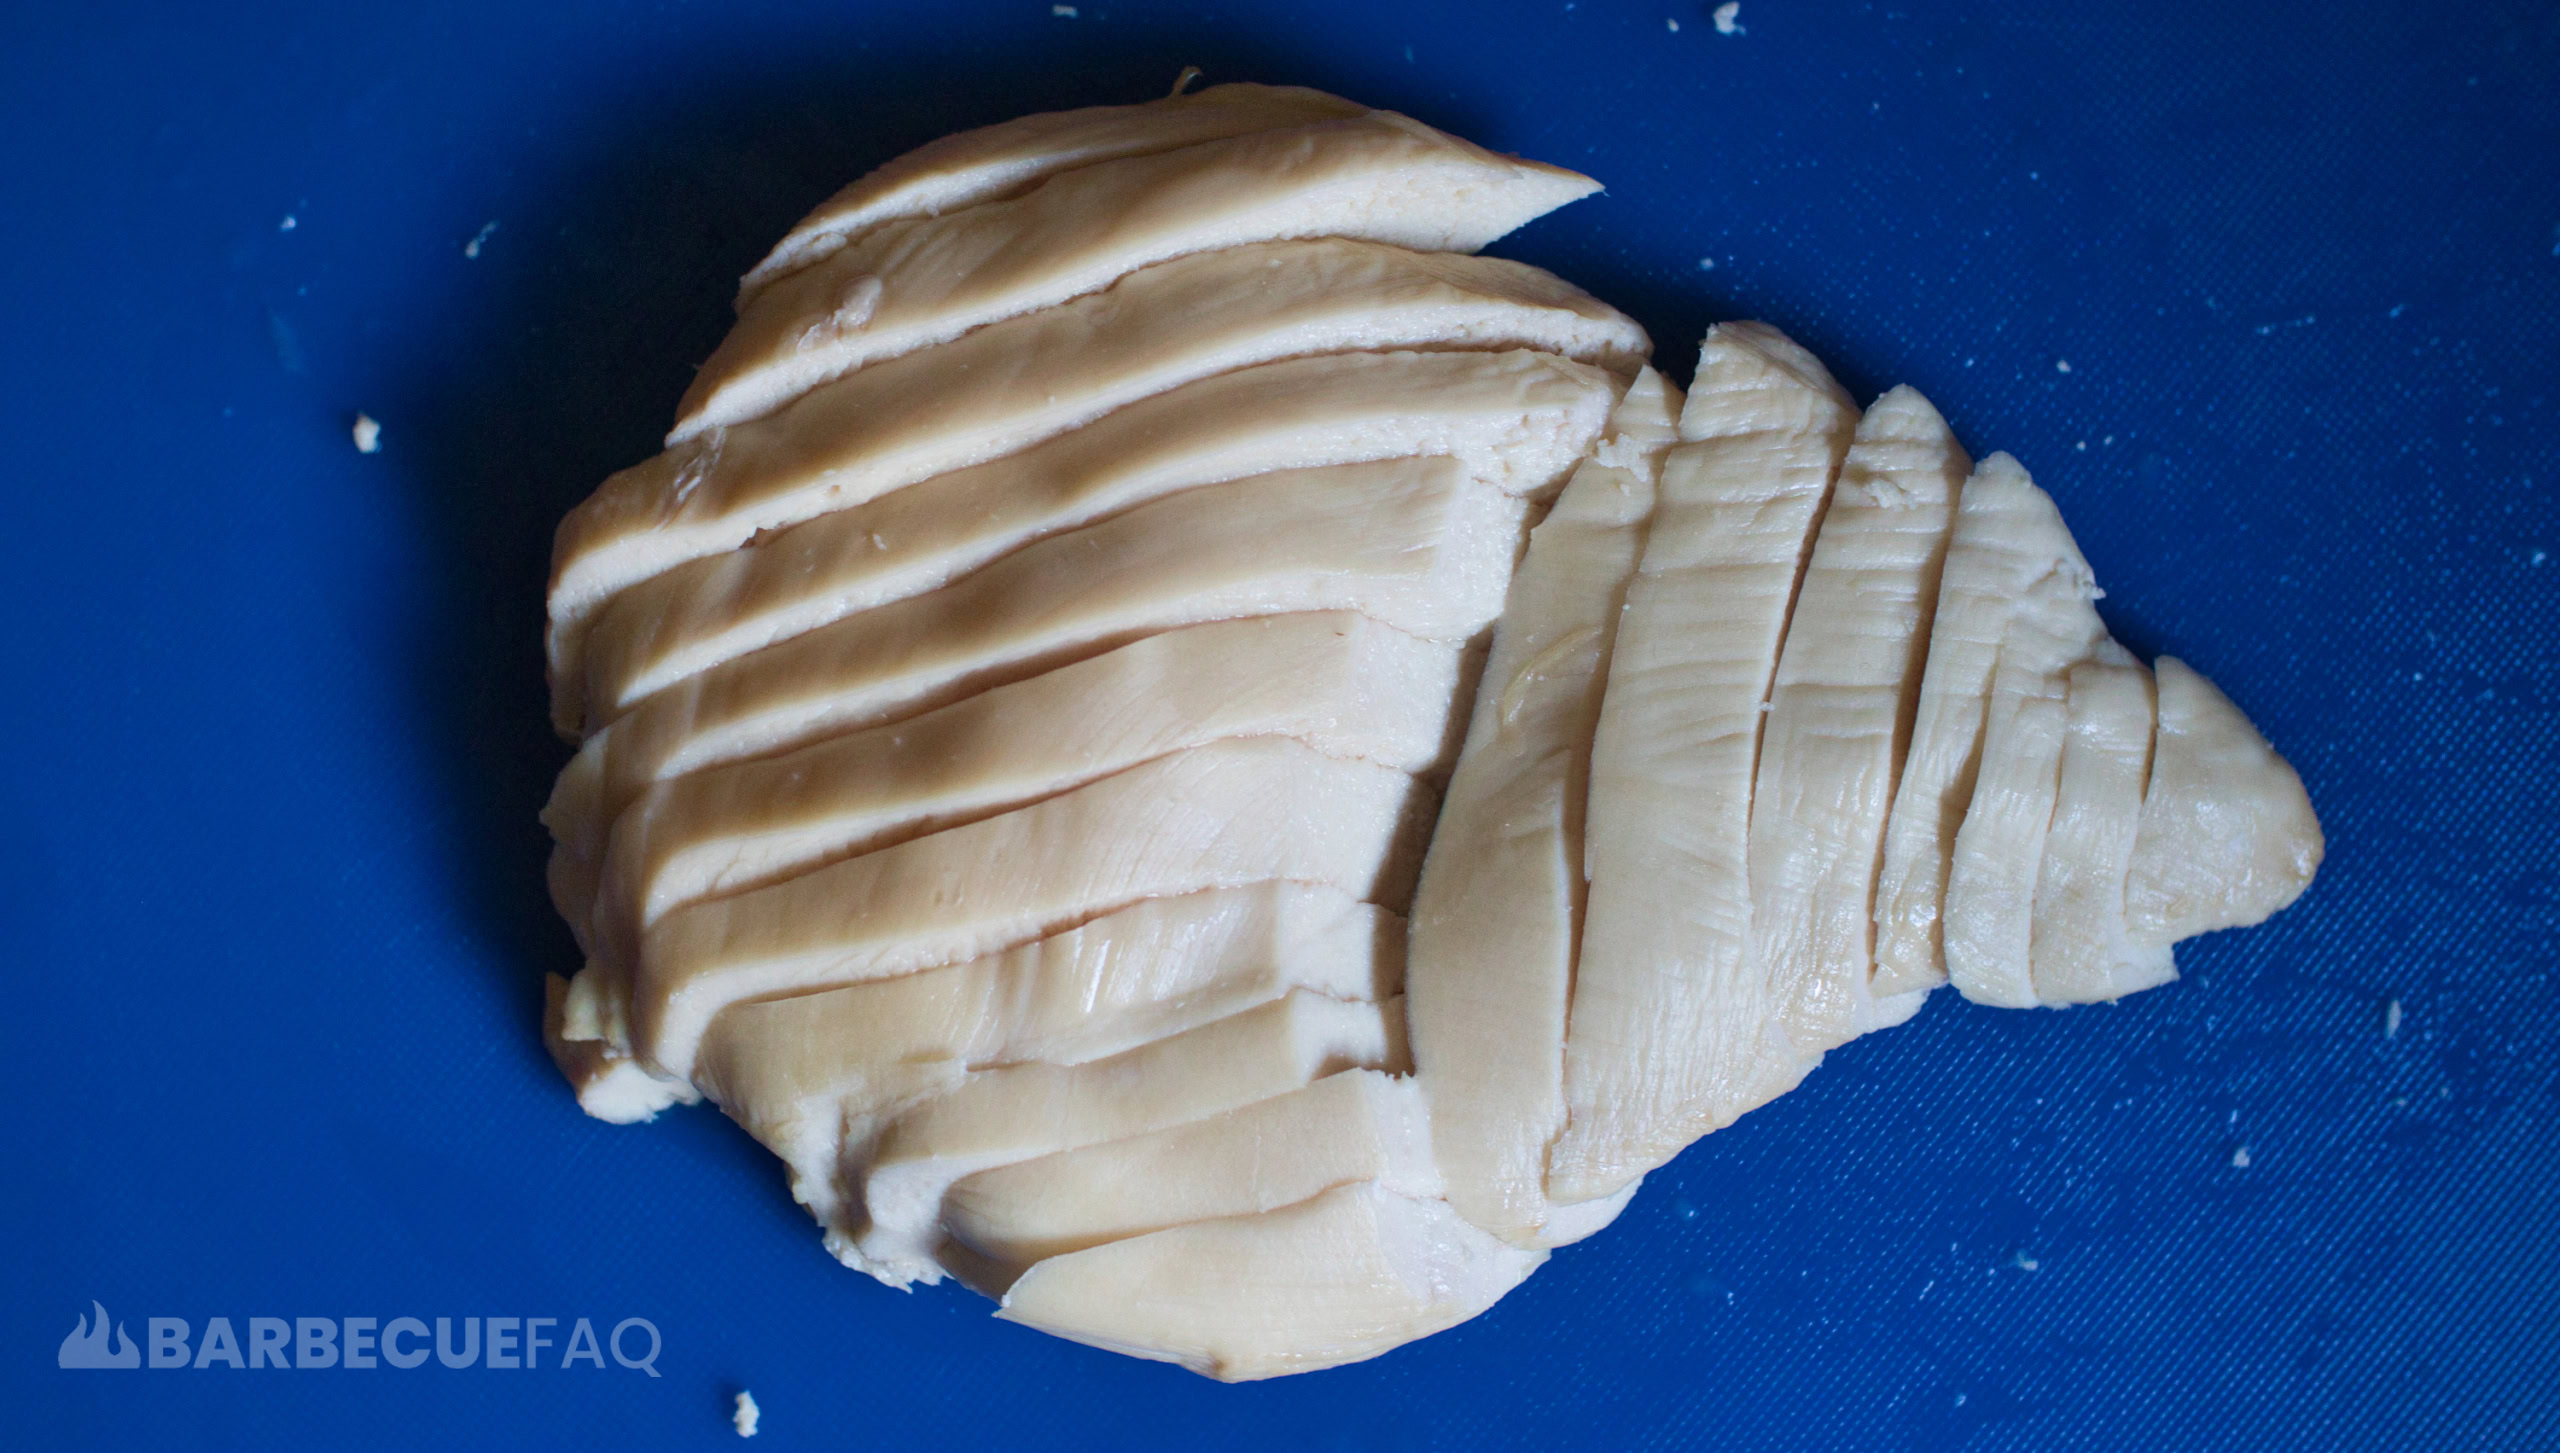
Here’s the individual slices:
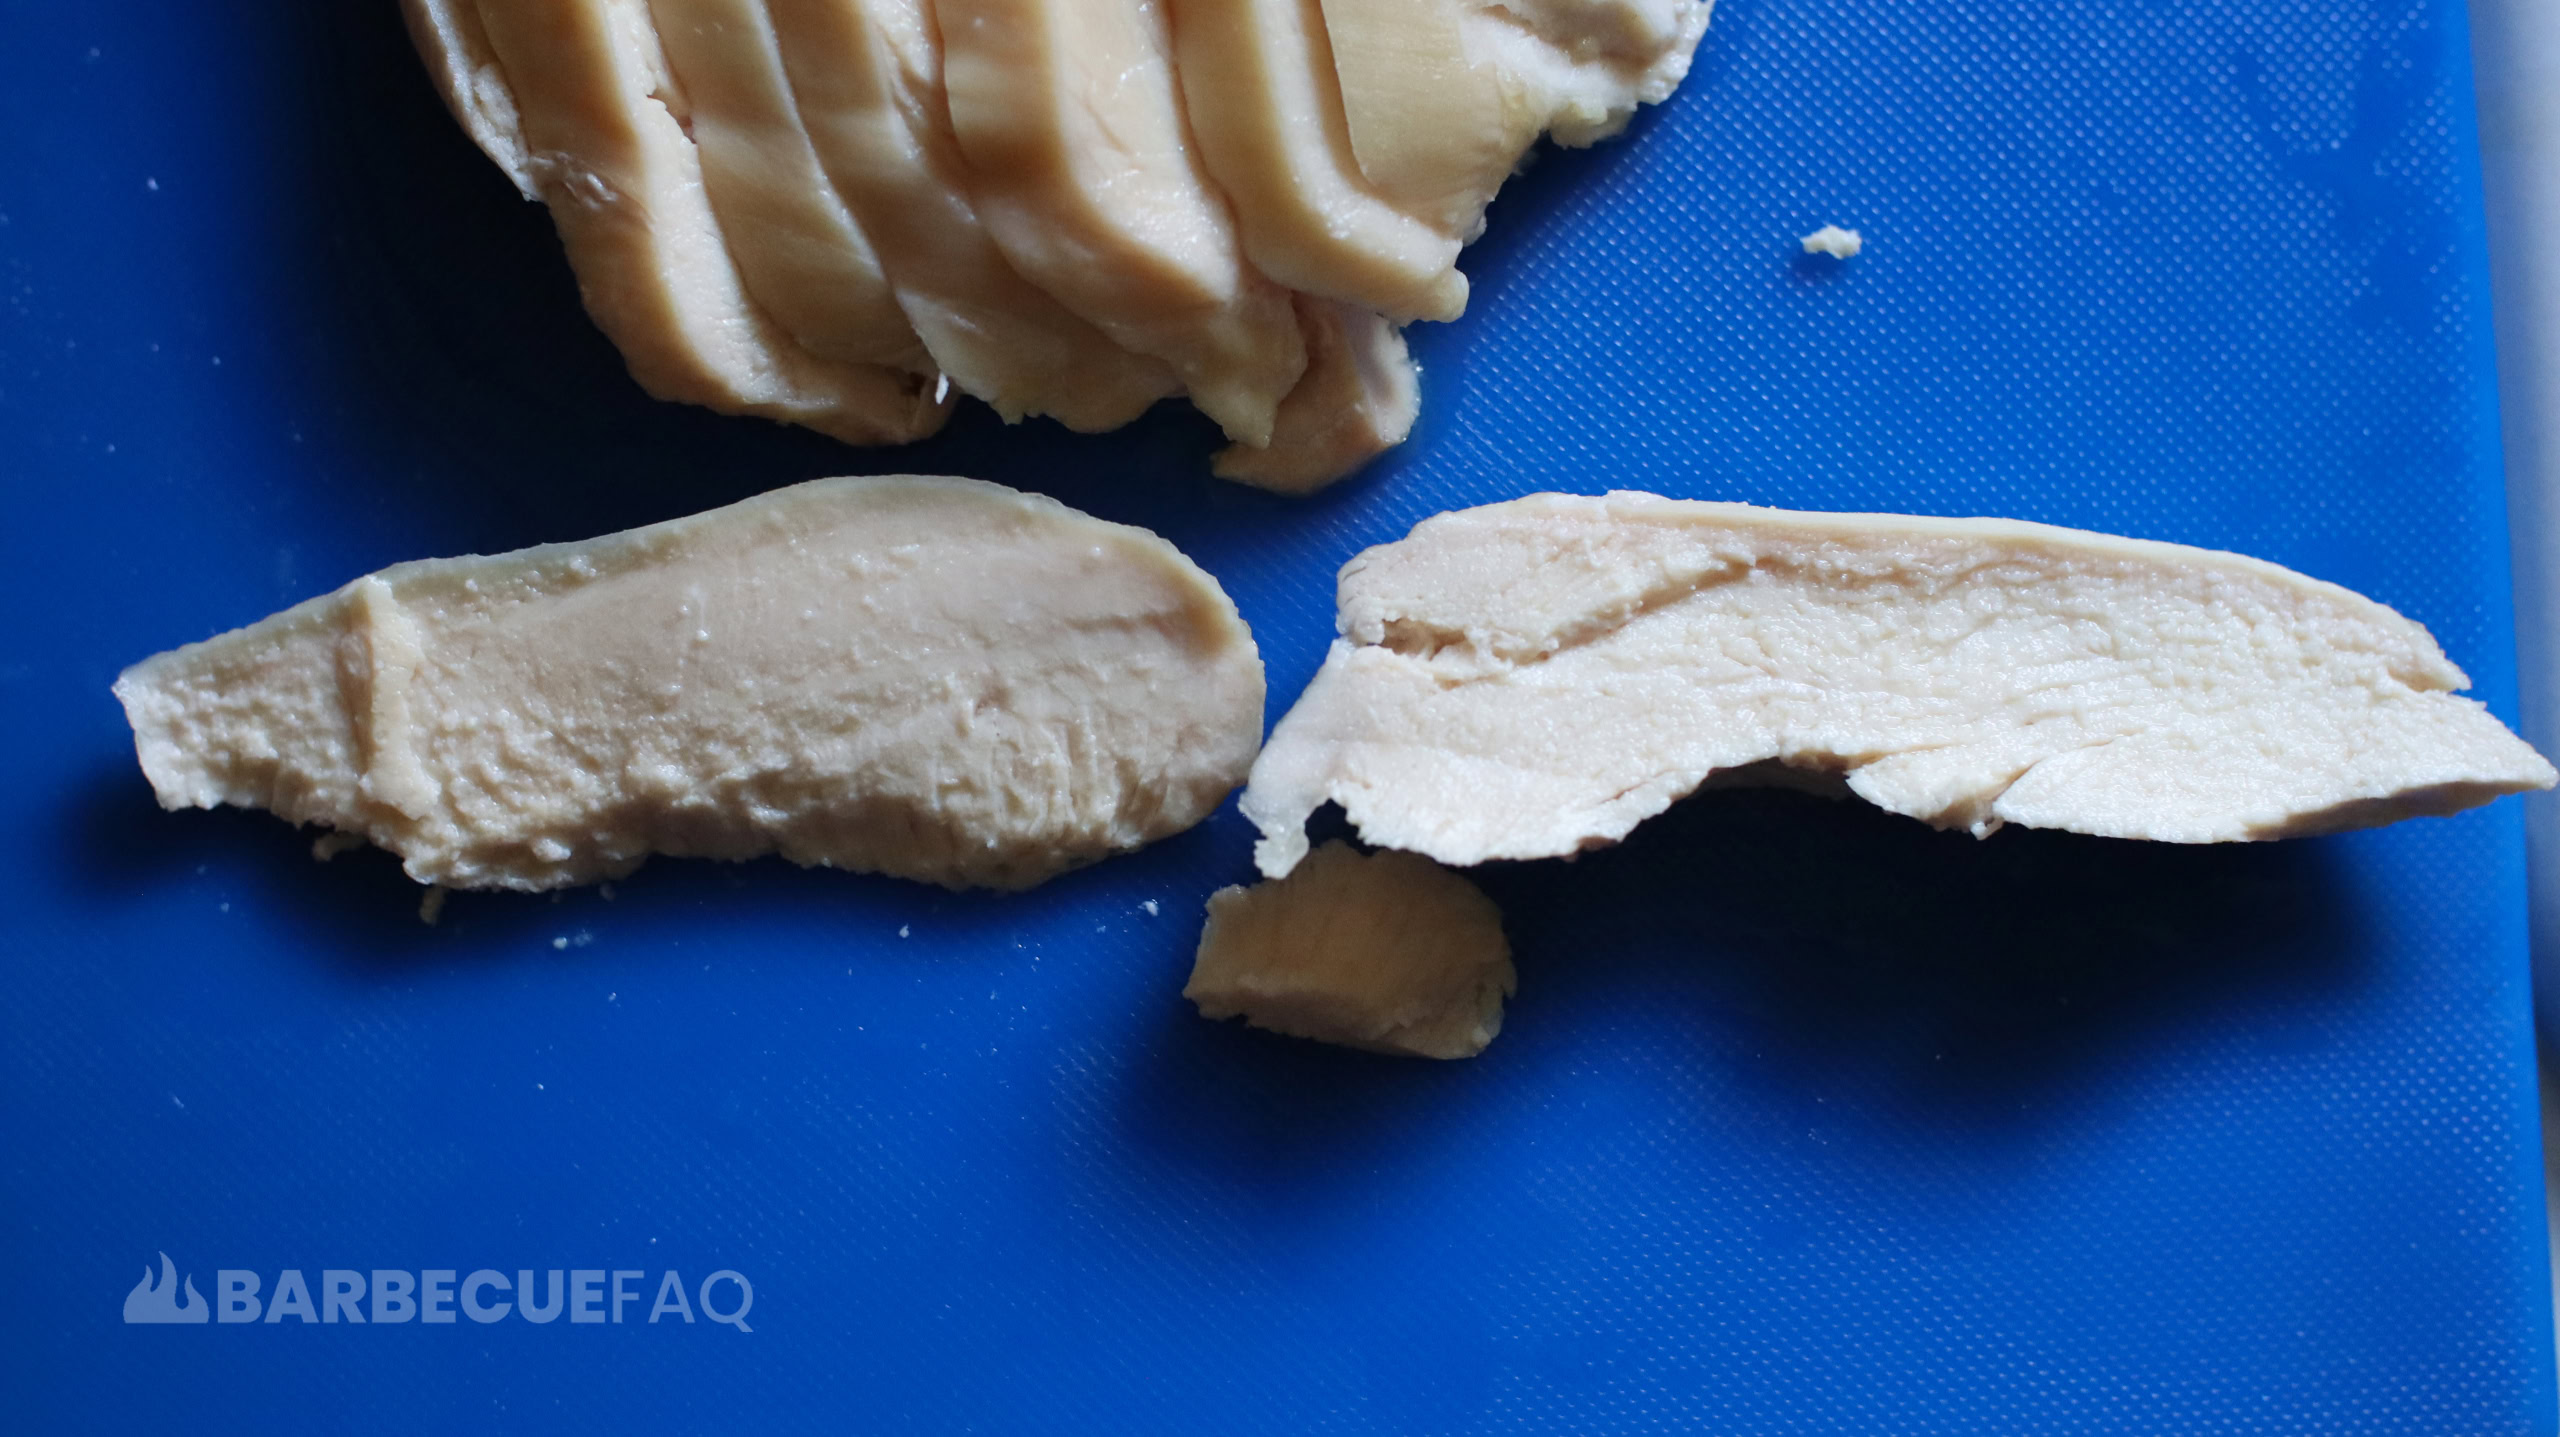
Applying slight horizontal outward pressure to see where the fibers would break:
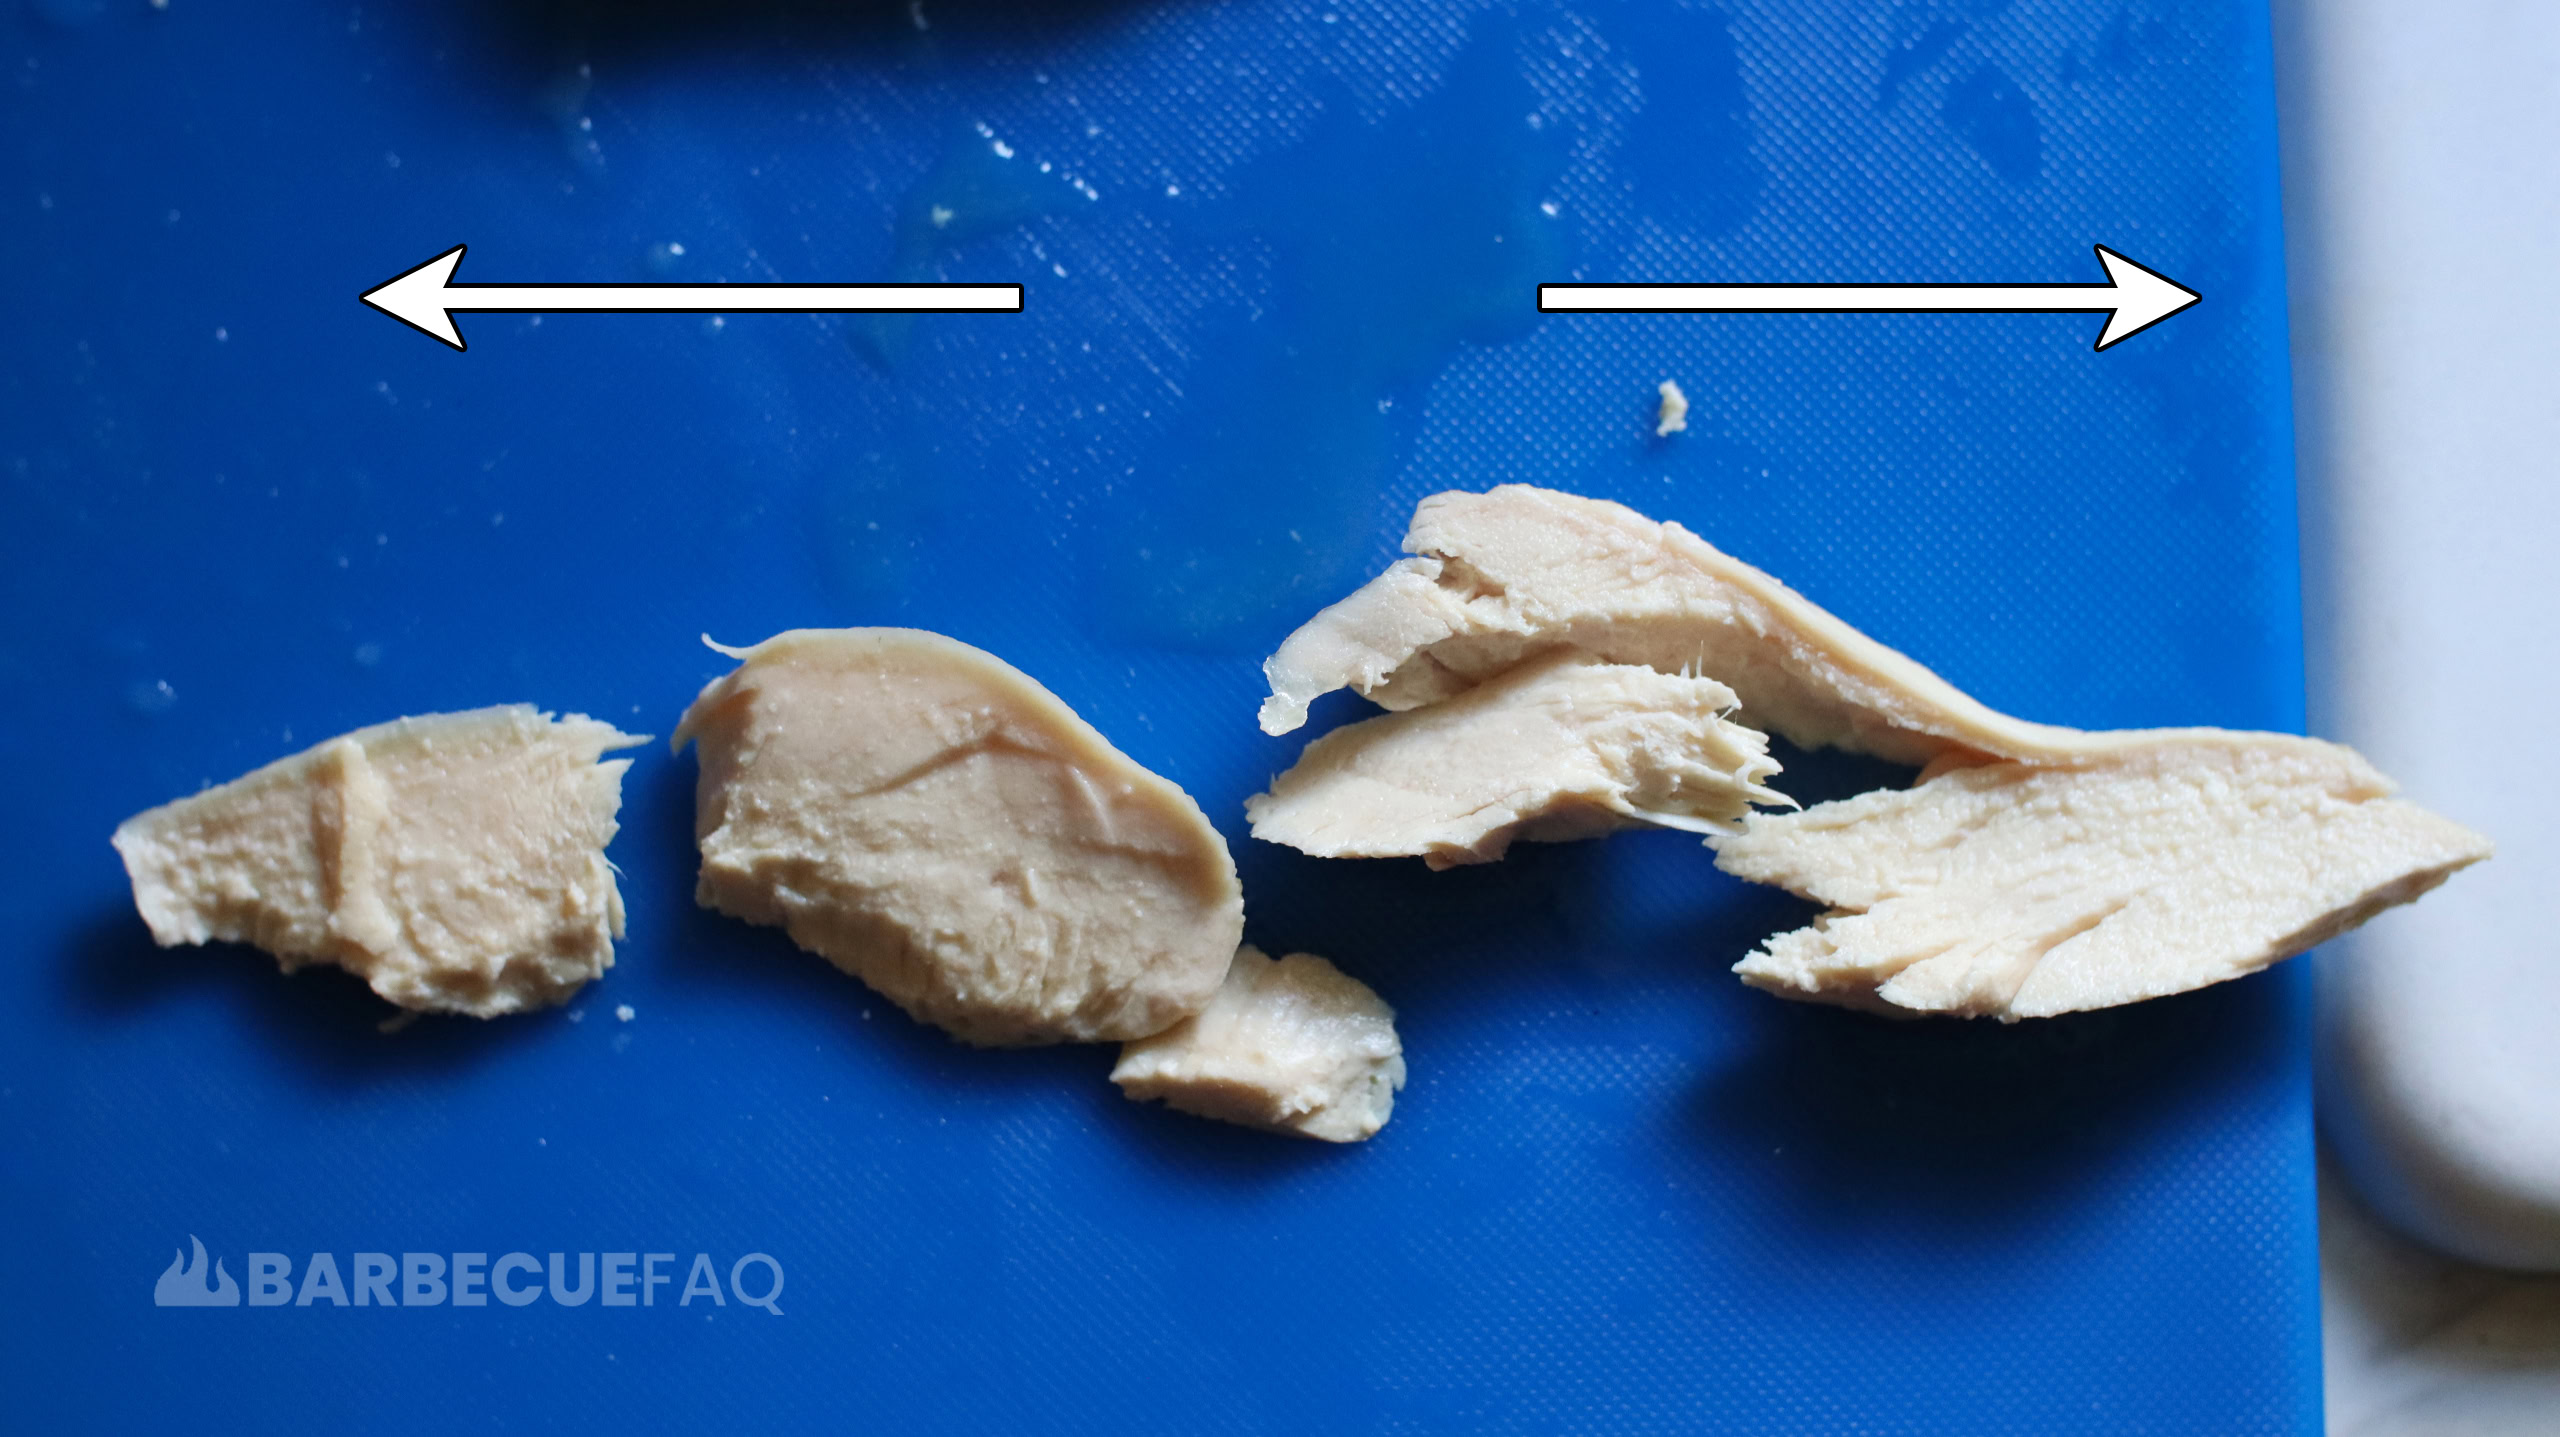
The pieces were chosen at random.
As we can see from the tears, some are against the grain, while others lie horizontal – this is a consequence of the grain structure curving.
However, the pieces were still tender in the mouth regardless of the slice. Meaning, it doesn’t really matter how you choose to slice chicken breast.
You can do:
- With the grain,
- Against the grain,
- either option on a bias,
- either option sliced vertically
The above are my thoughts and opinions after repeating this test for roughly 10 chicken breasts cooked to 157F with no seasoning and being held for 1 minute.



4 comments
Richard
Is it better to cut after cooking or before?
Dylan Clay
Hi Richard – it depends on what you’re making.
If you’re asking if the grain changes or something along those lines post-cooking, it does not.
But if you’re asking if it’s seemingly more tender one way vs the other, I personally don’t notice a difference.
I think however you prepare it matters more than slice orientation.
ie. a piece of chicken cut against the grain that you then velvet is going to be more tender than a piece of regular whole chicken that you sliced against the grain after cooking.
Similarly a piece of whole chicken that you brine in a salt solution is more tender than a piece that isn’t – same goes for a piece of meat that’s introduced to a tenderizer like vinegar or a citrus like lemon or lime.
So I’d counter your question with – what are you cooking?
Barry
Good job Dylan, thanks for sharing! Although not so important with poultry this is basically the same technique as slicing beef brisket. Personally with brisket I always separate the point and flat before smoking for various reasons.
Dylan Clay
Thanks for the comment Barry.
So this same concept is across all types of meat; You noted brisket – which I also have a fairly nuanced guide to as well. I’ve even take that a step further and broke down various cuts of steak that can be sliced more optimally like ribeye or t-bone steak (which most people slice incorrectly).
I’m personally a fan of keeping those muscles in-tact as apposed to separating but to each their own 🙂
-Dylan