By Dylan Clay
Controlling the temperature on your charcoal grill or smoker is important. Unlike a gas grill, you can’t dial a temperature with volatile fuels like wood and charcoal. These fuels can be different shapes and sizes and can burn at different rates and temperatures.
A charcoal grill uses two fuel sources: A combustible material (charcoal or wood) and oxygen.
This concept is referred to as the “Fire Triangle” or Combustion Triangle. This model outlines the three elements needed to ignite fire: heat, fuel, and oxygen.
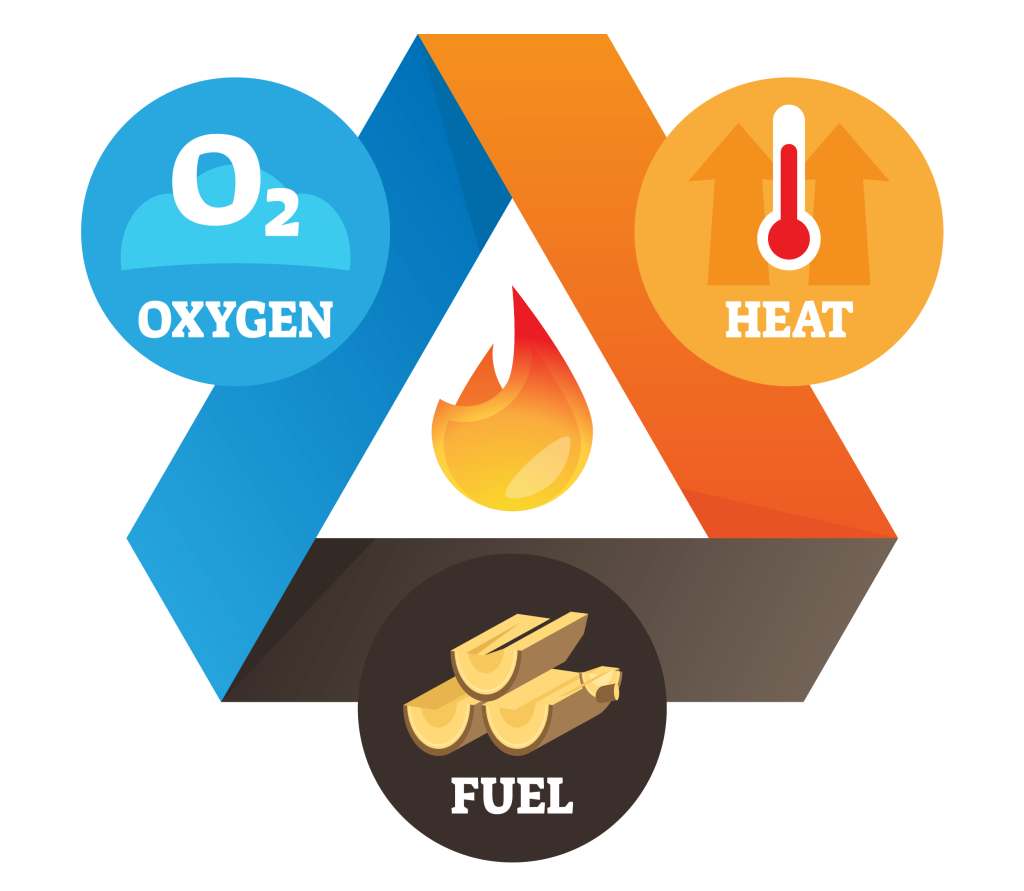
When any of these elements is removed, fire can’t be present. This concept can help us better understand temperature control in a charcoal grill as you can directly control the fuel and the oxygen that’s present.
There are three main ways that temperature is controlled on a charcoal grill: intake and exhaust vents, amount of charcoal/fuel source, and fire arrangement.
In order for the coals to remain lit, they need oxygen. Most charcoal grills will have two ways to control oxygen:
The intake damper is how I choose to control temperature. As you might expect, the more oxygen that you allow to come through the intake, the hotter the fire gets. In order to reduce heat you can close the vent, subsequently decreasing the amount of oxygen in the system.
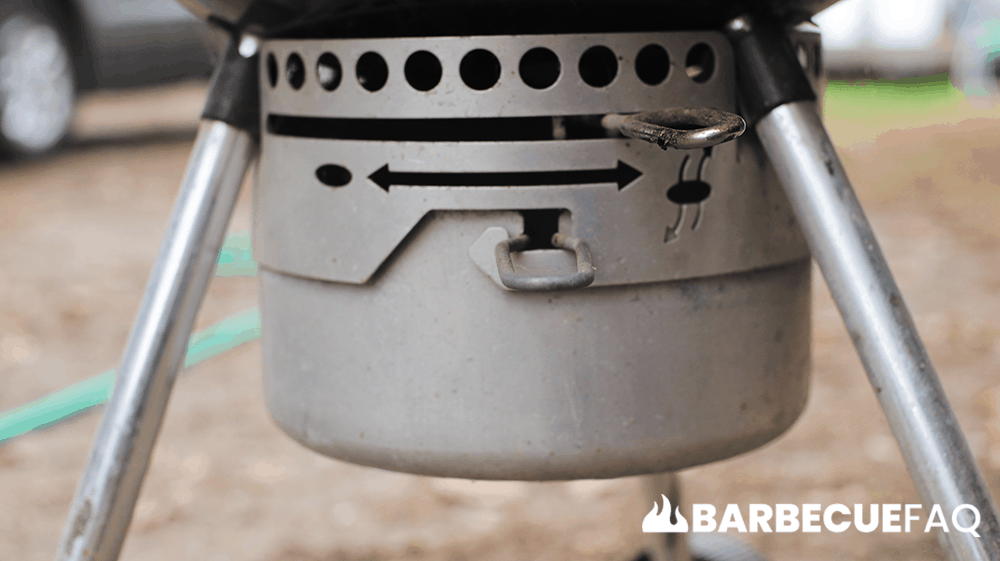
However, a completely closed intake vent will “starve” the fire and cause the fire to burn out even if the exhaust damper is open.
As heat rises through the charcoal, the combustion gases, heat, and smoke escape through the exhaust damper. This pressurized system or draft causes more oxygen to come through the intake damper (hence why it’s important NOT to close the intake).
The exhaust damper should be partially open at all times. This prevents combustion gases from smothering the fire.

Before starting this process, be aware that it can take time to calibrate your grill. Start by doing dry runs without any food and with the intake and exhaust vents open all the way.
As the fire settles, you can adjust the bottom intake vent. Close the vent half way and see how that affects the temperature.
You shouldn’t adjust the exhaust vent at the same time. Trying to adjust both is like trying to control the speed of your vehicle with both the gas and brakes at the same time.
However, if you’re not able to reach a certain temperature with the intake vent alone, you can start to adjust the exhaust vent.
Once you’re able to dial in certain temperatures like 225 and 325, make note of them on your grill. It will make reaching those temperatures that much easier in the future.
Note: Brands like Weber suggest an opposing view. They note to leave the intake vent wide open and to adjust only the exhaust vent. The reasons being: ambient temperature, wind, and how clean your grill is.
They mention the latter because if you’re not cleaning the ash (you should before each cook), it could stifle the intake and choke the fire.
Weber lists the following reference/coorelations between exhaust damper and temperature:
As you might expect, the more lit fuel or charcoal, the hotter the grill can be.
*Keep in mind that briquettes are more uniform than lump charcoal. Burn rates aren’t as volatile, however lump charcoal is more responsive to vent adjustment. You can learn more about the differences between briquettes and lump charcoal in this article.
The following estimates are based on using Kingsford charcoal briquettes for a standard Weber kettle grill:
Every single cooker is different, the above estimates were based on a specific type of fuel and grill. In order to determine exact temperatures and amount of charcoal to use for YOUR grill, you can use a charcoal chimney as a measuring cup for both the lit and unlit charcoal to calibrate specific quantities of charcoal.
Note: Placing lit charcoal onto unlit charcoal is referred to as the “Minion Method.” The advantages of this method is that there’s less of a chance for the grill/cooker to run hotter than you want. Meaning, it’s easier to start with a few lit coals and to bring the cooker up in temperature rather than starting with a lot of lit charcoal and bringing it down in temperature.
Make note of the temperatures in the following scenarios and for how long the grill holds those temperatures.
Half Chimney of Lit Charcoal Onto:
Full Chimney of Lit Charcoal Onto:
Keep in mind that charcoal is at its peak temperature when they are fully lit. Fully lit charcoal is also stable. Over time temperature will decline as the fuel is consumed by the combustion process.
If you need to add combustibles (fuel/charcoal) you should do so only as you start seeing the temperature drop. You also shouldn’t add “unlit” coals as doing so will spike the temperature as they ignite and build up in temperature.
This is also why I noted I prefer to adjust the intake as apposed to the exhaust. When coals are fully lit, it’s easier to control one variable as apposed to two (intake and exhaust). Adding lit coals also helps to combat spiking temperatures and combustion by-products.
As you might assume, the fire arrangement for searing steak is different from that used for smoking pork butt.
The way in which you arrange your coals and where you place the food on the grill grates is another way of controlling temperature.
Note: It’s important to have an understanding of the above concepts in regards to the amount of charcoal and vent calibration as they are directly related to charcoal arrangement.
When it comes to general grilling, my personal preference is to set-up what’s referred to as a “2-Zone” fire. As the name implies, you’re creating two zones for cooking: One with direct radiant heat (above the fire), the other with indirect convection heat (safe zone).
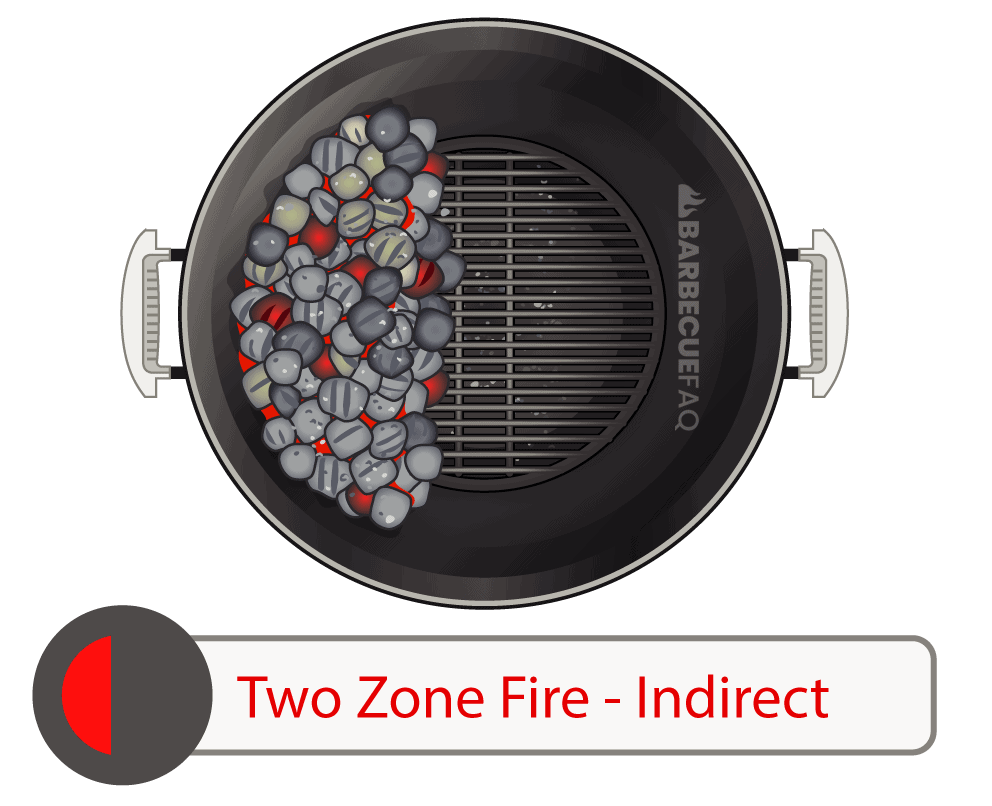
From the above sections, we now know that we need to add more lit coals in order to achieve higher temperatures. High heat also typically implies shorter cooks, for instance searing steaks or cooking burgers. A full chimney of lit charcoal into an empty grill will easily achieve 450 – 550F.
I discussed 2-Zone fire setups above because you can also apply this same concept to low-heat smoking. Instead of placing the meat over the fire and cooking the food via direct radiant heat, you’re placing the meat in the indirect zone and cooking via convection heat.
Unlike the high-heat scenario, we don’t need as many lit coals in order to comfortably achieve temperatures between 225 – 325 F that are used for smoking.
We can also use the Minion Method by placing unlit charcoal in the hot zone and placing lit charcoal on top. The meat is then placed in the indirect zone to further control the distance from the fire.
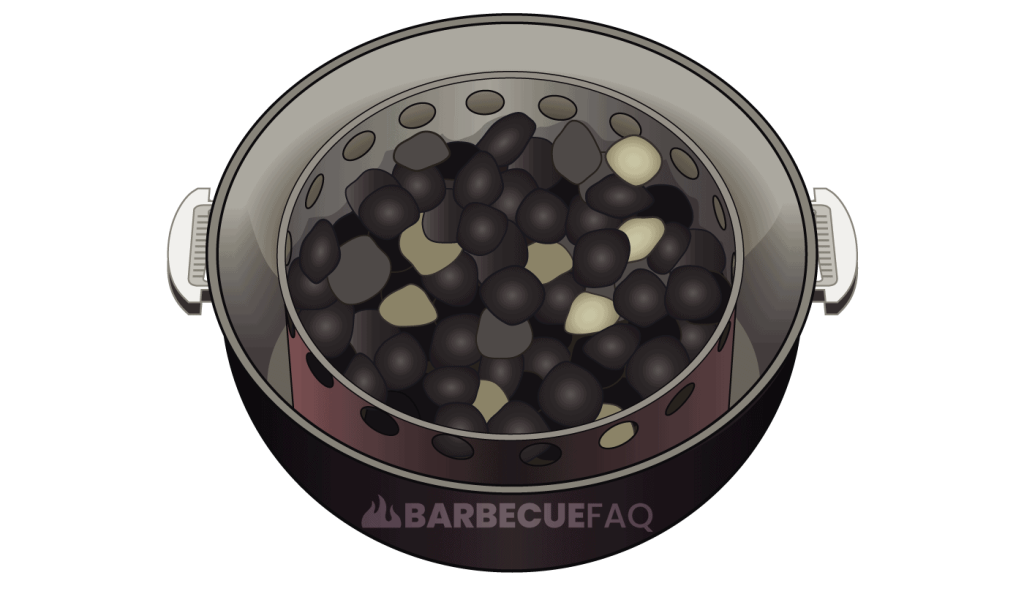
This is also why I said you should calibrate your grill and see how it responds to certain amounts of lit and unlit charcoal.
While a simple two-zone setup can work, there are other fire arrangements you can use. One of the most popular is referred to as the “Snake” and/or “S” or “C” shape method.
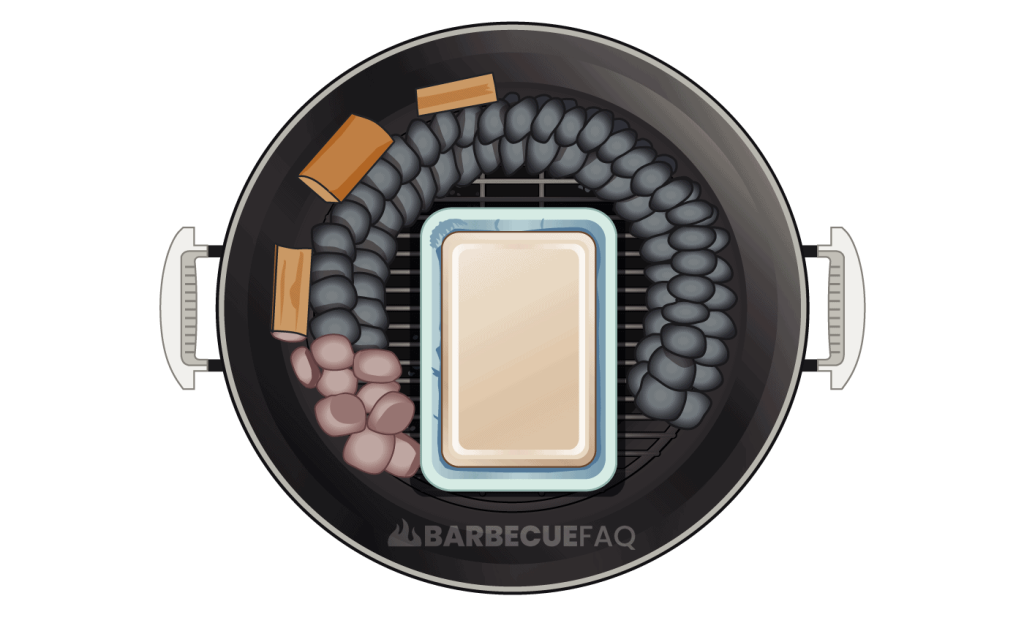
In this method, you neatly arrange briquettes along the perimeter of the grill. Typically 2-3 layers of briquettes is recommended with wood chunks at intervals. You then light 4-5 coals at one end and the charcoal will continue to light the defined “Fuse” throughout the smoke.
