

1. Remove the giblet bag from inside the bird as well as any pop-up timers.
These are common with roasters but may or may not be present.
If there is a pop-up timer it will be on top, angled into the thickest part of the breast.
2. Pat dry the surface of the bird with paper towel.
3. Use a pair of kitchen shears to remove the backbone.
Start with the breast side facing down and the back side up.
Locate the tailbone and cut parallel to the left and right of it; Discard the backbone in the trash or save it for stock.

4. Clean the inside of the bird
Use a paper towel to remove kidney remnants (typically near the thigh) and other entrails.

I also like to remove the thigh fat as it’s not apt to render well when spatchcocked:

5. In order to flatten the chicken, you need to break the clavicle – or wish bone.
Use your kitchen shears to separate the clavicle on the inside of the breast.

Alternatively, you could simply flip the bird over and press into the breast. You will hear a crack, indicating that you’ve cracked the collarbone.
When the clavicle is broken, it will look like this:
The bird should now lay flat flat.

Set Your Pellet Grill to 375F
I’m personally not a huge fan of smoke with chicken but if you are, apple is a safe bet.
Seasoning the Spatchcocked Chicken
Combine the following ingredients:
- 1/2 Tbsp 16 Mesh black pepper
- 1 tsp Morton’s kosher salt
- 1 tsp granulated onion
- 1 tsp granulated garlic
Use olive oil as a binder and apply to the surface of the chicken.
Then apply your rub.
Place the Chicken on the Pellet Grill
If you’re someone who uses meat probes, insert the probe so that the probe is reading the thermal center or the thickest part of the breast meat.

Wait for the Breast Meat to Hit 162F
By pulling early (before 165F), we’re allowing the outer surface temperature to carry-over to the internal temperature when we rest.
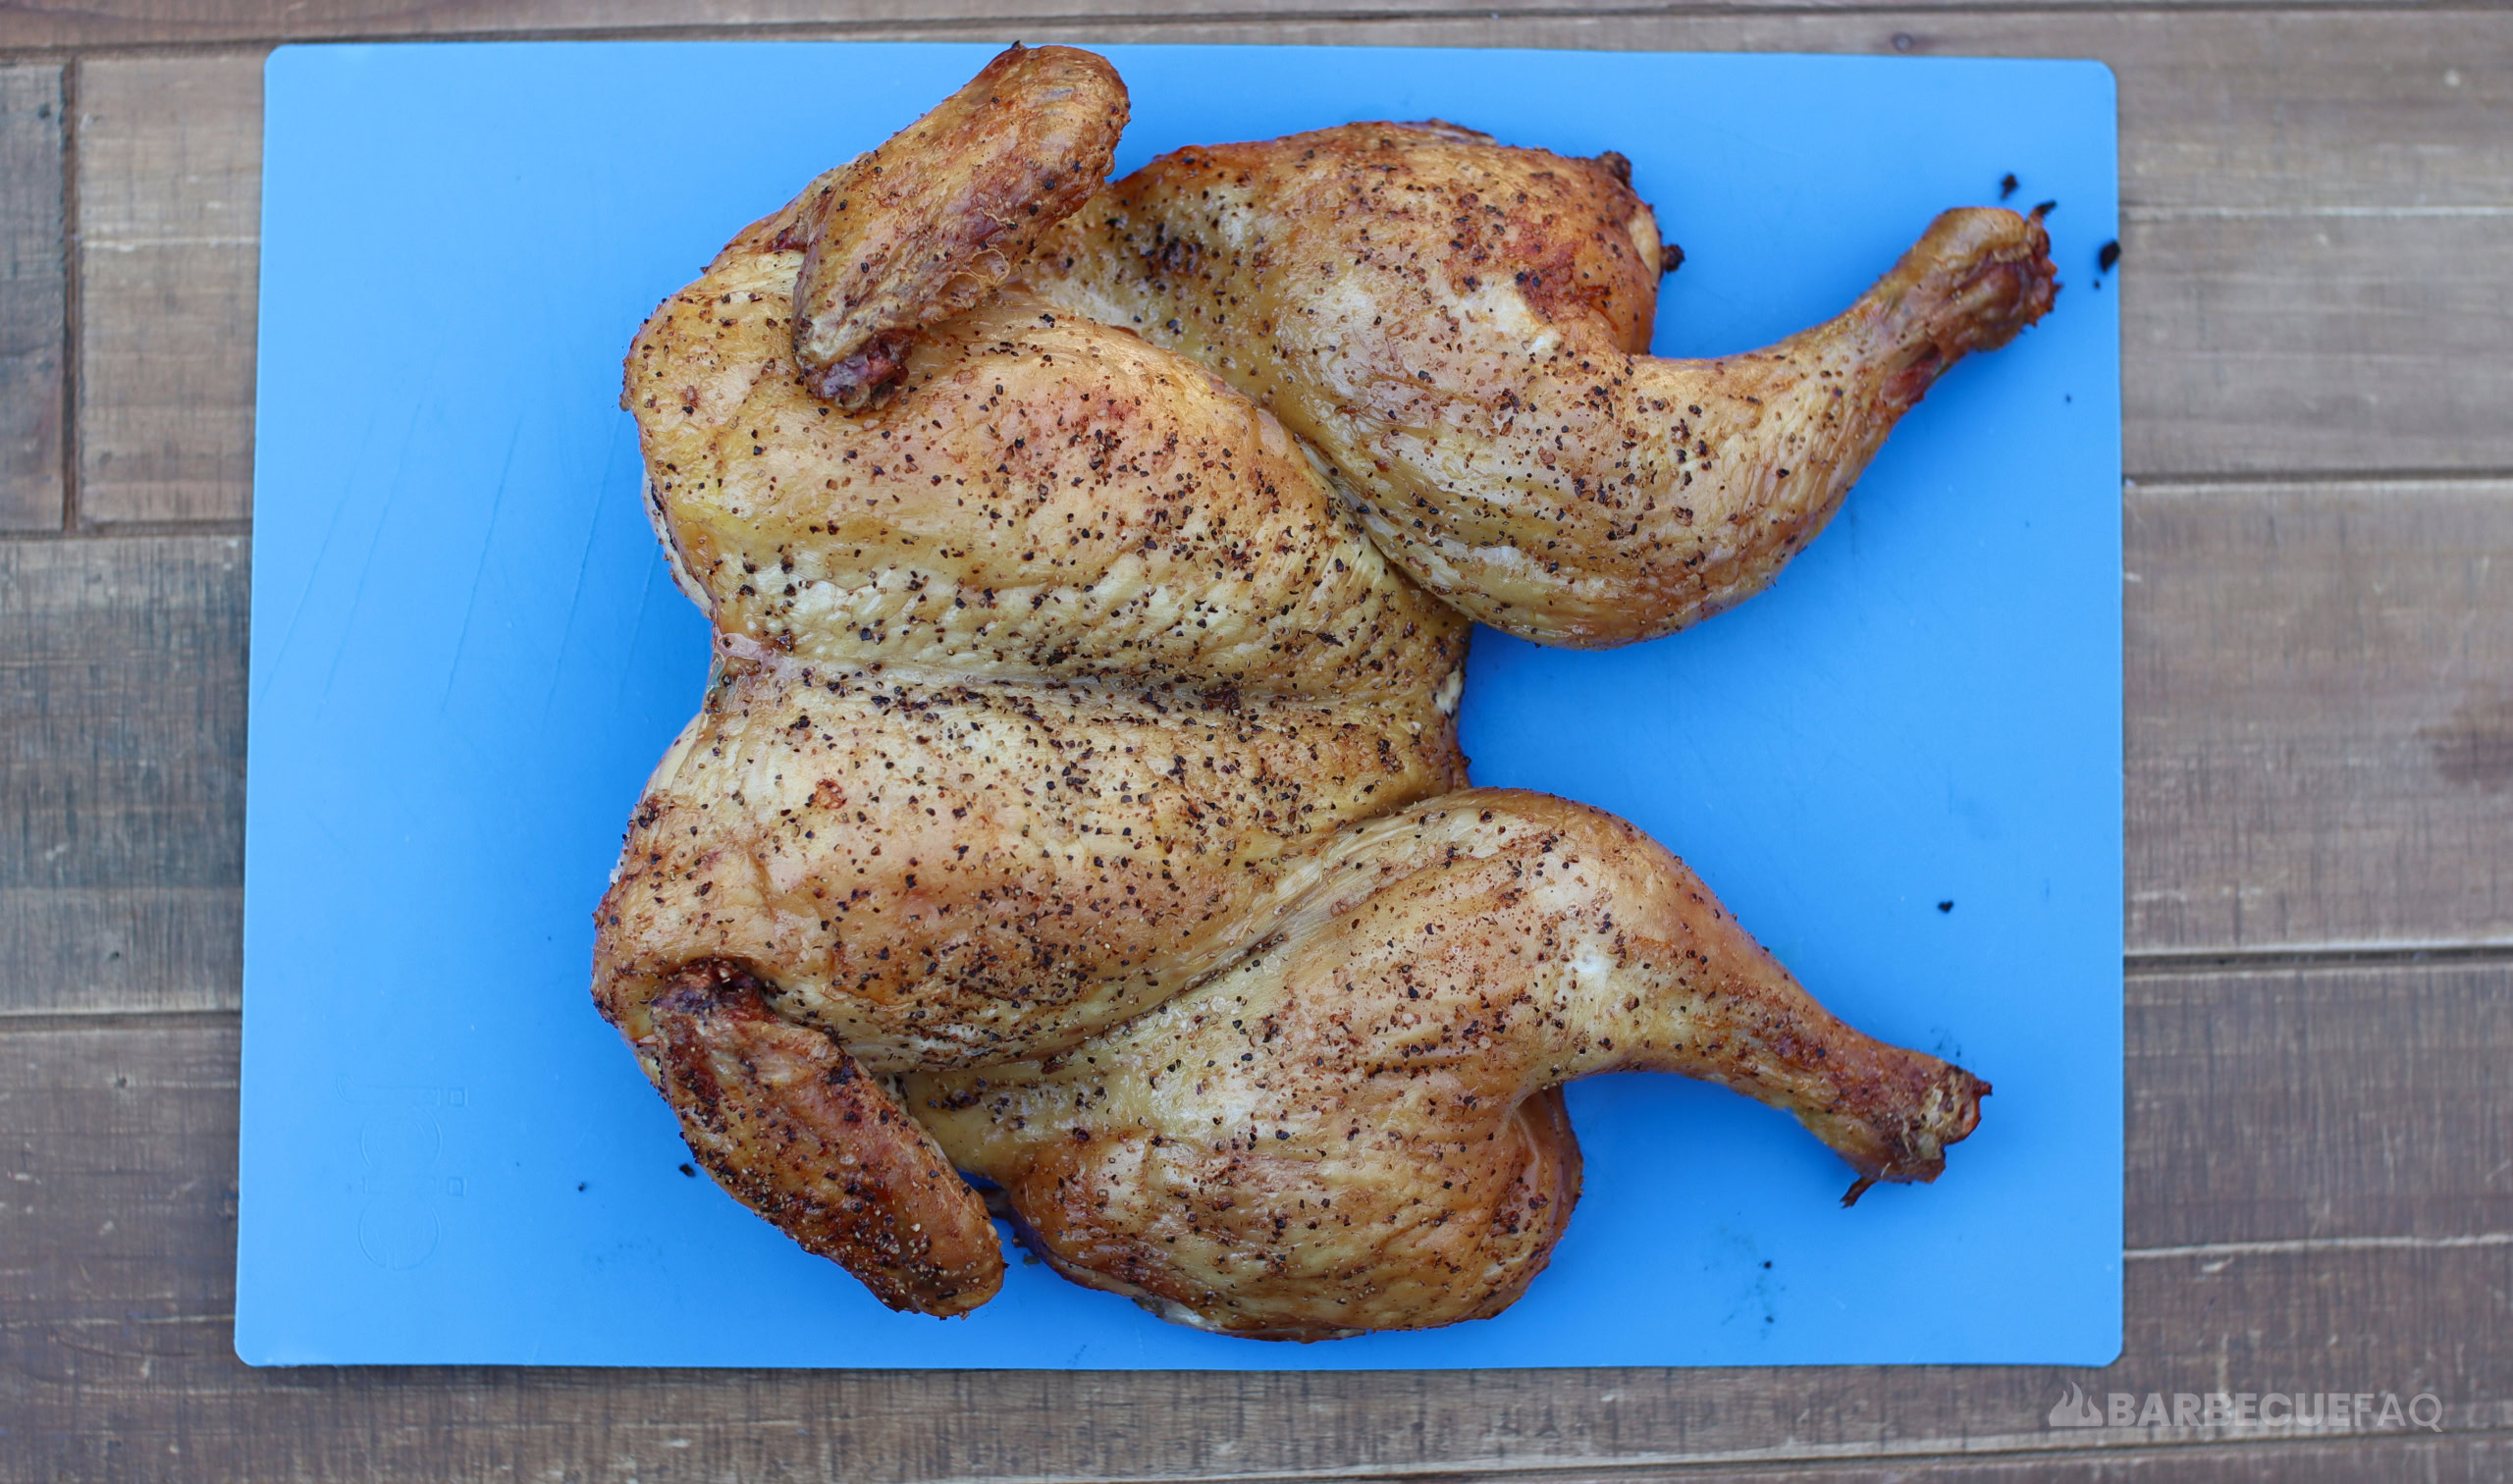
I allowed the chicken to rest for 5-7 minutes and the temperature at the thickest part of the breast reached 165F:
The chicken is now considered safe to eat as per the USDA recommended finishing temperature – 165F internal.
Slice the Chicken by Following my Diagram Below
The wings should pull cleanly away from the rest of the bird.

Slice the thighs and drums at their respective joints.
You can slice the breast meat off the bones or remove the whole breast portion itself.
Spatchcocked Chicken on a Pellet Grill
Ingredients
- Olive Oil As a binder, use as needed
- 4.9 lb Whole Chicken
Chicken Rub
- 1/2 Tbsp 16 Mesh Black Pepper
- 1 tsp Morton's Kosher Salt
- 1 tsp granulated onion
- 1 tsp granulated garlic
Instructions
- Take chicken out of package and pat dry with paper towel.
- Remove giblet bag and pop-up timer if present.
- Spatchcock chicken – if you need instructions, look at pictures provided above.
Season the Chicken
- Put olive oil on the surface of the skin.
- Combine the dry rub ingredients in the specified quantities.1/2 Tbsp 16 Mesh Black Pepper, 1 tsp granulated onion, 1 tsp granulated garlic, 1 tsp Morton's Kosher Salt
- Season the surface of the skin with the dry rub.
Set Pellet Grill to 375F
- If you're a fan of meat probes, put the probe in the thickest part of the breast meat.
- Place the chicken on the grill so that the breast is in the middle of the grates and so the the thighs and drums are oriented towards the hot zones.
Pull When the Temperature Reaches 160-162F
- All you're waiting for is the thickest part of the breast to reach 160-162F. The reason for pulling early is because you don't want to dry out the chicken. When you rest for 5-10 minutes the temperature will continue to climb by about 5F.
- I took the chicken off at 162F internal and rested for 5-7 minutes until the internal reached 165F.
- Then slice and enjoy.
2 comments
Justin Hemingway
Simple, straightforward recipe. Thanks Dylan! This came out great on my Traeger.
Dylan Clay
Happy to help Justin!