First, Contact Your Pellet Grill Manufacturer
The reason I say to do this is because there is a good chance that the hot rod or igniter rod is covered by the pellet grill’s warranty.
Just for the sake of the article, here’s a few popular Pellet Grill Manufacturer’s warranty pages as well as wording from these respective pages:
| Brand | URL | Warranty Wording |
|---|---|---|
| Traeger | Warranty URL | “Traeger Pellet Grills LLC will provide a replacement part for any part found to be defective. Original part(s) approved for return by Traeger’s Parts Department must be returned prepaid.” |
| Camp Chef | Warranty URL | They have a full parts breakdown on their warranty page. The hot rod is specifically quoted at a 1 or 3 year warranty depending on the model of the grill. |
| Pit Boss | Warranty URL | “Dansons carries a five (5) year warranty against defects and workmanship on all parts, and five (5) year on electrical components” |
| Recteq | Product Specific | “During the term of the limited warranty, recteq’s obligation shall be limited to replacement of covered, failed components.” |
| Grilla Grills | Warranty URL | “Grilla Grills offers a 4-year limited warranty on all factory defects and many other issues as well for most models. The Chimp is covered under a 2-year limited warranty.” |
| ZGrills | Warranty URL | “This warranty applies to defects in all materials and workmanship. During the warranty period, Z GRILLS, Inc. will at its option repair or replace defective parts or units.” |
This list isn’t all encompassing but most brands will work with you to make you whole.
If not, the part also won’t break the bank, they usually range from $10-$20.
In my case, Grilla Grills was a pleasure to work with and was happy to send me a replacement igniter rod.
1. Remove the Cover from the Firepot
Make sure the grill is off and unplugged.
My firepot was held in place by 3 screws.

I personally have screwdriver bits for my socket wrench and that helped a ton as the angles here suck.
Once the screws are removed, slide the firepot housing off the frame.
Upon doing so you might feel a slight bit of resistance, this is likely the hot rod wiring that’s now taught.
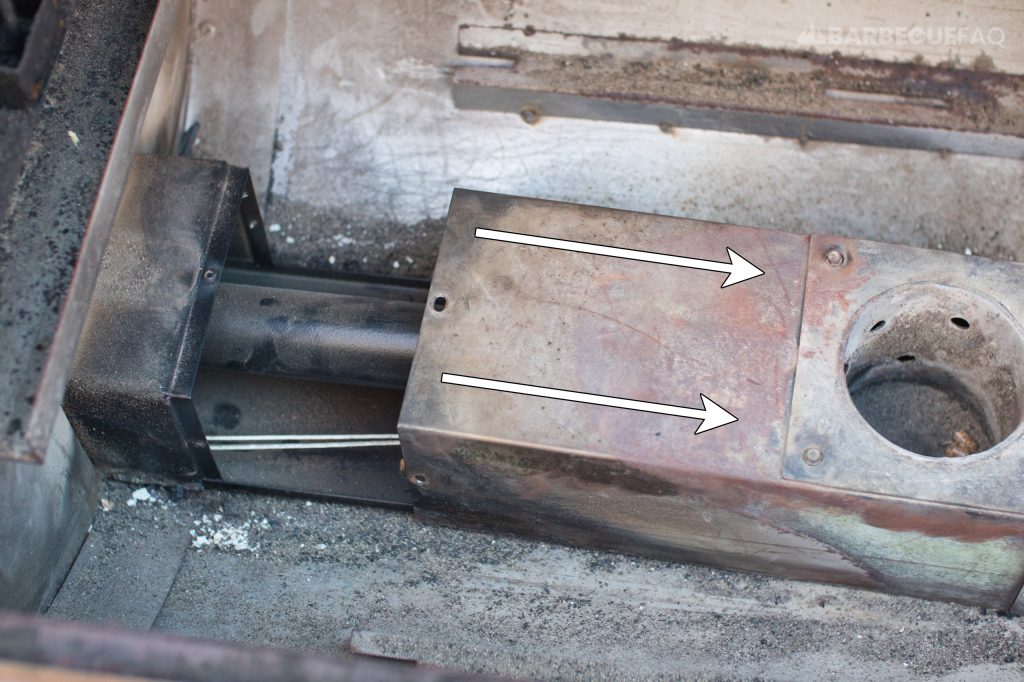
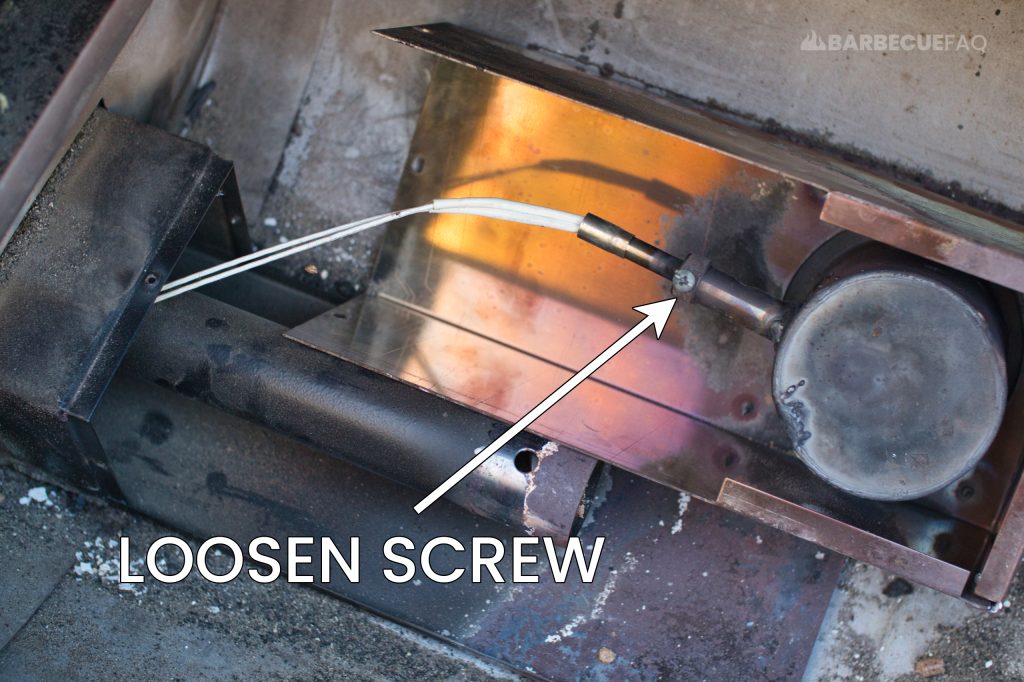
2. Loosen the Fire Pot Screw
My igniter rod was held in place by a singular, tightened screw – loosen this.
The hot rod can be removed from the fire pot.
3. Access the Wiring
Most wiring for your pellet grill is housed behind or below the hopper (where you put your pellets).
If there’s a basket that covers everything, unscrew it.
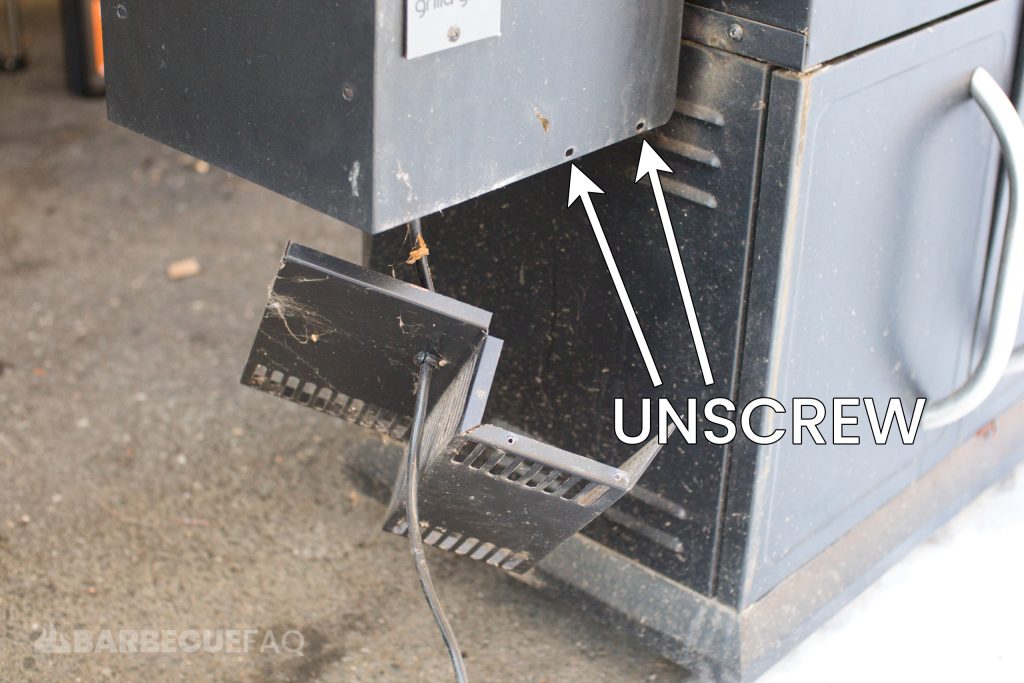
From there, follow the hot rod wire from inside the grill to find where it’s connected and disconnect it.
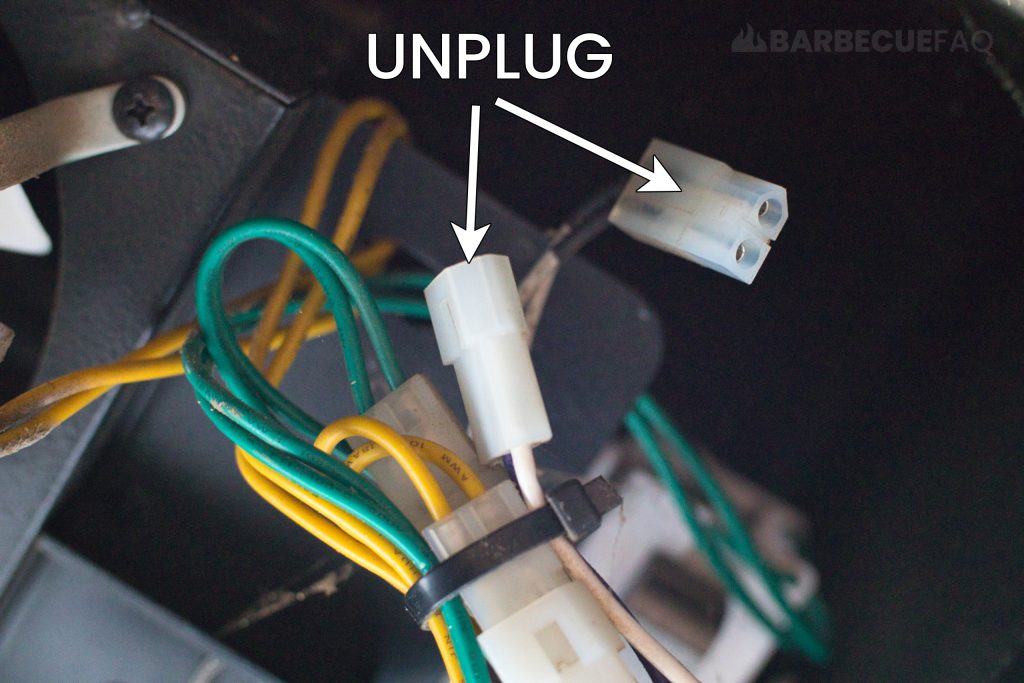
I then unplugged the wire, snipped the zip ties with wire cutters, and guided the hot rod (not the Molex connector) through the grill until it was removed.
4. Plug-in the New Hot Rod
With how these igniter cables are designed, I’d suggest plugging in the molex connector first and then guiding the rod through.
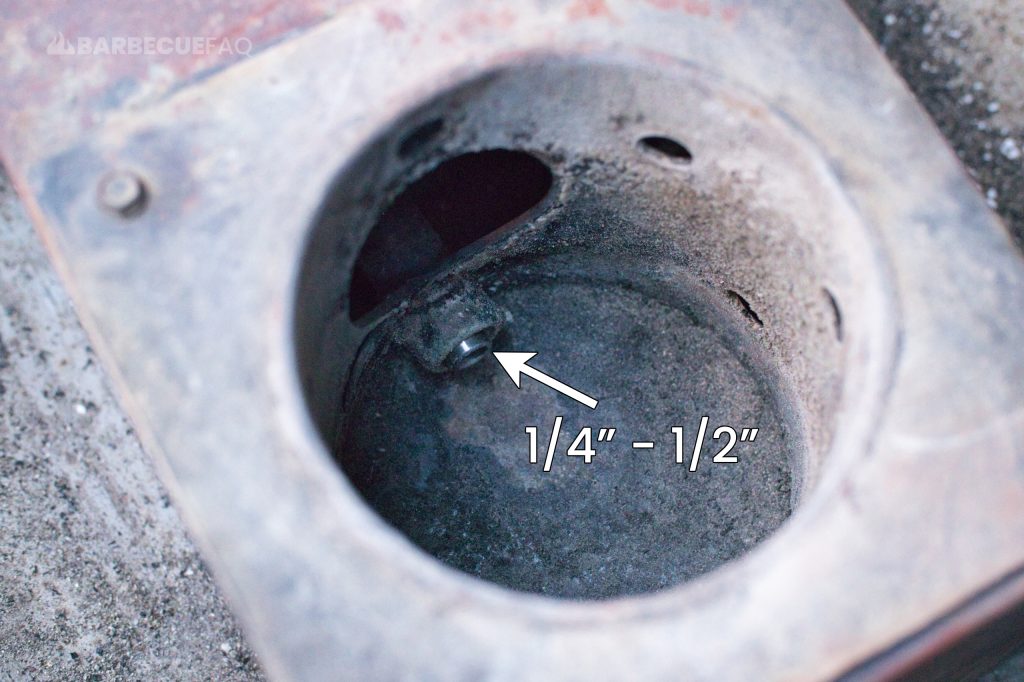
5. Put the Hot Rod Back in the Fire Pot
You want the hot rod to slightly protrude into the firepot about 1/4 to 1/2 inch.
Once you’re satisfied with how it looks, you can tighten the screw on the underside of the hot rod to fasten it in place.
6. Screw the Fire Pot Housing Back in Place
7. Test the Hot Rod
Before I zip tied the wiring, I tested the hot rod to ensure that it worked.
I plugged my pellet grill in and started the grill with the burn pot exposed. I then watched the auger dump pellets into the firepot.
I then started to notice some embers which is a good sign that the new hot rod was working.
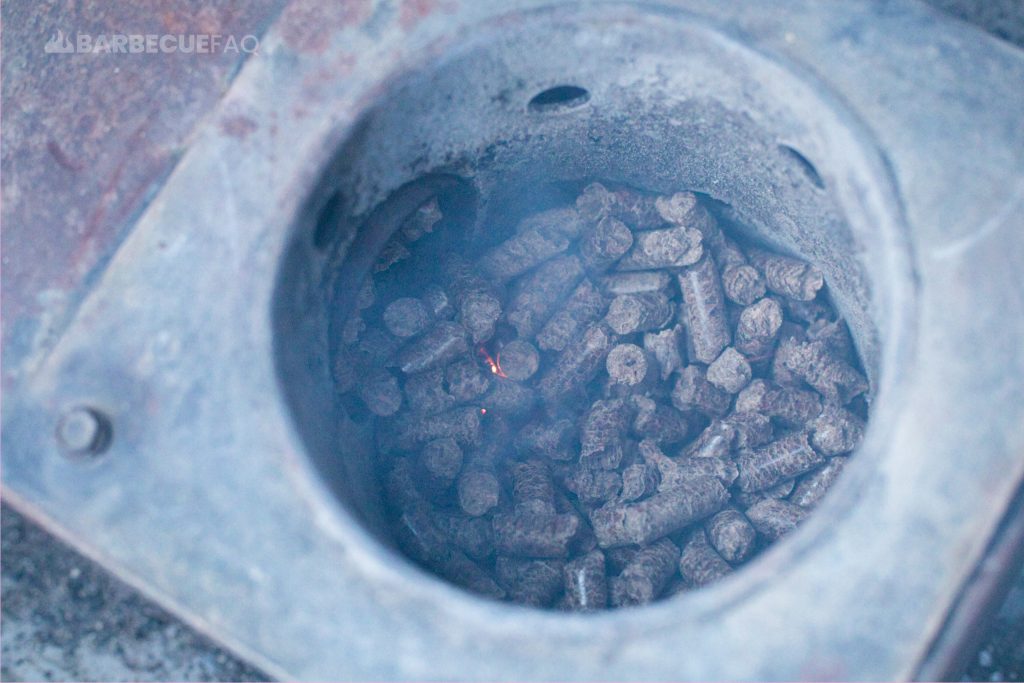
As I noticed this I put my heat deflector over the firepot and waited.
Everything went as normal, there was a large cloud of smoke – which normally happens and eventually all the pellets were ignited and the grill was starting to climb in temperature.
We’re good to go.
8. Zip Tie the Wires and Re-screw the Housing Back in Place
Once shut down, I unplugged the grill again in order to zip tie the wires and re-screw the basket housing for the wiring.


